Pages

Friday, 28 August 2020

Uniko Challenge #60 Winners

 Hey!

I'm here today to announce the WINNERS of Challenge #60 In My Garden, optional twist Hot Summer Colours

A huge thank you to everyone who played along with this challenge.

First we have our overall WINNER chosen by the Design Team.

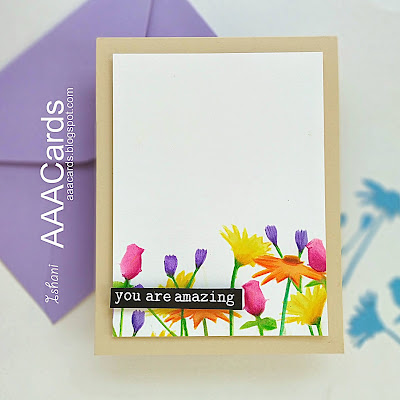
AAA Cards, CAS card, Clean and simple card, STAMPlorations stencils - Bloom SilhouettePolychromos, Quillish, Stamplorations, stencil card, stenciling

Congratulations Ishani!

Here's your winner's badge


You have won a £15 eGift Certificate to spend in the Uniko store. Please contact me at bev@uniko.co.uk by 11th September 2020

We would also love to have you join us as our Guest Designer for our next challenge. If you are interested please contact Jane at jane.taylor52@btinternet.com by 4th September 2020.

 Next up is the random winner who twisted with us....


Congratulations Creative Twins!

You have won a £5 Egift Certificate to spend in the Uniko store. Please contact me at bev@uniko.co.uk by the 11th September 2020 to claim your prize.

Here is your winners badge:


Then we have our randomly selected winner who used Uniko products on their creation...


Congratulations Deekshita!

You have won an £5 Egift Certificate to spend in the Uniko store. Please contact me at bev@uniko.co.uk by 11th September 2020 to claim your prize.

Here is your winners badge:


Now for our Top 3 chosen by the DT and in entry order:


Congratulations to you all & here is your Top 3 badge:


You have all won 150 loyalty reward points.

Please contact me at bev@uniko.co.uk


Congratulations to ALL the winners & EVERYONE who joined in with the challenge!

The next Uniko Challenge starts on Friday 18th September.

Hope to see you come back and join in with the fun :)


Tuesday, 25 August 2020

Brand Ambassador Inspiration - Invitation au voyage

 Bonjour !

Izzy here. For you who have not gone on vacation or for you who already wish to leave again, I invite you today to follow me on this trip.

We will start our cruise aboard a beautiful sailboat ...


For this card I used the Nautical Treasures set for the sailboat and the compass rose. I stamped in dark blue the sailboat on a stitched square card stock as well as the small compass and the sentiment stamped in red.

To make the large white panel background, I used the Anchors stencil to emboss. Then I used the Background Blocks Pinstripe to make the thin stripe panel behind the sailboat.

The winds being favorable, we will not take long to reach the Pacific Ocean and its islands with a tropical climate.


For this second card, I used one of the Background Builders Arts Décoratifs stamp to illustrate the wave on the ocean. I simply blended three blue Distress oxide inks shades on a white panel, and once dry I repeatedly stamped and white heat emboss the waves. 

For the hibiscus flower and leaves I used the Paradise and Paradise Leaves that I stamped with Altenew inks on a white card stock and I white heat embossed the outlines before fussy cut the images.

In order to see these magnificent flowers more closely, we will dock on one of the islands.


I get inspired by Yana Smakula's recent post to make this card. I stamped the hibiscus flowers around the edges of a white panel then with some masks, I stamped the leaves. I coloured them with Copic Markers. I also coloured the background and then I stamped and white heat embossed the sentiment which comes from the Sentiments Outlines set. To finish I flat adhered this panel on a double white card.

I hope you enjoy this little virtual journey as much as I enjoyed making these cards. Thanks so much for visiting Uniko !

Take care and have fun crafting safely at home !


Friday, 14 August 2020

Hey You

 Hey & Happy Friday!


I do hope you are well. It's been a while since I checked in over here, so I thought I would share my most recent masculine make with you...


I love the Background Block Mid Century Modern for masculine cards and it is so easy to use to create an all over background too. 

You might be thinking that my chosen colours are not very masculine, but I used my friends favourite colours. I kinda like the combo of grey, aqua and purple. 


'Hey You' is my usual greeting in a text, so it seemed an appropriate greeting on my card for him. Alphabet Outlined is perfect for creating your own focal sentiments. I used foam adhesive to give a little dimension and I added a few enamel dots for added interest.

I hope you all have a lovely and creative weekend :)

Crafty Hugs
Bev


Monday, 10 August 2020

One stencil, 3 techniques - Brand Ambassador Inspiration

 Hello friends Rahmat here, I am up with some inspirations using Uniko Stamps and stencils.

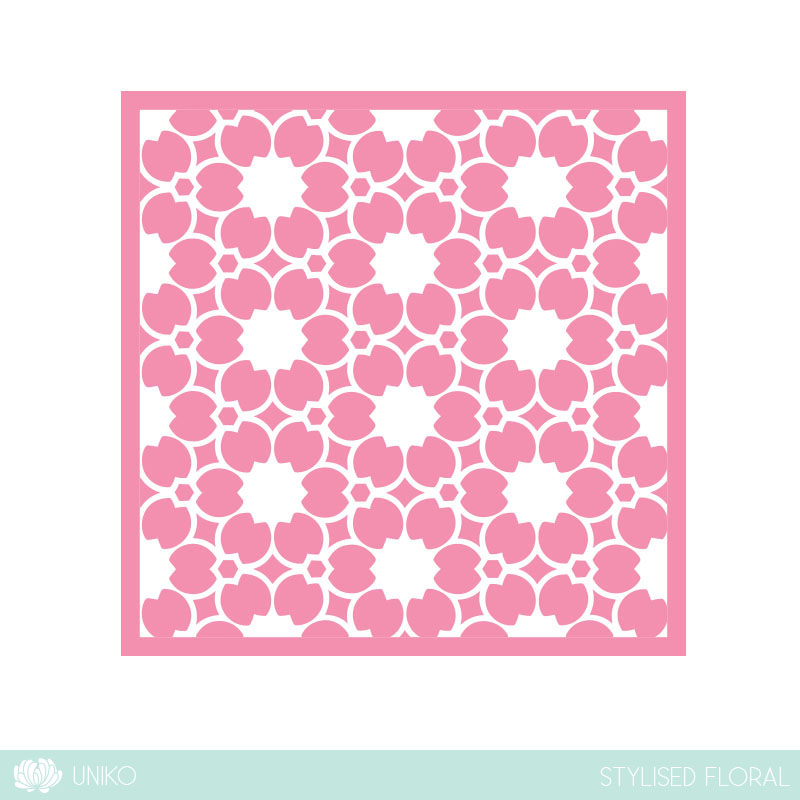
I have used Stylized Florals stencil here for all the cards but with different techniques.

I have used Foil transfer, adding shimmer to transfer gel and used a glimmer paste here.


                              This card is made using Thermoweb transfer gel DUO with Gina K silver sequin foil.

I spread the gel evenly through the stencil and let it dry. It dries clear and tacky, then add the foil and run through the die cutting machine, or you can also apply pressure manually, the gel is tacky enough to get a good transfer. I have used a heart diecut here during the transfer.

I used distress ink Weathered wood with a light hand to ink the base card and added the foiled heart with a foam adhesive, the sentiment is from Always and forever set. I added a foiled strip att he bottom for interest


The second card is made using a translucent glimmer paste, I simply spread the paste evenly through the stencil, and once it was dry, I had die cut the heart and added with a foam adhesive to the base. The base card is inked using distress in worn lipstick with a very gentle hand. The sentiment is from the same set as above. A pink glitter strip is added for some interest.

                                .                                                                      
The last card is made using the Thermoweb transfer gel with translucent glitter. I spread the gel evenly through the stencil, and then added the glitter and let it dry. Once it was dry, I die cut the heart and added to the base card, the base is inked with distress ink  Hickory smoke, and silver glitter strip to finish it off.


       Thank you for stopping by, I really appreciate your kind feedback. Have a great day!     


Saturday, 8 August 2020

Brand Ambassador Inspiration - Mono-printing with Stencils

Morning all, Julie here with some ideas to inspire you to get more from your stencils.

With so much time on my hands at the moment, I decided to have a play with my stencils to create some panels using a couple of mono-print techniques.

Here are two panels I made using a technique I saw Jennifer McGuire use on You Tube

I started by inking an A6 panel of white card with lots of Picked Raspberry and Salty Ocean DI. Then I made a hinge with some masking tape and added a plain white A6 panel. Without getting water on the plain panel, I spritzed the inked side then sandwiched the Stylised Floral stencil between and ran it through my die cut machine a few times using the normal die cut set up. Carefully separating the two panels revealed these colourful, fun, textured effects.

Here are a couple of cards I made using each of the panels, I still have a bit left over too for further makes! 


This first card uses a strip of the darker panel slipped behind textured lined panels, a simple stamped, uncoloured small peony bloom from Pure Florals - Peony. I kept it simple and uncoloured so as not to detract from the panel, the sentiment is from Simply Said Blocks.

For the second card I used a panel die cut from the paler print and the same bloom, again not coloured so as not to distract from the background. This time the sentiment from the peony set is stamped on matching linen cardstock.
My final card uses a slightly different technique to create the background. Instead of a piece of white card I added a cut down baby wipe over the stencil in the sandwich and ran it through a few times in the die cut machine as before. This time I rang the changes and used the Fun Flower stencil. The damp baby wipe lifts away the ink where it peeks through the stencil to leave this soft effect. The panel was inked with Tumbled Glass DI this time.

To make the card, I used more sentiments from Pure Floral Peony mounted on deep blue and the small butterfly from English Country Garden, embossed in white on vellum and then die cut. A few clear sparkly sequins complete. The embossed panel was mounted on the same blue card and added to an A6 card base.

That's it from me for this time. I hope I have encouraged you to look at your stencils again, you don't have to use these two, have a play and see what effects you can achieve with what you have.

So until next time, keep safe!


Tuesday, 4 August 2020

Uniko Brand Ambassador Inspiration

Hello everyone! 

It's Jane here today with a little inspiration using some of the gorgeous Uniko stamp sets.

I've taken one sketch and created three different cards to showcase the versatility of Uniko.

Here's the sketch:


And here are the cards I've created:


For Card 1 I used Background Blocks Halftone and Bee Happy


I started by stamping the halftone background and then added the hexagon clusters following the sketch placement. I then stamped, coloured and had cut the two bees, popped them up on foam pads and adhered them on top. The final touch was to add the sentiment banner strip which I cut at an angle rather than the straight edge from the sketch..


A completely different look for a completely different occasion, but still using the sketch as the basis for the placement of elements. 

I started by stamping and colouring the background block and then added the words instead of the two circles - sketches don't require exact matching of shapes as long as the overall look reflects the sketch.

 I finished off with the horizontal strip near the bottom.


Card 3, my personal favourite, uses Background Blocks Pinstripe II and Beautiful


This card was created in a similar fashion to the other two starting with the stamping of the background block and then adding the two circular elements from the sketch popped up onto foam pads. The greeting for this card was added to the bottom horizontal element and I once again trimmed the strip into an angle.


Thanks you so much for taking a look at my cards today, I really appreciate it.

Stay safe and keep crafting!

Jane
x