Thursday 28 February 2019

DT Inspiration - Celebrate with the Scattered Polka Dots Stencil

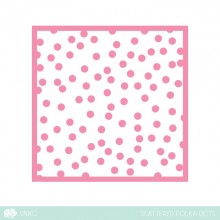
Julie here with a couple of cards using the Scattered Polka Dot stencil.
ScatteredPolkaDotStencilPP

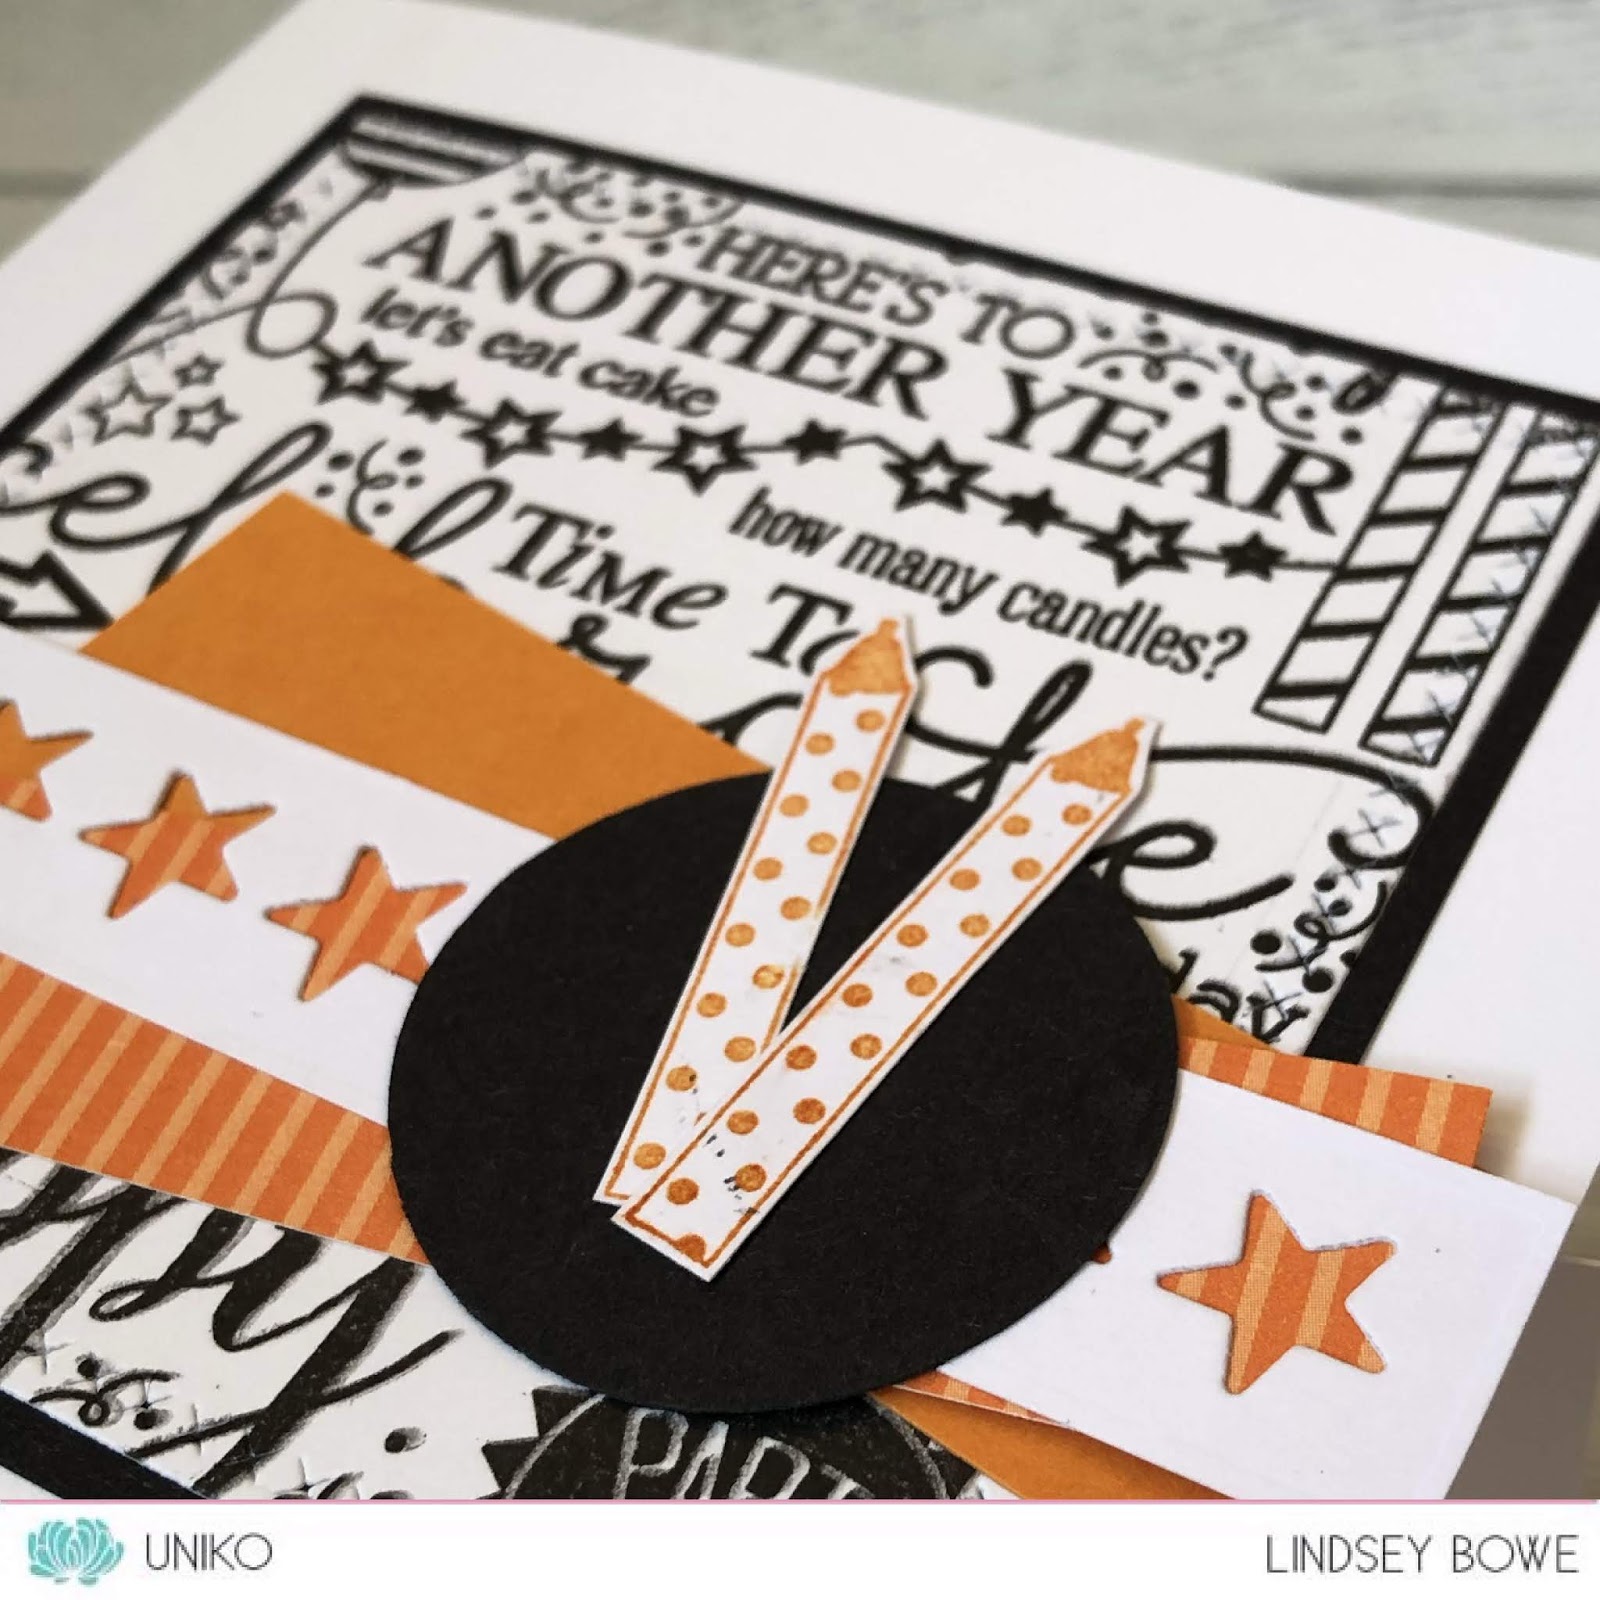
My first card started off quite awhile ago with an experiment using some glossy white embossing paste on black card. The panel had been put in a box with some other backgrounds for use later, so I retrieved it and decided to have a play around with it. Here's the result.


The white on black looked a little stark so I decided to use my Copics to colour the dots to create a jazzy panel. If you have a steady hand you could just colour freehand but I decided to replace the stencil over the embossed panel before adding colour. Your stencil can be cleaned with a little Copic blender solution or isopropyl alcohol in a well ventilated space and away from naked flames. 
The finished panel was then added at a jaunty angle to a plain white A6 card, trimmed and the sentiment from Birthday Sentiments stamped underneath. My die cut SMILE was cut from red and white card and glued together so that the red peaks out slightly, before adding to the panel.

This second card uses the same stencil but the background was created using a homemade wreath builder jig and Distress Oxide ink. (Here's the link to set of instructions if you would like to make one.)


Basically all I did was ink through the stencil onto a panel of white card, then rotated it in the jig and repeated using a different colour.  I did add some fill in dots freehand but when I was satisfied with the coverage I trimmed it down to size and popped it behind a die cut frame. 
Finally the sentiment was stamped using the same Birthday Sentiments set.

So that's all from me and I hope you've been inspired to think about using your stencils in a different way.


Monday 25 February 2019

DT Inspiration: Mix & Match - Old & New

Hello there friends it's Sarah P here with a little DT Inspiration post.

I hope you've been enjoying all the new birthday goodies, released earlier this month as well as the birthday celebrations here at Uniko throughout February. There's still time, if you're quick, to join the 'Win Stamps for a Year' link up as well as our 7th Birthday Linky Party, both of which end at 23.58 GMT on Thursday.

My cards today use both new and old stamp sets from Uniko to show the versatility when you mix and match them. Each card uses a birthday sentiment too - just to extend the festivities that bit longer!


First up a bold duo followed by the more subtle ones...


The new stamps & dies I've used are: BIG & BOLD Happy, Birthday Wishes and Passiflora with the older sets being: Flower Power #7, Kindness Blooms, Uniko Style, Wonderful Day. There's even the reverse side of a circle from the Background Builders: Round in Circles set!

Having stamped all of the images, overlapping in some places with various Altenew and Lawn Fawn inks I've added some highlights with embossed images over the top.


I hope you like my creations and why not have a go at combining various sets and see what you come up with. Thanks for calling by the blog today and have fun!

Sarah


Sunday 24 February 2019

Bonus Stencil Sunday.... with Guest Designer Ruth Andrews!

Welcome to a Bonus Stencil Sunday!

This month I have had a wonderful Guest Designer joining Uniko for our 7th Birthday & February Release celebrations AND also for a Bonus Stencil Sunday feature this month!

If you missed Ruth's first Stencil Sunday post you can catch up HERE and get to know Ruth a little more too :)

Let's have a look at the project she is sharing over on her blog HERE for Stencil Sunday. 


Be sure to head on over & leave Ruth some love. Ruth has used Uniko's Let it Snow Stencil and a sentiment from Festive Sentiments clear stamp set (links below).

Thanks for stopping by today & joining in on all the fun this month.
Hugs

Saturday 23 February 2019

Wonky Candles

Hello!

I hope you have had a good week.  It is Sarah G on the Uniko blog today sharing a card that I have made using the fab Wonky Stripes stencil.  I was inking it up in a rainbow of colours to create a border but when I took the stencil away I thought that the inked image looked like a row of candles:


I stamped the flame that comes with the Big and Bold Wish stamp set and drew a black line to create the candle wicks.  The sentiment is from the new Birthday sentiments set that Uniko released this month.


A simple card which shows that, if you use parts of your stencils you can make them the focal point of your card.


See you again soon!

Sarah x

Thursday 21 February 2019

DT Spot - Block Party Birthday

Hello!
It's Lindsey with you today and a little inspiration using the Block Party Birthday Stamp.


This stamp is great for making quick and easy cards and a fab stamp to turn to for those, often dreaded, masculine cards!

Just stamp in black ink for a monochrome background.  Then pair with a bold, bright colour for an equally bold, striking masculine card.

I've plumped for orange with a strip of matching patterned paper, but it would work just as well with blue or green (or whatever takes your fancy!).

I've also added a couple of candles from the "Big & Bold Wish" stamp set, again stamped in orange.


When positioning items on your card, be mindful of the "rule of thirds".
The thinking behind this rule is that an image should be imagined as divided into 9 equal parts by 2 equally spaced vertical and 2 equally spaced horizontal lines.
You then position important elements of your design along these lines or at the points where they meet.
I use this composition in the huge majority of my card designs; if you haven't already, why not give it a go?!


BTW my favourite black ink is Versamark Onyx Black; it's great for detailed stamps like this one!
Just allow it time to dry as the ink stays wet a little while; you don't want to smudge your lovely stamped image!

Thanks for popping by today.

Wednesday 20 February 2019

DT Inspiration ....... Using your stamps with your stencils

Happy Wednesday ......

It's Linda here, with a little bit of  midweek inspiration for you.
I'm going to be showing you a closer look at one of the cards from last weeks fabulous new product release.

I hope you all enjoyed the Birthday celebrations, and the new release.  Did you manage to get a hold of your favourites and add to your Uniko stash?  I do hope so.
If you haven't joined in with any of the party fun then there's still plenty of time.  The closing date for the Birthday Linky Party, the HUGE Birthday Giveaway, and the Birthday Blog Hop and Treasure Hunt is Thursday 28th February.  Check out the links for all the details, and you could be one of our prize winners announced on March 1st.

OK ........ a couple of my favourites from the new release were the brand new Abstract Triangles stencil, and the new Background Block - Graffiti Texture.
Two great additions to your craft stash ..... and I love how well they work together


Here's a really quick and easy card, using the stencil to create the background design, then adding some detail using the stamp.

I placed the stencil over a piece of white cardstock and secured with low tack stencil tape.  I then added the colour by using Distress Inks and a stencil brush ...... starting at the bottom with Shaded Lilac and moving on to Wilted Violet as I worked my way up to the top, creating a sort of ombre look


I removed the stencil and cut the card down to size leaving a thin white border around the edge. The stencil used in full, is the perfect size to fit a 6x6 finished card.

Using low tack stencil tape I then masked off the edges of some of the triangles before using the Graffiti stamp to add the detail.  To keep all the colours co-ordinating I used Wilted Violet  again for the stamping, only this time I used the Distress Oxide version.  If you haven't tried the oxides for stamping with, give them a go, they stamp beautifully!


I pleced my stencil back over the design before adding a few spaltters of black ink here and there for a little more interest.

The sentiment is from the new Birthday Wishes set, stamped in black and then die cut.


With the metal die still in place, I used the Distress Inks to add the colour around the edge, and then attached it using foam pads for dimension.

I do love this new sentiment set ..... great for the outside of your cards but also perfect for using on the insides too .....


And you don't always have to use all of the stencil design ...... a bit of masking before applying the ink means you can use just part of it to add a little matching detail on the inside.

Look at your stencil designs and see which ones you can use alongside your stamps.

Thanks for popping by .... have a great day.

Cheerio until next time ......

Sunday 17 February 2019

Uniko Studio DT Showcase...Distress Ink Backgrounds (aka: Colouring Made Simple)

Hello,

Carol here, with a burning question:  Are you, at times, daunted by colouring, especially 'big' floral images? If so, welcome to my world! While I do enjoy (usually...) dabbling with copics, Tombow/Zig markers (provided water is 'not' involved!) and pencils, reality is that oftentimes, my efforts aren't successful (which makes for a happy, well-fed recycle bin *grin*) or I don't have time/inclination to colour.  

Today, my Uniko Studio DT Showcase features a 'round about' colouring technique that  most of you are familiar with but...it's nice to have reminders now and again, right? Right!

Have you been following Kristina Werner's Distress Oxide blends series? Swoon! I selected a trio of her combinations - inks I had no idea would work so well together -  to pair with various Uniko Studio images. NOTE: I mixed-and-matched oxides with regular distress inks, depending what I had in my collection.

My goals: to create cards with colour, minus the stress/time of full-fledged colouring and to highlight just how pretty outline stamps can be, left more or less, as is.

How about I let the photos do the talking...you'll see what I mean.


Card 1
Background panel: Spun Sugar, Abandoned Coral, Aged Mahogany
Sentiment:  Simply Said
Because the image looked a bit 'flat', I went in with a couple of prisma pencils, just a bit darker than the actual distress inks to add some shading/depth to the rose petals.

Card 2
Background panel: Festive Berries, Worn Lipstick, Scattered Straw
Sentiment:  Simply Said
Again, I used pencils to add depth/shading.

Card 3
Background panel: Chipped Sapphire, Pine Needles, Twisted Citron
Sentiment:  Simply Said
Yes...more pencil...

Hopefully, you'll come away with some new ink blending techniques to 'breathe life' into your Uniko Studio stamps. Easy to do...with results that can be both pretty and time-saving!

Friday 15 February 2019

February Release Showcase by Rahmat

Hi everyone Rahmat here.

I was away during the Feb release, so I am showcasing the release today.

I have 5 cards where I have combined all the stamps, die cuts and stencil.

I stamped the flowers and leaves in pink and grey and used the coordinating diecuts. Arranged the flowers and stamped the sentiment above to finish off.


I have used printed card base here, used the diecuts from the previous card, and used the stamps from the big happy set to stamp around in random


I used CrafTangles liquid watercolors to crest the Bg and then used green ink to stamp the Graffiti, used inlaid die cut technique to add the black die cut sentiment.


I used the stripes stamp and the freebie together here for this card. Since I saw this image on the DT blog, I was looking forward to convert it to a butterfly and I am very happy that I did. I used CrafTangles liquid watercolors to watercolor the flower and leaves.


I used the distress oxides hickory smoke and worn lipstick to ink the stencil, edged the panel with a glitter strip and added the flower and sentiment in Altenew ink.


        Thank you for stopping by, I really appreciate your kind  feedback :) Have a great day!
                                                                     

Wednesday 13 February 2019

DT Inspiration - ink blending with a Stencil

Hello, Wiebke here with two moncromatic birthday card in a Clean and Simple style. Both created with a stencil and some ink blending.


Today I'll show you how to improve your blending skills with the help of a Stencil.
 
Do you like ink blending? - NO?
Why?- The smooth blending between different colours is always difficult!

When you agree with these answers, I may have a great solution for you: Take a stencil, Inks and a Blening Tool and give it a try!
I'm sure the result will show you, blending is something you can learn.

When you aren't familiar with blending, you can start with a pure mono cromatic card to get a feeling for this kind of "colouring" and add more colour(s) in the next projects.
The colours should be different shadings of the same colour family (like light blue + blue + darker blue) OR colours adjacent in the colour wheel (like yellow + orange + red / yellow + green + blue / a whole rainbow of 6 colours).

I love to blend with Ranger Distress Oxide Inks, cause they blend really easy and they forgive you a lot...!
This doubles the positive effects for this blending-project!
Mandala stencils are perfect for beginners, cause we'll work in circle motions, fitting to this form.

The first step you have to do is to avoid any movement of the stencil. I love to take a soft painters tape to fix stencil and paper together. When you finished the blending it's easily removable without any tearing of your finished Mandala.

Now we start the blending. It doesn't matter if you start with the lightest or the darkest of your colours and also, if you start on the inside of the Madala or the outer edge.
But it's important to move your hand in easy circle motions over the paper and add the colours - one after another. You can add colour several times to get a darker shading.

Avoid spressing  the Blening Tool with lots of power into the inkpad - the more ink is in the blending foam the worse the blending will be.
To get soft colour-gradients, layer the colours one over another on the edges of every area.

So, what's the miracle?
Stencils have little areas with crisp edges and you won't see smaller "uneven" blendet areas as clear as on plain paper. The white lines and areas are so helpful and seperate the areas for you!

After you have cut the finished paper down to the size of your cardbase, you can start to embellish the Mandala with little pearls, rhinestones, enamel dots,... or selfmade dots (Stickles, Nuvo, ...)
You also can conceal tiny little mistakes with your embellishments if necessary.

For both of my cards I used the same Stencil - Mehndi Mandala and a Sentiment stamp - out of the NEW set Birthday Wishes.
But ee how versatile these products and how different the cards are!


The yellow Mandala reminds me of flowers or sunrays. I think we all crafe for spring and warmer temperatures, right?

For the Mandala I used hese Oxide Inks: squeezed lemonade, mustard seed and wild honey.
I used little epoxy stickers - a round one for the center and little drops for the heart-shaped areas and some little pearls to embellish the Mandala.
The sentiment is stamped on an extra piece of paper and then cut and folded to a little banner. To get a bit dimension it's adhered with 3D pads.


The blue Mandala looks like a snowflake or icy crystal. Perfect for birthdays in the cold winter time!
 
 
As embellishment I used clear and blue mini rhinestone drops and insert them in the pattern of the Mandala.


I stamped my sentiment with the darkest of the Oxide Inks and added immediatelly clear embossing powder.
For the Mandala I used these Oxide Inks: mermaid lagoon, broken china, tumbled glass.


Hope you like this kind of project and you'll give it a try!

Happy greetings from Wiebke


Monday 11 February 2019

7th Birthday February 2019 Reveal, Blog Hop & Giveaway Treasure Hunt!


Happy Birthday Uniko & Woohoo! 
Finally the day has arrived and the 7th Birthday February 2019 Reveal, Blog Hop & GIVEAWAY is here! The Release will be available to purchase HERE at a NEW time of 9pm GMT tonight. 

Ok, so how about a look at the 6 new Clear Stamp Set designs, 2 coordinating Designer Die collections AND 1 Stencil Design being released later today...


Background Blocks Graffiti Texture  £5
Copyright Uniko Ltd 2019


Background Blocks Pinstripe  £5
Copyright Uniko Ltd 2019


BIG & BOLD Happy £10
Copyright Uniko Ltd 2019
www.uniko.co.uk


Designer Dies BIG & BOLD Happy £18.50
Copyright Uniko Ltd 2019


Birthday Wishes £10
Copyright Uniko Ltd 2019


Passiflora  £10
Copyright Uniko Ltd 2019


 Designer Dies Passiflora  £15
Copyright Uniko Ltd 2019


Stencil Abstract Triangles £3.50
Copyright Uniko Ltd 2019


AND this little gem is a Release Day FREEBIE Clear Stamp Set...


You Are, Yes You £5
Copyright Uniko Ltd 2019


Please note, this clear stamp set will be automatically added to release day orders of £25 or more up until Sunday 17th Feb 9pm GMT or while stock lasts. 

After 9pm GMT Sunday 17th February, if there is stock remaining it will be made available for purchase at £5.

Whoa! That was quite an introduction, BUT we are not finished yet! We have our traditional Design Team Blog Hop & Giveaway with a difference! 

As it is our 7th Birthday Blog Hop I wanted to add a little more FUN to the blog hop and I have incorporated a Treasure Hunt! Hidden in photos along the blog hop are these letter balloon icons. 


The 'Rules' of The Treasure Hunt are simple...

1. Comment along the Blog Hop & find the icons
2. Email bev@uniko.co.uk with the following information

- Design Team Members Name & Balloon Letter Found 
- What the Balloons spell out

Entries need to be emailed no later than Thursday 28th February 2019, for the winner to be announced Friday 1st March 2019 (winner will be randomly chosen from all the correct entries).

Prize...

The ENTIRE 7th Birthday February Release! (6 clear stamp sets, 2 co-ordinating designer die collections & 1 stencil design).


PLUS... I will still randomly select another winner! Be sure to comment along the hop for your chance to win ALL SIX Clear Stamp Sets!! You have until Midnight (GMT) Thursday 28th February 2019 to comment and the winner will be announced with ALL the 7th Birthday February 2019 Winners.

Happy Hopping!

Hugs