Showing posts with label BA Inspiration. Show all posts

Friday, 28 August 2026

Brand Ambassador Inspiration, Pure Florals Rose

 Hi, Julie here with a card I made quite awhile ago and realised I hadn't shared so I thought I would!

I was cleaning up the front end of my computer yesterday and came across this card I made a few months back but what with Christmas in July and the Christmas release it got forgotten about so here it is!


It's on the same lines as one I made using the Peony set here. The ladies at my Wednesday art group loved it and so I did a class to show them how to watercolour a stamped bloom but in the end I used the Lily set as it was simpler for them to paint. Perhaps now we have done a simple flower we may go back and try this bloom.

I used watercolours instead of inks to paint my rose which I stamped with a pale ink on mixed media paper so that the outline didn't show. The finished bloom was then fussy cut and attached to my die cut panel on which I'd stamped the greeting, a mix of Doodle Flowers and an older set, You Are, Yes You, with Memento London Fog.

The diecut panel was then added to a white top folding note card.
That's all from me for the mo but thanks for stopping by!

Friday, 24 July 2026

Brand Ambassador Inspiration - Christmas in July and a FB VIP reminder

 Hi, Julie here with a quick reminder that there is still time to enter our FB VIP Challenge on the theme of Christmas!

I was thinking what I could use for my inspiration when I can across some Gelli plate prints I made some time ago and it got me to thinking, what could I do with them? I had also recently seen a video on You Tube by Ardyth making a swing card, so I thought I would have a play. Here is my end result.


The Gelli print was made using the Let it Snow stencil and Distressed Oxides in Picked Raspberry and Seedless Preserve which I pimped up with an extra layer in White Gold watercolour paint.

I made a 41/4" square base card from white card and then trimmed my Gelli panel to 33/4", glueing it around the edges only, the reason will become clear next! I die cut a circular aperture using a circle die from The Greetery and removed the two layers. As I hadn't glued the center down, I could use the center of the panel for the middle of my card! To make it stand out against the other panel, I added more Seedless Preserve DOx and then die cut a slightly smaller circle from it, this was then glued to my white circle.

To create the center of the card, I cut a panel of white card 4"x 8" and then scored it at 21/2", 41/2" and 61/2". The rest of my Gelli panel was cut into 2 strips 33/4" x 13/4" and glued them to the two middle panels.

The largest panel was glued to the right of the center fold of the card and the smallest to the left of the front panel. If you follow the link Ardyth explains it so much better!


I cut a Snowflake using the Sparkling Snowflake die but it was too large to fit through the opening, so I trimmed it down and added it to my pink circle. The sentiment from Pattern Building Christmas Tree stamp set was stamped in Picked Raspberry DOx and added before I glued the the die cut onto the inner panel. Again Ardyth explains it wonderfully!

Ardyth says that she is obcessed with this design and I must admit I am too!!

So if you haven't joined in over at FB why not have a play and join us there?!

Happy crafting! 


Friday, 10 July 2026

Festive Friday, BA Inspiration using MCM Baubles stamp set and stencil

Good morning, Julie here with a card for Uniko's celebration of Christmas in July!

It's a great opportunity to get my Christmas card stash up as I've been a bit remiss in making them thus far! Here's a design I made using a mixture of MCM Bauble stamps and the matching stencil.


I'd seen a card on Pinterest where the front of the card was covered with die cut Christmas baubles and thought I could use the stamp and or stencil to get a similar effect.

On an A6 white card panel, I created rows of interlocking baubles using one of the baubles MCM stencil using a mix of Distress Inks, before adding the centers with one of the detail stamps from the matching stamp set. I thought I could add more dimension by adding a darker area over the white embossed detail. To achieve this, I stamped the shape from the stamp set onto some scrap paper, then traced over it onto a piece of acetate from some packaging and cutting away the center to create a stencil. 

Hangers were added with sparkly platinum WOW EP and some really old holographic gems were added to each center. As the background was so detailed I kept the sentiment simple, Season's Greetings from Christmas Sentiments, stamped with black on white and mounted on black.


That's all from for today but please check out some of the other BAs and Bev for more Christmas in July ideas!


Thursday, 16 April 2026

BA Inspiration Pure Florals - Peony

 Good afternoon, Julie here with a little bit of floral watercolour inspiration. Over at Color Hues the colours for the latest challenge are Coral and Green, so I thought I would ink up my large Pure Florals Peony and do some watercolouring with inks. Here is the result.


I used Altenew's Limestone ink stamped onto Mixed Media paper, to create a no line look, then I smooshed some of their other inks onto an acrylic sheet to use for the technique. I used Coral Berry, Grapevine and Coral Bliss for the petals and Olive, Moss and Evergreen for the stem and leaves.

Each petal was painted separately, first with plain water then with the paler Coral Bliss and darker Coral Berry, allowing the water to blend the colours. It's best to paint sections that don't touch one another to reduce the risk of colour bleeding until each section has dried. Some of the lightest areas had virtually no colour and the off white paper showed through to suggest hilights. I repeated the technique for the leaves, using first Olive then Moss.

To create an even greater sense of depth, I went back into the bloom, first with a damp brush, I wet the areas that needed to be in shadow before going in with the Grapevine ink. For the green shading I used the Evergreen ink. Once dry, I fussy cut it out and concentrated on my background. 

I used a Mama Elephant die to cut Eyelet panel from white card, then removed the center with a rectangle die to create a frame. Using the magnets in my Misti, I held the frame and bloom down whilst I placed the greeting from Originally Organic. Once happy with the placement, I removed the frame and bloom and stamped it in Memento London Fog. The frame and bloom were then glued to my A6 white base card.

That's all from me for today, but why not take a moment to try the technique. You don't need watercolour paints, just some dye inks and a paintbrush! You can get really lost in the process, well I know I do!

Keep crafting! 

Monday, 9 February 2026

Brand Ambassador Inspiration, Spring Botanicals- Tulip

Good morning, how was your weekend? Mine was not what I had anticipated as a workshop I was helping at got cancelled at the last minute, so I had some time to play in my own craftroom! 
Here's what I made, specifically for an old work collegue who loves red flowers!


Just before Christmas Bev used a Waffle Flower die set to create this card and so I was inspired to make this one using the same die and Spring Botanicals - Tulip.

On a panel of Mixed Media paper, I used the stencil from the die set to plan my placement of the tulips, sketching in the open areas lightly with a pencil. Next, I stamped using some masking, a bunch of Uniko's Spring Botanicals- Tulips with Memento Toffee Crunch.

Watercolours were used to paint the blooms and I was about to cut the Postage Stamp panel when I realised I'd had the stencil the wrong way around and my planned design wouldn't work!
So with a little bit of thought, I decided to cut the panel anyway and see what I got. Instead of placing my panel face down, I placed the wrong side face down into the die panel. I had initially intended to cut out each of the panels along the stitched lines and place them on a new die cut panel, but now couldn't do that but with the help of an old fashioned embossing tool and a foam mat, I sort of rescued it with some manual embossing!
To cover where the masking hadn't worked I inked through the stencil with some Mustard Seed DI, then stamped a few bits in Toffee Crunch at strategic places.
I'd purposefully left the small rectangle in the bottom right clear so that I could stamp my sentiment, Doodle Flowers in more Toffee Crunch.


The die cut panel was mounted on some black card and then onto a trimmed down 5 x 7inch white card base. The black serves to hi-light the die cut as well as masking the different white of the MM paper. I love using MM for watercolouring, but getting a base card to match is tricky. This little trick is just enough to fool your eye!

So that's about it from me for today, crafty hugs

Thursday, 11 December 2025

BA Inspiration -

Evening all Julie here with a little bit of BA Inspiration. Have you got all your Christmas cards made and posted? I hope I have but I do have a few spare just in case.

If you've been really organised and made and sent your Christmas cards, how about an idea for a quick New Year card? 


On an A6 top fold, white note card, I stamped the Background Blocks- Party Confetti in Versamark and embossed with jewelled gold EP. On a separate panel of white, I used the numerals from the Alphabet Solid set to create the 2026 in more of the jewelled gold EP. This was mounted on a slightly larger black one then added over my confetti with foam pads. A simple sentiment from Simply Said Blocks Christmas in black completes.

A very simple design that you could ring the changes with by using gold on black or perhaps silver on black. How about replacing the year with HB2U for a simple birthday card, the possibilities are endless!

Anyway that's it from me for the moment, hope you have a fab Christmas and KEEP CRAFTING!!

Tuesday, 21 October 2025

Autumn Wishes using Nature's Treasure Stencil

Good morning all, Julie here with some BA autumnal inspiration. 

Over at Cardz4Guyz their latest challenge is to make a card using some or all of these colours in a masculine card, Orange, Purple and Black. I know many of you find masculine cards difficult so here is what I came up with.


CAS is a great way to make a masculine card and as flowers are a bit of a no no for them too, I turned to leaves. In this case I used Nature's Treasures stencil, some DIs,Wilted Violet, Black Soot, Ripe Persimmon, Carved Pumpkin, Dried Marigold, Ripe Persimmon, Spiced Marmalade and a sentiment from Organic Wishes.

I mostly used the smaller of the two stencils moving it around to create the look of an autumnal tree inking onto an A6 top fold white card. I wasn't sure how the purple element would work out but I quite like it. Where it overlays the orange it gives a shade of brown but the purpley hues suggest depth and the black stencilling, shadows. The sentiment is quite ambiguous and could be used for a variety of occasions, including sympathy.

On a side note it was loveley to see and interact with so many Uniko stampers at Port Sunlight last Saturday. If you wonder which one was me, I was the one with zero till skills and glasses!!

Just a quick reminder that over on FB, the Uniko FB VIP challenge is Autumn Vibes with the option of Halloween and you have until Novemeber 10th to add your Uniko makes. 

Happy crafting!

Wednesday, 24 September 2025

Brand Ambassador Inspiration, Uniko's VIP FB Challenge Reminder

Good morning, Julie here with a little bit of BA inspiration and a reminder of Uniko's VIP FB challenge.
This month it's a colour themed one.
These colours suggest an autumnal theme perhaps, but I've gone down the Christmas route with this design using Season Of Beauty stamp set.
My starting point was a card made by a blogging friend from Color Hues, Bonnie. She used a background stamp and watercolouring with inks to make the base for a card for the latest challenge and it got me thinking I could do something similar using the Season of Beauty set. Here's my design.


I started by embossing the poinsettia and foliage with white EP on an A6 panel of Mixed Media paper. I smooshed some of Altenew's Desert Night ink onto a kraft mat then wet the whole panel with water and added the ink with a brush. The water makes the ink lighter than the original, literally diluting the colour. To achieve the patchy look, I removed some of the ink with a piece of kitchen roll before it dried. I haven't used Altenew's ink like this before and it is not as forgiving as Distress Inks, which I usually use but the colour was a better match to the swatch.
On some scrap white card, I stamped the poinsettia with Carved Pumpkin and Ripe Persimmon DI for the 2 top layers. I filled in some of the white around the sepals with more Carved Pumpkin. The foliage and green sepals I inked with Forest Moss and Peeled Paint DI, adding water to blend out the lines.
My yellow flowers we originally stamped with Wild Honey DI but they got a bit lost, so I added some dots of white gel pen over and a touch of a yellow Copic marker.

On a circle of white card, I used the Desert Night ink to stamp the sentiment and on a slightyly larger one, I added some of the same ink to create a matte. The elements were then fussy cut and added to my sentiment panel. Meanwhile, I added my inky background to a 5 x 7inch white base card and then placed the layered focal point on to that.

That's it from me for today but please consider jopining in over on Facebook for a chance to win an e-voucher worth £10 to spend in the Uniko store. You've got until October 10th to play.

Thursday, 28 August 2025

BA Inspiration, Bauhaus Blocks

 Afternoon, Julie here with a card I made for my final week of guesting with the girls at JUGS. This week is stencil week and so I couldn't help myself and reached for the fab Christmas Layering Bauhaus Blocks stencil. Then I thought why not combine it with the regular Layering Bauhaus Blocks set, win win in my view!


I've gone large for this card, a full A5 white base card with an A6 panel for the stencilling. 
I started by inking through the Christmas set into the middle of my white A6 panel using Mowed Lawn, Candied Apple and Worn Lipstick Distress Inks, before filling in and around with a mix of the regular Bauhaus Stencil and Christmas one, keeping to the same colours. Just using these colours makes the standard stencil feel festive!

Once complete, the panel was trimmed to neaten up and double mounted onto some red and green card. A sentiment from one of my first ever Uniko purchases, not even sure of the name now but it's well used, was stamped with more Candied Apple and then embossed with clear super fine EP from WOW. I've learnt the hard way that stamping in a colour then adding clear EP is so much cleaner than using coloured EPs and easier on your pocket too!

So that's all for today, happy crafting!

Saturday, 23 August 2025

BA Inspiration, Watercolour Garden and a FB VIP Challenge reminder

Good morning Julie here on a Bank Holiday weekend and unlike most others recently, it may well be a good one weather wise. However we could really use the rain, our large pond that our flock of sheep use to get water is now nothing less than a trickle through a muddy hollow! 

Anyway here is a little scene I created to remind you all that there is a challenge over on Uniko's VIP Facebook page The theme is ANYTHING GOES, so long as it's using Uniko products, so a chance to use those newly acquired goodies or an old fave and a chance to win a £10 voucher too.


I've used some older sentiments together from Originally Organic, with the fun flowers from Originally Organic Flower Garden. 

After stamping the little group from the set with Versamark and heat embossing with white EP, I masked the leaves and flowers with liquid masking, let it dry before adding more blooms either side with a pale ink, Altenew's Limestone, then masking again.
Once the masking was fully dry, I washed in some Mowed Lawn DI across the bottom and Salty Ocean across the top getting paler towards the center where the two colours met. Once the background was dry I removed the masking and painted the flowers and leaves with Zig watercolour markers. To give the grass more interest, I added flicks of darker green with my Zig marker pen. Dots of white were added to the background with some white acrylic paint.

I neatened up my finished panel by die cutting it with a stitched rectangle die and mounting it onto a side fold note card from my stash. The sentiment was added using black ink.

Hope I've inspired you to join in our challenge.

Tuesday, 1 July 2025

Christmas in July - Brand Ambassador Inspiration with Background Builders Christmas 2018

 Afternoon, Julie here with the first of many posts celebrating Christmas in July with Uniko!


Over at Color Hues their new colour combo is red and white, so I thought I would use that to spark an idea using Background Builders Christmas 2018, some red card and white heat embossing. Here's what I came up with.


I've used this set a couple of times to make 'jumper' style cards as the patterns always remind me of Christmas sweaters! There are a few strips which you could combine to make a pattern but I stuck with just two.
For this card, I simply stamped and embossed three of the stylised snowflake strip onto an A6 panel of red card and bookmarked it with the hatched lined stamp strip. A simple partial circle die cut out of the red panel followed by a die cut welt made from two stacked circle dies, suggests a neckline. The red panel was then trimmed to leave a border when attached with glue to my A6 white base card.  A simple white heat embossed sentiment from Christmas Sentiments completes, a very simple card in the end.

Here are a couple more ideas along the same lines from a few years ago.


This uses a zipper die set from MFT and the tags below are simply strips of card with fussy cut collars, die cut circles, butchers twine, a couple of buttons and some ribbon bows!


So that's all from me today but don't forget to look out for more Christmas inspiration to kick start your Christmas stash from the BAs as well as a new release later in the month.

So for the moment I'll say bye and happy crafting!


Sunday, 16 March 2025

Brand Ambassador Inspiration - Organically Zesty

Good afternoon, Julie here with some BA Inspiration.
Today I've got my Color Hues DT hat on as well as my Uniko one on, as it's my turn to host their latest challenge. I chose lemon and lime as the colours and what says this more than the lemon from Organically Zesty! 
Here are a couple of ideas using the lemon stamp from the set. When I went back to the release, I couldn't believe it was way back in May 2022! Here's my first idea using a watercolour technique for the background and to colour the image.


I started by stamping the lemon in black onto MM paper and heat embossing with clear EP. It's just so much easier and cleaner than using black EP. I also stamped over the top again whilst still in my MISTI with Versamark and more clear EP to ensure there was full coverage.

Instead of getting my watercolour paints out I smooshed Altenew die inks onto an acrylic panel to form a palette. If you have reinkers it makes life so much easier, but I don't have any. I first added water to all the leaves then added a wash of Limeade and then some darker Lime ink. A grey Zig watercolour marker created the shadows. A mix of Lemon Yellow and Maple Yellow was used for the lemon, adding texture with a dry brush and the darker yellow ink. Again my Zig brush marker created shadows on the lemon and blossom. The white of the blossom is just the bare paper showing.
The lemon was then fussy cut and put to one side whilst I made my panel.

I found some scrap acetate sheet from some packaging to which I added some of the green ink and then spritzed lightly with water before carefully flipping and stamping onto a panel of white card. I repeated the process until I was satisfied with the coverage. The panel was die cut with a scalloped edged rectangle and mounted with pads onto a white base card followed by my lemon and a sentiment strip stamped with one from the set.

This is the second card I made with the same stamp but set it onto a black panel through which I'd inked with white pigment ink and the scattered polka dots stencil. A simple white panel stamped with another of the sets sentiments was glued in place and the lemon, made the same as the one above added on pads.


I decided to use this second design for the Color Hues challenge, which one would you have chosen?

Well that's all from me for today, happy crafting.
 

Thursday, 6 February 2025

More Birthday BA Inspiration


Good morning.
Julie here with some more Birthday themed inspiration for Uniko's 13th Birthday celebrations.
My friend's birthday is later this month so I thought I would combine it with a BA post using her favourite colour of red. 

So what red flowers could I use, I thought roses, then the fab Gerbera stamp but finally decided on the gorgeous poppies in the Remembrance stamp set. The sentiments were not suitable for a birthday but poppies are always a cheery bloom, evoking open fields, blue skies and summer! Here's what I made.


I used my watercolour wash with masking fluid technique for this card, fuller details on this technique can be found here.
After stamping on Mixed Media paper with a pale ink, I used Altenew's Limestone, I added masking fluid and left to dry. A trick I saw recently says to run your brush through a bar of soap before dipping in the masking fluid and I think it does stop your brush from clagging.
When completely dry, I added water to my panel and flooded in 3 shades of green water colour. I also added a few areas of red to suggest poppies in the background. Try to keep the darkest greens to the area around the flowers, it will dry lighter, then I added my sheet of crumpled snappy wrap and left to dry fully. Only when it was COMPLETELY dry did I remove the snappy wrap and then the masking fluid.
Now it was just a case of colouring in the outlines with watercolour paint. Once dry, I trimmed my panel and added it to a panel of red card and then onto a 5 x 7 base card. The sentiment from Bauhaus Blocks was stamped on a scrap of matching paper completes.

That's all from me for the moment but please pop back tomorrow for more birthday inspired makes.

Wednesday, 18 September 2024

Brand Ambassador Inspiration - Wednesday Workout with some Autumn Themed Stencilling

 Morning all, Julie here with a little bit of BA Inspiration using stencils.

I'm helping out a friend on one of her challenge blogs up until Christmas and their latest challenge is Autumn so I thought I would have a go using some stencils that I haven't used or one not in a while! Here is my card using the Nature's Treasure stencil and the French Script stamp.


On a panel of white card, I stamped the script with Versamark before heat embossing with gold EP, then inked through the stencil, roughly covering the text and trying not to overlap the sprigs.
Rather than use a single colour for each leaflet, I blended a couple to get a graduated effect. The colours used were Mustard Seed, Carved Pumpkin and Vintage Photo Distress Inks. Once the text was covered, I dried the ink and then as the background looked a little too stark, I blended Antique Linen over the panel before trimming and adding to my cream base card. A strip of gold mirror card and a heat embossed Happy Birthday complete.

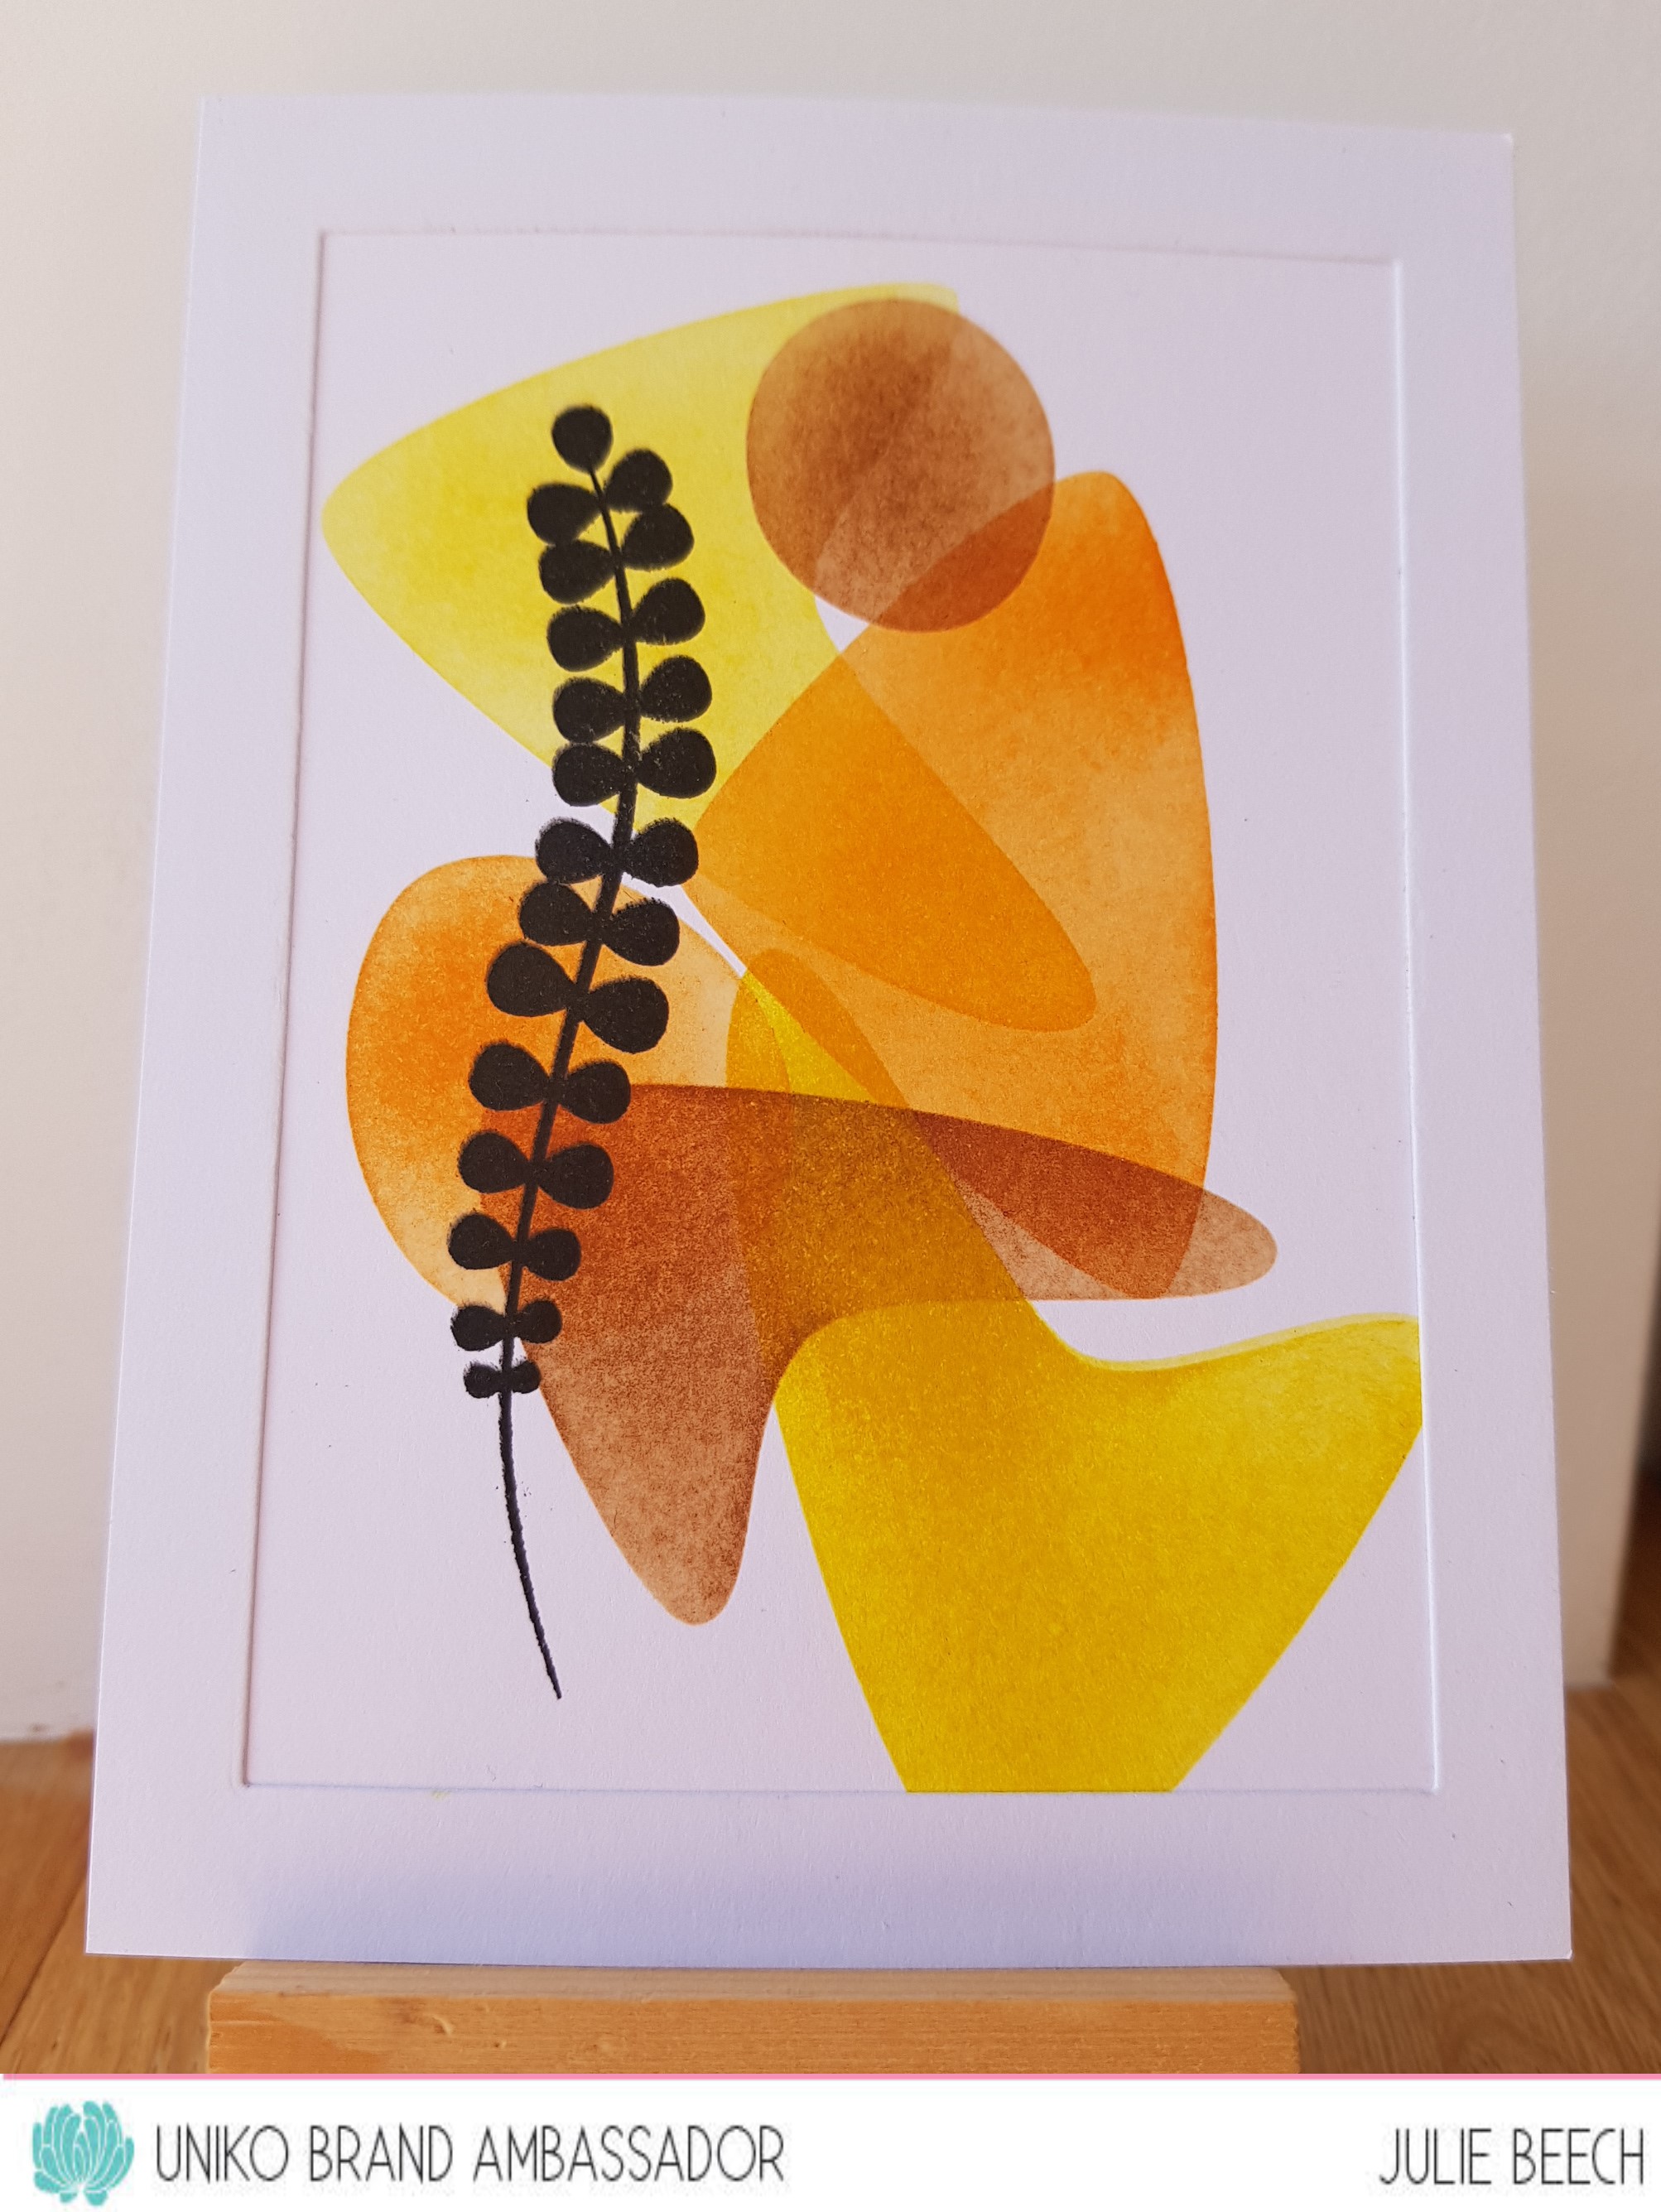
My second card uses the Mid Century Modern Shapes stencil and the Nature's Treasure II stamp set.


I was just playing around with the same inks from the card above as they were still on my desk, looking to make an interesting pattern by moving the stencil around so that each shape overlapped the next. The foliage was stamped in Altenew's Obsidian ink and is a great contrast to the softer blended DIs. I found the frame in my bits box and I think it just sets off the panel perfectly. What do you think? No sentiment this time, think it would spoil the look.

So two totally different designs but linked by the colours and the use of stencils. I hope I've encouraged you to have a play and see what comes about. 

Happy crafting. 

Monday, 29 July 2024

Merry Monday, some more Christmas in July BA Inspiration

Good morning, Julie here with a few 'krafty' ideas for some Christmas makes. Here are my ideas using various Uniko stencils and stamps and kraft card.


I was looking through my stash the other day and came across a couple of panels of kraft card that I'd made a while ago and not used, so decided as my Christmas card pile is not what it should be, I should turn them into cards.

This first card started off as a stencilled panel using Winter Foliage stencil. I made it and used a snippet for this card back in 2022, so it's about time I used it!


I first secured the stencil to a panel of kraft card then inked through with Hero Arts Unicorn White pigment ink. Carefully removing the stencil so as not to smudge the ink, I set it aside to fully dry and washed the stencil. Using the white ink allows the dye ink I used after to pop off the kraft, otherwise it would soak into the card and be rather dull in comparison.
Once completely dry, I replaced the stencil over the panel and inked through with a mix of Evergreen Bough DI for the holly leaves, Festive Berries DI for the berries and Mowed Lawn DI for the ivy leaves. The evergreen sprigs were a mix of both greens. My pine cones were inked with Ground Espresso DI.

To make this card, I cut the panel into two, and attached it to a kraft base card, for sparkle a strip of red glitter paper was added and finally a sentiment embossed with gold EP.

This second card uses the smaller of the two panel pieces, glued to a red base card, a thin strip of gold mirror card and a large heat embossed sentiment in gold.


Finally I had a sentiment panel that had gone wrong, the top half was smudged but I didn't throw it away, just cut the messy section away and trimmed it to form the central panel of my card.


Trying to think what to do with the piece I had left, I went looking through my ideas folder and found this.

No name so I can't link back but I also found this by our old BA Hannelie, here, so mine is a bit of a mashup!
I found some tape in my stash, Lidl I do believe, and cut a triangle from the sentiment panel. Here is one using blue that I made at the same time. It's so easy to make loads at the same time as arranging the small individual sentiments does take some time, even in a MISTI! The tape was wrapped around a panel of kraft then the center panel added over on pads, a simple punched white card star and gold embossed sentiment completes.

So that's all from me for today, hope I've given you some ideas to get your Christmas makes up and running.

Saturday, 23 March 2024

Brand Ambassador Inspiration - Watercolour Spring Botanicals

 Good morning all, Julie here with a little bit more Spring Botanicals inspiration. Earlier in the month I used Snowdrops and Crocus for my design here, but today I want to share the fab Tulip set from the series. I received a lovely bouquet of them for Mother's Day from my son and have only just consigned them to the compost heap, so I was inspired to get the set out for a play. 

I love to use simple frames in my cards and for my first card I've used an oval frame for these pretty spring tulips. 


On a panel of MM paper, I stamped and masked this bunch of tulips in a pale ink for a no line look.
Each petal was then painted by adding colour then water to so that I didn't have any harsh edges. The watercolour bleeds into the water and does a lot of the work for you! I did do alternate petals and left them to dry before attempting another as I didn't want the colour to move from one petal to another. Once dry, I tackled the stems and leaves in the same way.

Once complete, I die cut a frame from textured card to match my 5 x 7 base using a couple of stacked ovals fromWaffle Flower. I stamped and heat embossed my sentiment in gold EP before fussy cutting it from the same card. The frame was attached to the panel of tulips cut with yet another of the nesting ovals with foam pads and then flat onto the base card with glue. My sentiment was placed to one side, overhanging the frame.

My second card was trickier to stamp as I went for embossing but this method is much easier to water colour.


I stamped the flowers onto more MM paper with DI Black Soot then heat embossed with clear EP. I prefer this to stamping with Versamark and black EP as I always manage to get black EP all over the place!!

Again I used the same watercolour technique as before but the water should stay within the cells created by the embossing so is a little quicker to paint. This time I filled in the background with a thin wash of blue before trimming and adding my die cut frame, MFT. Again I used foam tape to add the frame and added the panel flat onto my square card base. A simple sentiment stamped in black was slipped under the edge of the frame before it dried completely.

So that's it for today from me. I hope you've been inspired to have a go for yourselves and embrace the joy of Spring Botanicals!

Happy crafting

Wednesday, 7 February 2024

Brand Ambassador Birthday Inspiration

 Good morning everyone Julie here. We are well into our birthday celebrations here at Uniko. The Brand Ambassadors have all been sharing some birthday inspiration all week and today it's my turn to share some too. I've gone with a pretty, feminine birthday card using Pure Florals - Rose.


This card uses the small rose and leaves from Pure Florals - Rose and some DP from my stash. I decided to use watercolour for this design, stamping in black ink onto MM paper before heat embossing with clear EP. The raised embossing creates little cells for the colour to sit in and is much quicker and easier if you aren't that confident with a paint brush.

I could have got my watercolours out but instead decided to use some Altenew inks that I smooshed onto and acrylic block, then used as watercolours. Adding a thin layer of water to each petal in turn before adding colour allows the ink to spread and not leave harsh edges to the colour. I wasn't too bothered about completely filling in each petal as the white left adds life to the rose, I think. Once dry, I fussy cut the flower and the two leaf sprigs.

The blue dotted DP is some NitWits paper which I glued onto a DL note card, then added the frame which was hanging around from another project. In another card here with the same layout, I did use the BB Dots stamp to create my own background which gives you another option. The leaves were glued flat but I popped up the rose on some foam pads before adding the simple stamped sentiment.

One more thing before I go, don't forget Bev's birthday present to you. The discount code 'birthday12' is valid for the whole month of February 2024 and can be used on any order placed, even if you place multiple orders during the month!
Hope you are enjoying the birthday celebrations here at Uniko and there'll be some more birthday inspiration tomorrow, so for now happy crafting!