
Good morning, Julie here with a bit of Brand Ambassador inspiration.
Today I've got my arty hat on, inspired by the ladies at CAS Mix Up to get my watercolour paints out of cold storage!! Here is what I came up with after a couple of afternoons playing about and getting messy!
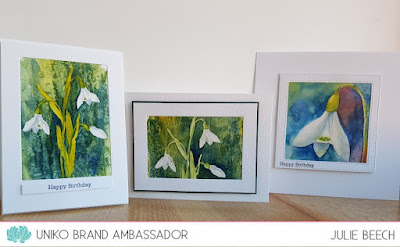
I don't get my paints out as much as I should, in fact my travelling box had some of the pans stuck to the lid! As you can see I've used the fab Spring Botanicals - Snowdrops as well as an old digi that Bev gave away some time ago for my large single flower.
I apologise ahead, as this is going to be a photo heavy post, so grab a cuppa, sit back and follow my journey. I learnt such a lot experimenting with these cards.
Before I start, here is a list of what I used to create the basic panels.
- A6 panels of Watercolour or Mixed Media paper
- Spring Botanicals - Snowdrops
- Masking Fluid
- A piece of cling film
- household salt
- Altenew's Morning Frost ink
- Watercolour paint, Cadmium Yellow, Prussian Blue and Alizarin Crimson
After stamping my image with the Morning Frost, I masked it out using masking fluid.
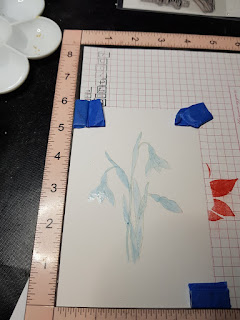
Before the washes dried too much, I added salt around the edges and placed the cling film over and left it to dry completely. Don't rush this as the longer you leave the wrap on the better the texture in the finished panel.


I was enjoying myself so much that I made another panel!
Once completely dry, I carefully removed the masking fluid to reveal the stamped image against the textured background.
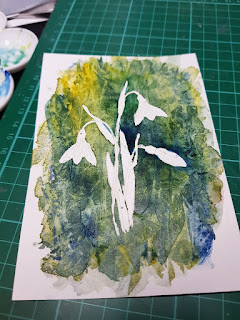
I love the texture you get from the salt and cling film. If you don't have watercolours you could try Brusho crystals to get a similar effect. If your masking has not been too accurate, you can always add some white gouache paint to the dark areas, but I left mine as is.

The revealed image was then painted using a mixture of the yellow and blue paint for the stems and leaves and a watery mix of Prussian Blue and a tiny bit of Alizarin Crimson for the shadows. I added a little too much yellow for my green I think in the first, so in the second panel I added more blue and watered the mix down. Watercolour always dries paler than you think! I prefer the more realistic second attempt.
To make my cards, I decided to frame them using the same card as my base card, one was framed vertically, the other horizontally.


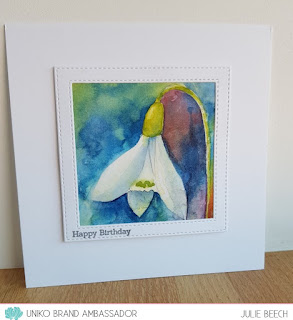
My final card uses the free digi snowdrop you can download here and you don't need any masking fluid.
To start, I enlarged the digital image as I only needed a single bloom and printed it off. I then flipped it over and traced from the back onto a panel of mixed media paper. The ink from the printed image leaves a faint impression on the MM paper when you remove it. Any missing areas can be quickly sketched in. You'll also notice that because of the process the finished image is a reverse of the original. If you would prefer the image the other way around you would either have to flip the image before enlarging or add pencil scribble to the wrong side of the print off.


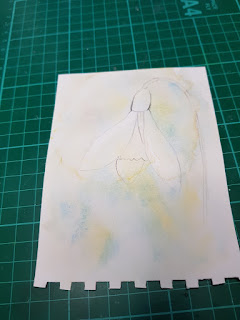
The above image shows the beginning of the process. Sorry, but I forgot to photograph my panel when I'd finished painting.
Here is the completed card using my trimmed down, finished panel. The frame is cut using a MFT die-namic die on a 5 x 5 base card, sentiment Simply Said again.
Looking at the finished painting, I think I should have added a little more shadow to the central petals, but overall I'm quite pleased with the result, even if it looks nothing like Joanne's!
And relax, that's a wrap, as they say.
I hope you are inspired to get out those watercolours and have a play, it's only paper and paint in the long run if you make a mess. An old tutor of mine always said not to throw away your mistakes, they maybe much better than you think after a night's sleep. He's been proved correct on more than one occasion!
So until next time, keep crafting and stay safe.

Wow - fantastic results and thanks for sharing the how-to.
ReplyDeleteHugs, Sarn xxx
Gorgeous painted images. I especially like the really large digital one. Unlike yourself, I prefer the more yellow stems in your first snowdrop card though. So it goes to show we are all different! X
ReplyDeleteHow gorgeous - loving your backgrounds and the gorgeous flowers
ReplyDeleteStay safe
Blessings
Maxine
Stunning! You are so talented and all three would look fabulous framed and on a wall.
ReplyDeleteThree beautifully watercolored snowdrop cards, Julie. So pleased you joined us at CAS Mix Up with your 3rd snowdrop work of art:-) TFS the link to the video too. Love and Hugs...Nancy
ReplyDeleteI so enjoyed reading the post and learnt lots. Thank you for the fabulous inspiration x. Your cards are stunners, so artsy, so unique and they should be framed Julie x.
ReplyDeleteJuli, your idea of using resist technique and watercolours is great! Reminds me of doing it again myself...
ReplyDeleteLike Jane I think they are so beautiful and should be frasmed!
Greetings, Wiebke
Julie, I would be proud to frame any one of these gorgeous cards! How absolutely phenomenal! I'd never put that arty hat of yours away!
ReplyDelete=]
Oh my goodness, these are beautiful...love the mixed media backgrounds, and thank you for the 'how to' details and link. These are inspiring!
ReplyDeleteBlessings
Maxine