Wednesday, 20 May 2020

Brand Ambassador Inspiration- A Masculine Birthday Card

Good morning folks, Julie here with another Brand Ambassador post.
Today I would like to share this masculine, CAS card with you and the steps I used to create it.


I don't know about you but I'm starting to run out of my favourite cardstock, so I decided that I would use some of my odds and ends that I save from other projects and some larger A4 sheets that have been in the stash for more than 7 years! So I started with a small panel of white card from the scrap box, which I taped under my abstract triangles stencil.


I found it easiest to stick it from the back with masking tape, so needed to add a little talc to stop the sticky tape from catching on my MISTI when stamping. The stencil was then placed in my MISTI and I then stamped the largest of the sentiments from Birthday Wishes set repeatedly through the stencil with black ink. As the ink will sit on the stencil, take are not to smudge the residue when moving your stamp around. 
I carefully removed the tape from one edge of the stencil and placed a panel of scrap paper under it and carefully rubbed away the excess ink with a cloth. The stencil was still attached by one side so it acted like a hinge allowing the stencil to remain in place. After carefully removing the scrap paper, I placed the stencil back over the inked panel and replaced the tape and inked through with Salty Ocean DI. Once dry I carefully removed any excess ink from the stencil before placing the Scattered Polka dot stencil over and securing.


Blueprint Sketch DI was then added through the two stencils to create yet another layer.


The photo above shows what the panel looked like after the polka dot stencil was removed.


Finally, the Abstract triangle stencil was removed to reveal the finished panel.

When using small patterned panels, I find a piece of copy paper cut to size very useful, allowing you to position each of the elements before adding to the final base card. You can roughly plan the final design without ruining your base card.
I trimmed a panel of textured card to create two panels, adding two strips of scrap card inked with Blueprint Sketch and stamping Happy Birthday from Simply Said in black before popping up them over the stenciled panel on the copy paper with fun foam. The base card was made from the same textured white card.


The instructions sound quite complicated but I do encourage you to have a play, use up your scraps like me. 

That's all from me for the mo, so stay safe and well until next time.


Friday, 15 May 2020

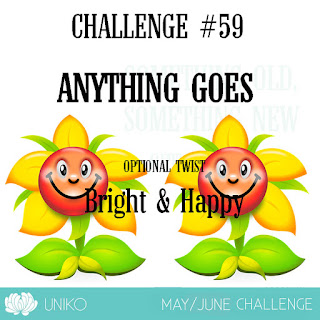
Uniko Challenge #59 - Anything Goes + optional twist Bright & Happy

Hey!

Welcome to the May/June 2020 Uniko Challenge.


Have you been struggling with creativity during the lockdown? Or are you filling the time crafting away a huge stash of cards? Whichever we hope our Anything Goes and optional twist of Bright and Happy will inspire you to join in and play along.

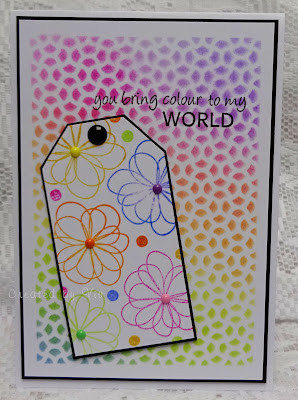
We have Viv joining us as our Guest Designer for this challenge and she has definitely embraced the bright and happy with her card!

Viv


Viv's card make you feel more cheerful immediately! If you get time it would be wonderful if you'd pop over to her blog and leave her a lovely comment - HERE.

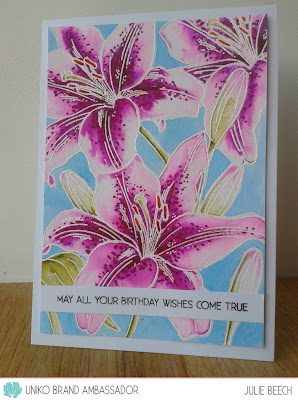
The Uniko Brand Ambassadors have also been busy creating inspirational projects to fire up your imagination. Check them out!

Bev

{Coming Soon!}

Carol 


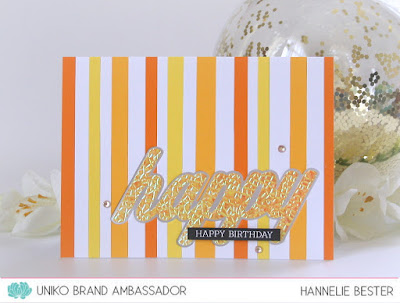
Hannelie


Wiebke


Are you ready to play?

Well, just in case you need some more incentive to play along with the challenge here are the details of the prizes. 

Due to the current chaos around the world and here in the UK, I have temporarily reduced the value of the prizes. This is so that I can keep my small business afloat during these uncertain times. I hope you understand and will still join in on the fun.


Thank you for your continued support & joining in on the fun at Uniko.
  
THE PRIZES
  • Main Winner Chosen By the DT - £15 eGift Certificate
  • Random Twist Winner - £5 eGift Certificate
  • Random Uniko Stamps Winner - £5 eGift Certificate
  • Top 3 Chosen By DT - 150 Loyalty Reward Points


You've got plenty of time to play along with this challenge. 
The deadline for submission is midnight (GMT) on Friday 19th June 2020.

Crafty Hugs,


Thursday, 14 May 2020

Brand Ambassador Inspiration - happy & colourful

Hello

Wiebke here with a happy and colourful post to brighten your day!

It's also a happy bithday surprise for Beverley!
 
I'm so 
HAPPY HAPPY HAPPY HAPPY
to have you in my life! 😘


I made this bunch of clean and simple cards in a really short time! How I did it? By using all the "left overs" to create second cards!

The materials for all four cards are similar:
  • a self made rainbow-colour paper
    made of multimedia paper (it doesn't warp as much as normal cardstock when it get's wet) & Ranger Distress Oxide Inks (and a blending brush or tool) & a clear iridescent embossing paste (just added a thin layer with a palette knife)
    To create this paper you'll need a bit of time, but below I have some alternative ideas!
  • the Big & Bold Happy Dies
  • fitting stamps - I used Big & Bold Happy, Happy Days and bee Happy (guess why! 😉)
 
:-:-:-:-:-:-:-:-:-:-:-:-:-:-:-:-:-:-:-:


To avoid lots of glue-time for the thin areas I used adhesive sheets, but needed a bit of glue here and there anyway!

For the first two cards I cut out the bigger "shadow" word of my sparkling paper first, then placed the smaller die on this hello and cut again to create the thin edge of the word. - This was the difficult part - to line it up exactly for an even edge!
But with the help of some low-tack painters tape (I used the pink one from Tesa) it wasn't a real problem! 

The rest was easy!
To adhere the thin layer in the original shape and without wonky lines I used the other one as guide before I adhered it on a second cardbase.
All sentiments were stamped in black ink. I love to use my stamping tool for these jobs - You can position all the stamps perfectly with the gridlines on the lid and you can stamp twice for a perfect black impression without any problems of missplacing!


The black lines of the box are drawn with a thin black marker and and a T-ruler.
The small butterflies I punched out of the scraps of the sparkling paper and placed them as a fluttering crowd above the word die cut.

 :-:-:-:-:-:-:-:-:-:-:-:-:-:-:-:-:-:-:-:

Here on the next picture you can see in the reflection, how much this selfmade paper is sparkling! (It's always hard for me to catch this with a camera.)


For the second two cards I directly cut out the smaller die of the sparkling paper. 
On the cardbase I brushed the same colours I used before to create the sparkling paper, but with a lighter hand for a softer, less intense shadeing.
The more intense happy on a white shadow paper I placed there, added the two sentiment-parts and the card was finished!


The last card is made of the leftover again. I cut out the "frame" with a knife and a metallic ruler, rounded the corners by hand and adhered it on the cardbase.
This time I used the cute bee insted of a sentiment - just as a "be(e) happy".

:-:-:-:-:-:-:-:-:-:-:-:-:-:-:-:-:-:-:-:

Hope you like this idea of making quick'n'easy cards!


Some more ideas to stretch this technique:  

You needn't use a selfmade sparkling rainbow-paper.  
You can also use 
  • a patterned paper or 
  • a monochromatic shading
  • a paper with or without sparkling
  • ...
When you havn't a iridescent embossing paste, use
  • a sparkling embossing powder
  • a sparkling spray (maybe selfmade with some mica powder)
  • a thin layer of glitter glue or glossy accents (maybe with some glitter?)
  • ...
When you hon't want to make "happy" cards, use one of the other Uniko Big & Bold die sets!
"wish" or "snow".
 
:-:-:-:-:-:-:-:-:-:-:-:-:-:-:-:-:-:-:-:


Thanks for looking by today!   💓💛💚💙💜
Have a great and creative time and be happy!
 

Hugs Wiebke


Friday, 8 May 2020

Brand Ambassador Inspiration : Pure Florals

Bonjour !

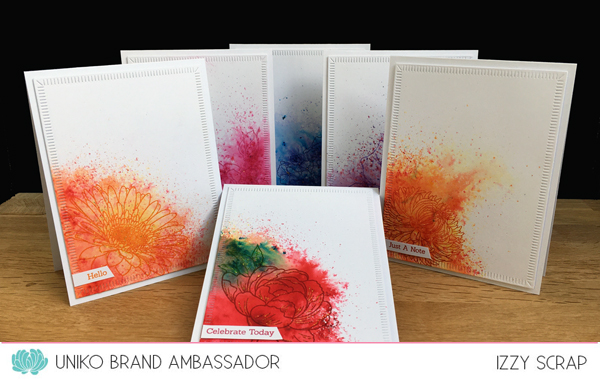
Izzy here. Today I'm going to show you some cards I made few months ago to offer my friend for the New Year. 

I made a bunch of them with the Pure Florals collection, keeping the same design and only changing the colour of the background.


To make the cards, I die cut white panels with a die and I determined where to make the coloured backgrounds placing the stamps on the panels. 


Then I put some Brushos powders and spritzed with water until I covered the panel according each flower.


Once the panels dry, I stamped the flowers with matching coloured inks...


...and then I stamped again with Versamark in order to heat embossed with clear powder.


To finish I adhered the panels on double white card and I made stickers with sentiments from the Simply Said set.


As it was a gift, I also made envelopes to match with each card by stamping part of the flower on the top left corner.


Some closer pictures to show you the touches of glitter I added to highlight the flowers even more.

That's all for me today ! Thanks so much for stopping by. Take care, stay safe at home and give your Uniko stamps some love...It's the best way for me to keep sane !


Wednesday, 6 May 2020

Uniko Brand Ambassador Inspiration post : Lovely hummingbird

Hi there!

Hannelie here with my monthly inspiration post !

On today's card I'm combining one of the newer floral stamps (which I LOVE) with the Paradise hummingbird  stamp set from an earlier release.

Hummingbirds are amazing little creatures ... I can watch them for hours :)


After cutting out the Paradise Hummingbird (with my Silhouette cameo) I used my blending brush to add the colors as shown above.

I then stamped the bird with the help of my Misti stamping tool using Versafine black ink.

On the card base, I stamped the large clustered flower called Hello lovely in black and used foam dots to pop the hummingbird up.

Lastly I stamped the sentiment from Simply said blocks , cut it out and also popped it up with foam dots for dimension.

I used flat back pearls as embellishments and added one as an eye for the bird.

I hope you still find comfort in crafting during this difficult Covid 19 time. Card making is the one thing that didn't change for me, where everything else out there is crazy. It keeps my thoughts at bay and now more than ever I am thankful for a hobby!

I hope you leave here inspired !

Thanks for visiting Uniko today 😊

Hannelie


Monday, 4 May 2020

Brand Ambassador Inspiration - DL Cards

Hi! it's Jane here today with a trio of DL sized cards to share.

DL cards are tall and skinny or long and skinny and used to be very popular when I first started making cards. So I thought I'd give this size a bit of love and bring them back in focus again.


My first card you may have seen before as I used it as part of the AAA Cards facebook group's Weekend Workout at the end of April. I'm sharing it again today as it really was the inspiration for this whole post.


I used three Uniko stamp sets - Background Builders Classics, Balloon Bash and Sweet Baby.


I stamped the edge first using my misti to line up the repeated stamping along the edge. The bear was paper pieced and hand cut. I then used it as guide for the sentiment and balloon stamping. i drew in the strings by hand.

My second card is also tall and skinny. It uses three stamp sets- English Country Garden Butterflies, Background Builders Classics and Organic Wishes.


I started this card by using the butterfly die to cut apertures and then added the detailed butterflies stamped onto patterned paper behind the die cut windows.


I finished off the card with the same striped border as the first card and some random stamping of the flower heads.

My final card is a long and skinny one. It uses three stamps sets - Bee Happy, Background Builder Happy Hexagons and You Are Yes You.


I think this is my favourite of the three DL cards I've created for this post. I started by stamping the hexagon lines and the flowers and leaves. Then I stamped and coloured the bees on some scrap card and hand cut them.


I added the swirly trails to two of the bees before adding them popped up onto foam pads and a sentiment to finish it all off.

Well that's me done for today. 
Will you give the DL card a go? I'd love to see your makes, share them on social media with #uniko if you do.

Thanks so much for your time today, it's really appreciated.

Keep safe, stay home and craft instead!

Jane
x

Friday, 1 May 2020

Uniko Challenge #58 Winners

Hey!

I'm here today to announce the WINNERS of Challenge #58 Spots & Stripes, optional twist Use A Stencil

A huge thank you to everyone who played along with this challenge.

All prizes will be Egift Certificates that can be spent once the Uniko store re-opens.

First we have our overall WINNER chosen by the Design Team...

#17 Viv


Congratulations Viv!

Here's your winner's badge


You have won a £15 eGift Certificate to spend in the Uniko store. Please contact me at bev@uniko.co.uk by 15th May 2020

We would also love to have you join us as our Guest Designer for our next challenge. If you are interested please contact Jane at jane.taylor52@btinternet.com by 8th May 2020.

 Next up is the random winner who twisted with us....


Congratulations Linby

You have won a £5 Egift Certificate to spend in the Uniko store. Please contact me at bev@uniko.co.uk by the 15th May 2020 to claim your prize.

Here is your winners badge:


Then we have our randomly selected winner who used Uniko products on their creation...


Congratulations Fikreta

You have won an £5 Egift Certificate to spend in the Uniko store. Please contact me at bev@uniko.co.uk by 15th May 2020 to claim your prize.

Here is your winners badge:


Now for our Top 3 chosen by the DT and in entry order:

#4 Anita in France


#22 Nandini


#49 Mugdha

Congratulations to you all & here is your Top 3 badge:


You have all won 150 loyalty reward points.

Please contact me at bev@uniko.co.uk


Congratulations to ALL the winners & EVERYONE who joined in with the challenge!

The next Uniko Challenge starts on Friday 15th May.

Hope to see you come back and join in with the fun :)