Saturday, 8 September 2018

DT inspiration - Extending your stamps

Morning all, Julie here with another idea on how to use those small stamps.
I'm up on my own blog with a card that uses the Originally Organic Additions and Big and Bold Hello stamps, as well as few hand drawn additions.


I've wanted the Christmas wreath stamps for awhile but as they are still out of stock I've had to think outside the box. I decided to show you that if you haven't got the exact right stamp, look at your stamps again and perhaps you can use those you have in ways that they weren't originally intended for!
I started by placing my handmade wreath maker, you could use the Gina K one if you have it of course, and a panel of card, in my MISTI.
Placing the small leaf element from the Originally Organic Additions set in the MISTI, I stamped.and rotated my card in the positioner and repeated 3 times. I was intending to stamp at every station but decided to keep it at 4, leaving out alternate positions.
To add more leaves instead of stamping I drew 2 in freehand on each spray, then added the flowers from Big and Bold Hello and the small berry clusters from Originally Organic Additions using the positioner and MISTI. To fill in some of the empty space I doodled a small flower by the stamped flowers and added more berries in various sizes, then coloured the elements with Copics.
My sentiment from Simply Said Christmas was stamped and embossed with gold EP.
To frame the wreath, I inked a slightly larger card panel with a Versamark pen and embossed with the same gold EP. Both panels were then added to a 5 x 5 white base card.

By the way there's a fab article featuring some of the DT in this month's Craft Stamper and a little extra on their blog here.

OK, that's it from me, thanks for stopping by,


Friday, 7 September 2018

Uniko Challenge #48 Winners

Hey!

I'm here today to announce the WINNERS of our Friendship Quote challenge #48, optional twist of FOR A CHILD. 

A huge thank you to everyone who played along with this challenge.

First we have our overall WINNER chosen by the Design Team...


Congratulations Hannelie!

Here is your winner's badge:


You have won a £25 eGift Certificate to spend in the Uniko store. Please contact me at bev@uniko.co.uk by 21st September 2018.

We would also love to have you join us as our Guest Designer for a future challenge. If you are interested please contact Jane at jane.taylor52@btinternet.com by 14th September 2018.


 Next up is the random winner who twisted with us....


Congratulations Stempelfrida!

You have won an in stock £4 clear stamp set from the Uniko store. Please contact me at bev@uniko.co.uk by the 21st September 2018, with your choice of stamp set and your postal address.

Here is your winners badge:


Then we have our randomly selected winner who used Uniko products on their creation...

Uniko Ltd, floral card, die cutting, Diecut, quillish, zig, Zig clean colour brush pens, Card for her, CAS, CAS card, cards by Ishani,  quillish, uniko originally organic stamp

Congratulations Ishani!

You have won an in stock £4 clear stamp set from the Uniko store. Please contact me at bev@uniko.co.uk by 21st September 2018, with your choice of stamp set and your postal address.

Here is your winners badge:


Now for our Top 3 chosen by the DT and in entry order:


Congratulations to you all & here is your Top 3 badge:


You have all won 150 loyalty reward points.

Please contact me at bev@uniko.co.uk
Congratulations to ALL the winners & EVERYONE who joined in on the fun!

The next Uniko Challenge starts on Friday 21st September.

Hope to see you come back and join in on the fun :)


Wednesday, 5 September 2018

Floral Stamp with floral stencil

Hello friends Rahmat here.

Today I am using floral stamps and stencils with some coloring and partial fussy cutting on this birthday card.
I started with stamping the Pure floral - Lily in Versafine black onyx ink, and then used a pink Chameleon pen to color  it, it gives a perfect gradient to the petals.
I partially fussy cut the floral panel.
On the base card I used the stylized flower stencil in green distress oxide.
I added the floral panel using the foam adhesive.
The sentiments is from the Cosmos set, I heat embossed in white on a black strip.
A few jewels to finish off the card.


Uniko has a lot of stencils now, and you can always mix and match these with stamps.
All the above products are from floral range from Uniko, and they all go pretty well together, I hope I had inspired you to combine the stamps and stencils.

           Thank you for stopping by, I really appreciate your kind  feedback :) Have a great day!
                                                                     

Tuesday, 4 September 2018

CAS Colours & Sketches #288 - Colours

Hello September!

A new month means a new hostess over at CAS Colours & Sketches and this month Samantha is our hostess. Summer is almost over and there is a hint of Autumn in the air already here in the UK, the days are slightly cooler and the sun is going down earlier and we start to think of the next holiday, Halloween! Which I think inspired Samantha's colour choices HERE this week...


I've never been a huge fan of Halloween and I don't make a big fuss about it or making cards to celebrate, so I had to sit and think of how to use them for a different occasion. This is what I came up with...


It has been ages since I used Background Builders: Squared and when I saw the current sketch over at CAS(E) this Sketch! seen HERE and below, I thought the colours and the sketch would work great with the stripe stamp. I used my MISTI tool to stamp the stripes to get them as evenly spaced as I could. 


I used a trio of Altenew colours that best matched the ones in the CC&S graphic and the sentiment is from Simply Said Birthday & die cut using a little rectangle die.


That's all from me today, I hope thatI have inspired you to join in on the challenge?! If you need a little more inspiration, pop on over HERE to see what the CC&S Design Team have created.

Thanks for stopping by!
Hugs

Saturday, 1 September 2018

DT Inspiration - Using Those Smaller Stamps

Hey!

It's Jane here today with some ideas about using those smaller stamps that are included in stamp sets.

 How often do we get caught up in the larger stamps and overlook those smaller ones from the same sets? Or maybe just use them as a finishing touch to add to the larger image? Well why not let them take centre stage for a change? 

Here's some ideas.

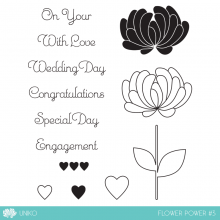
I'm starting with the small teddy bear from Sweet Baby and a heart from Flower Power #3.


I stamped the bear, a sentiment word and the hearts using shades of brown and pink all over a piece of card stock. This was then die cut with a stitched border and matted onto pink and then brown card stock.


SweetBabyPP  FlowerPower#3PP

My next card uses the smallest flower head from Paradise - Hummingbird.


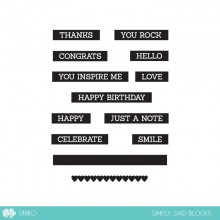
I stamped the central pink cluster of four flower heads by rotating them round as I went. I then added the blue clusters either side and finally added in the green ones. I stamped the greeting from Simply Said Blocks onto a scrap of card and adhered it centrally.


ParadisehummingbirdPP  SimplySaidBlocksPP

My final card today is one that really speaks to my CAS heart and I love the simplicity of it.


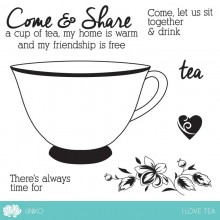
I used the chisel end of two Copic pens to draw the background lines and then stamped the greeting from Simply Said Blocks on top. The addition of the small heart from I Love Tea just finished it off a treat.


ILOVEteaPP  SimplySaidBlocksPP

Well that's me done for today. I hope I may have given you some ideas for utilising those smaller stamps from the sets in your stash. It's a fabulous way to get more for your money and who doesn't need to do that?!

Thanks so much for looking.  And keep crafting!

post signature

Friday, 31 August 2018

DT Inspiration .... using the new Alcohol Lift Ink

Good morning to you .......Happy Friday!

It's Linda here.  I hope you've had a good week.  Can you believe it's September tomorrow. 
There's only 17 more weekends left before Christmas!! ..... just saying.
Don't worry, I'm not going all festive on you just yet.

I've been having fun recently playing with the brand new Alcohol Lift Ink from Tim Holtz.  You may have already seen a couple of cards I made using this new ink, along with the Framed Florals stamp from the Uniko August release.  If not you can check them out when you've finished here.  I'll put a link at the bottom of this post.

Not only can you use this ink with your stamps, it's great for using with stencils too .....


Get your hands on the Alcohol Lift Ink Re-inker ...... great to re-ink your ink pad, obviously, but if you squeeze a little of the ink onto your craft mat or heat sheet, then use an applicator tool with one of the foam pads (not the felt pads that are usually associated with using alcohol inks) to apply the ink through your stencil onto an alcohol inked background, you will get this sort of effect ......


You only need a tiny amount of ink ...... don't use too much, and don't press down too hard, otherwise it will seep underneath your stencil and you will lose all the detail.

I've used the pretty Uniko Mehndi Mandala stencil here. 
I created my alcohol ink background on a piece of YUPO paper using shades of blues and turquoise inks with just a touch of pink in there.


I placed the stencil over the top and then used the ink.  You can see how the Lift-ink reacts with the colour and lifts if away onto the foam.

I removed the stencil and then used a soft paper towel to blot away any excess ink left on the card.  You need to do this a couple of times, making sure you use a clean piece of paper towel each time you blot. 


When you're happy there's no 'wet' ink left on the paper, gently buff over the whole piece using another clean paper towel.

A little mat and layering to frame the design, a pretty gem in the centre and a few dots of glitter glue,


and then I finished off with a sentiment,from Uniko's Pure Florals: Cosmos stamp set (which I believe is on offer at the moment with 10% off)


If you love Alcohol inks then you will love the new Alcohol Lift Ink ..... give it a try.

Thanks for popping by ..... Happy Stamping!
Before I go, here's the link I promised you to the cards made using the stamping technique and the Alcohol Lift ink.

Cheerio until next time .....

Tuesday, 28 August 2018

CAS Colours & Sketches #287 - Sketch

Hey!

Welcome back to another week at CAS Colours & Sketches and the last week in August! This week our hostess is Karen and she has this fun sketch HERE and seen below...


I've been wanting to put my background building stamp skills to the test ever since the recent Uniko Background Builders: Happy Hexagons landed on my desk, I just needed a little time to do it! I had a bit of time this past Thursday, whilst The Beans were out with their grandparents and set to making the largest panel on the sketch...


I used my MISTI tool and the Background Builders: Happy Hexagons acetate sheet the stamps come on to stamp and perfectly space the outline hexagons strip in VersaMark ink. I then heat embossed them in white. 


I also gave my recently purchased Altenew watercolours another outing, using the majority of yellows and oranges in the set, just randomly colouring them. The sentiment & bee is from Bee Happy. 

That's all from me today, I hope thatI have inspired you to join in on the challenge?! If you need a little more inspiration, pop on over HERE to see what the CC&S Design Team have created.

Thanks for stopping by!
Hugs