Saturday 29 June 2019

DT inspiration, A Stamped, See Through Card

Hi Julie here with a little bit of DT inspiration this Sunday. 

I was inspired to make this card for my daughter's birthday after seeing this video, being on the sick list earlier this year allowed me far too much time to watch You Tube videos! 

She love's butterflies and purple and turquoise colours so that's the route I went down.


Jennifer McGuire calls the technique stamped see through cards as you can literally see through the front panel!
This is how I went about the construction. 
There are a lot of steps but the end result is worth it, I think.
  1. Cut a piece of scrap paper to 5 and a half x 7 and a half inches.
  2. Using some white card cut a piece 5 x 7 inches and a small top folding card 3 and a quarter x 4 and a half inches.
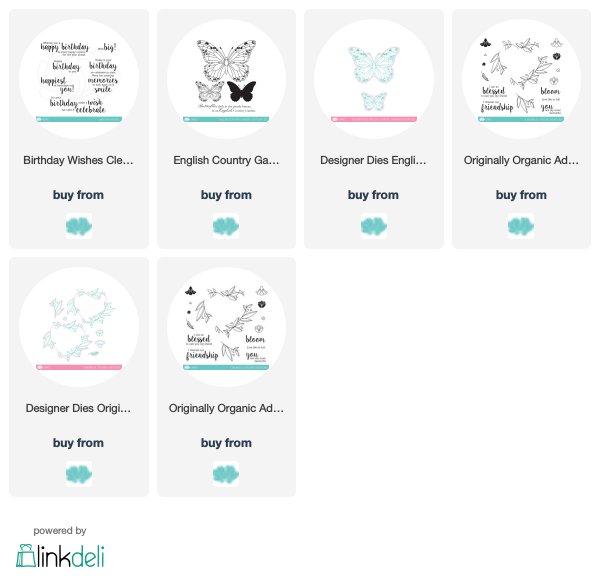
  3. From more of the same white card cut a few of both large and small butterflies from the English Country Garden dies. Retain the outer so that you can use it as a jig to stamp your butterflies more easily, works well especially with a MISTI.
  4. Place the die cut outer in your MISTI and then the stamps in the opening, close the door. Open and then place your die cut back into the space and stamp with black ink.
  5. Keep stamping until you have sufficient to cover your card front.
  6. Repeat the process with the Original Organics Additions stamps and dies. I used two of the large hearts and a few of the single sprays. 
  7. Colour as required, I used my Zig watercolour brushes.
  8. Arrange your foliage and butterflies over the scrap paper, overlapping as you go. The more overlaps the sturdier your card front will be. Jennifer McGuire uses Gladwrap Press n Seal at this point but not having any, I had to secure with low tack masking tape. Trim away the overhang.
  9. Remove scrap paper and secure each overlap with strong glue until you have a complete panel. Remove all tape  and carefully score a line about 1/2 inch from the top. This is your hinge.
  10. Trim the panel to be slightly less than 5 inches wide, just enough to create a narrow border against the white back panel. Hook the fold over the back panel and using strong glue, attach the front. (If you use tape tap a little talc on the exposed tape so that it won't stick to the envelope!) Trim the top panel to match the back if needed.
  11. To make the greeting panel, cut a piece of matching coloured card stock and a white frame using stacking dies. I used a die cut greeting from my stash but you could stamp and heat emboss one in white if you wish. Attach to the card front.
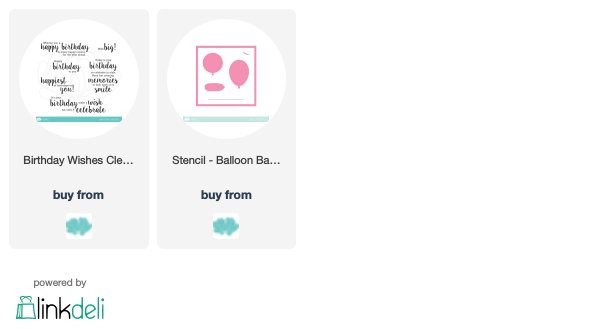
  12. On the small top folding card stamp the greeting on the inside, I used Birthday Wishes and glue to your panel of 5 x 7 card. This allows you to write your greeting and not spoil the effect from the front.

And that's about it.
I know that seems a lot of effort but it does make a really special card. Perhaps save it for that special person or occasion!

So there you have it, hope I've inspired you to try something a little different.


Friday 28 June 2019

Uniko Challenge #53 Winners

Hey!

I'm here today to announce the WINNERS of Challenge #53 Anything, optional twist of Masculine. 

A huge thank you to everyone who played along with this challenge.

First we have our overall WINNER chosen by the Design Team...

Masculine

Congratulations Amy

Here's your winner's badge


You have won a £25 eGift Certificate to spend in the Uniko store. Please contact me at bev@uniko.co.uk by 12th July 2019.

We would also love to have you join us as our Guest Designer for our next challenge. If you are interested please contact Jane at jane.taylor52@btinternet.com by 5th July 2019.

 Next up is the random winner who twisted with us....


Congratulations AJ!

You have won an in stock £5 clear stamp set from the Uniko store. Please contact me at bev@uniko.co.uk by the 12th July 2019, with your choice of stamp set and your postal address.

Here is your winners badge:


Then we have our randomly selected winner who used Uniko products on their creation...


Congratulations SathyaKala!

You have won an in stock £5 clear stamp set from the Uniko store. Please contact me at bev@uniko.co.uk by 12th July 2019, with your choice of stamp set and your postal address.

Here is your winners badge:


Now for our Top 3 chosen by the DT and in entry order:


Congratulations to you all & here is your Top 3 badge:


You have all won 150 loyalty reward points.

Please contact me at bev@uniko.co.uk

Congratulations to ALL the winners & EVERYONE who joined in with the challenge!

The next Uniko Challenge starts on Friday 19th July.

Hope to see you come back and join in with the fun :)


Wednesday 26 June 2019

Big, Bold & Happy!

Hi!
It's Lindsey here with a bit of  DT inspiration using the "Big & Bold Happy" die set.  You can see the set in the Uniko shop HERE.

I love the "Happy" die - it's big and bold and perfect for creating quick and easy cards with some pretty patterned paper.

I've gone for teenage funky, bright, masculine monochrome and pastel, soft feminine.


A lovely way to knock up a couple of quick and easy cards!

Thank you for your visit today.

Saturday 22 June 2019

DT Inspiration - Inky Foliage Silhouettes and Resist

Hello there, it's Sarah P here with my June DT Inspiration post.

I've spotted some gorgeous inky backgrounds with silhouettes on Instagram recently and I couldn't resist having a go myself, especially as those Distress Oxides blend so beautifully and they are always my Go-To product if I'm stuck with Mojo!

The first 2 feature a Heat Resist technique where I've stamped the images with Versamark ink then heat-embossed with Hero Arts White powder before inky blending over the top.

The Uniko sets are: Just Because, Natures Treasures I and Pure Florals: Cosmos for the 'May all your birthday wishes come true' sentiment. The Celebrate die is from Sugar Pea Designs


These next 2 use the same colour combos and same 'Just Because' set but adding 'Home Sweet Home' for the sentiments. 


I hope you like my cards and thank you for stopping by the blog today.


Friday 21 June 2019

WINNER!

Happy Friday!

It's almost the weekend and we have a lovely long daylight day today - YAY! Happy Summer Solstice, to those that celebrate the occasion. 

I'm here today to announce the winner of the recent Non-Release Design Team Blog Hop & GIVEAWAY we had HERE

Random.org helped me to select a lucky winner from all the comments left, so without further ado.... let's congratulate Tracey, who left this comment on Carol's blog...

madhatter said...
Awesome cards Carol.Great colours and love the reveal wheel sentiments.
Tracey.x

Congratulations Tracey! 

Please send me an email to bev@uniko.co.uk to claim your £25 eGift Certificate code.

Thank you to everyone that hopped along with us and for all the lovely comments left, they are truly appreciated by myself and all the team.

Have a wonderful Friday!

Hugs

Thursday 20 June 2019

DT Inspiration ...... Using Perfect Pearls with your stencils

Happy Thursday ......

It's Linda here, with a fun way of using your Uniko stencils, and Perfect Pearls.

We all have them .... little pots of pretty pearlescent powders that don't see the light of day very often, well mine don't anyway.

I was inspired to use them for a recent blog challenge and I've been reminded how gorgeous these powders can look, especially on black or dark cardstock.  They're so easy to use too ......


I used the Uniko Balloon Bash stencil for this birthday, or party design.

Using a sponge I applied Versamark ink through the stencil, and then brushed the Perfect Pearl powders over the top.


The colours I used were Mint, Pink Gumball, Turquoise and Sunflower Sparkle ...... really pretty pastel shades with great shimmer.

I used a soft brush to dust off any excess powder and then gently polished over the card using a soft tissue


I mixed a little of the Perfect Pearl powders with some water and then splattered the colour onto the background using a paintbrush


I used a silver gel pen to draw the strings on the balloons, and finished with a simple sentiment from the Uniko Birthday Wishes Clear Stamp Set, stamped onto a snippet of white card and cut into a banner shape.

Go on ....... give your Perfect Pearls a go, and see just how pretty they can look.

Thanks for popping by ..... enjoy the rest of your day.

Cheerio until next time ......


Monday 17 June 2019

Uniko Studio DT Inspiration...Balloons Shaker

Hello,

Carol here, warmly welcoming you to my Uniko Studio DT showcase, where I bring out a few of my Uniko Studio products to give them some extra love.  

I've noticed, as I'm sure many of you have, a trend of balloons - stamps, dies, stencils - appears to be popping up everywhere. So...as one *very* influenced by trends *grin*, as well as by a number of designers who balloon cards are blowing me away, I decided to follow suite, in creating a relatively simple stenciled balloons shaker birthday card. Nothing fancy-schmancy, but hopefully a design that will bring a smile...


Sentiment: Birthday Wishes
Stencil: Balloon Bash
Distress Inks, Studio Katia sequins

Nothing fancy-schmancy, but hopefully a design that will bring a smile...especially to those of you who find balloons as uplifting as I do! 

~carol


Sunday 16 June 2019

Stencil Sunday

Hi it's Julie and welcome to another Stencil Sunday at Uniko.

Today I'm going to share a couple of cards made using a wreath builder/ turnabout stamping jig that some of you may be familiar with. If you haven't got one here is a link to how to make your own.
Some of you may even have used one with your stamps to create some fun cards, like I did here, but this time I'm going to use a couple of stencils. I was inspired to have a go after seeing this Jennifer McGuire video.
My first card uses the wonky stripes stencil and the So Much clear stamp set.


I used Distress Inks in a rainbow palette and rotated the card panel under my stencil every time I changed colour.

  1.  Tape your wreath template down so that you can place the stencil over the top, securing across one edge to create a hinge. This will allow you to lift it and move the card panel around.
  2. Place your card panel to be inked, into the template, ensuring that at least one corner will fit snugly into the bottom left corner.
  3. Lay a piece of tape or masking paper over the area you don't wish to add ink to.
  4. Ink the area required then rotate the square to the next corner and ink again.
  5. Continue until you have completed all 7 rotations.

If your square is the same size as the jig then you will end up with a space for stamping in the centre, but don't worry if it is not completely symmetrical as you can always add a die cut over the middle!

Once my panel was complete, I mounted it on a slightly larger piece of black card stock and then onto a 5" square white card base. From matching card, I cut a circle and stamped my sentiment in black before mounting it up on foam over the coloured panel.

This second card uses the Broken Lines stencil and a more restricted palette.


I followed the same technique, rotating my card panel in the jig and keeping the stencil in the same place with some tape. This is a slightly larger panel so you have to be careful and remember which corner you rotate! A larger white die cut circle completes with the addition of an ombre coloured thanks from All Occasions Sentiments #6, fussy cut after stamping and colouring with Copics.

The panel was mounted on a panel of  matching paper and then onto a 5" square base card.

You can use a rectangular panel but you need to be aware that the pattern will be slightly different depending on where you place your corner!
 The link to the You Tube video shows you much better than I can describe so it may be a good idea to check it out if you need a more visual tutorial.


That's all from me for today, I hope I've inspired you to look at your stencils differently and have a play!


Thursday 13 June 2019

DT-Inspiration - Stencil with a simple kind of airbrush

Hello, Wiebke here with a new DT-Inspiration Post.

Like always, I used a stencil to create my card.

For this card I got a bit of inspiration from my kids. ...

Do you know a kids crafting stuff called BlowPen?

We got them a while ago. In the box were special markers with a blowing lid, some paper stencils and lots of colourful chaos and fun!

I have no airbrush system.
But something similar (please don't hit me for this comparison if you are a airbrush-lover!): The Spritzer Tool from Tim Holtz! It's also a kind of an easy "airbrush" system, like the kids pens.

My idea was to use this tool with one of my stencils to get similar effects like the kids with their BlowPens. (I'm not sure what kind of ink is in these pens, cause it's just a kids crafting and gaming stuff. but I will try them and then see how much light and time resitance the ink has.)

The most important thing with the spritzer tool is to have good moistured markers! I used my Distress Ink Markers and gave every Marker one or two drops of the Distress Refresher directly on the nibs and let it soak in for some minutes. 

It's so much easier to get the colour mist out of the pencils with this liquid helper!


I started to spray the big "Pure Florals - Chrysanthemum" stencil with shades of yellow, followed with oranges and reds.
When you use a delicate stencil like this big flower, be careful to spritz from above, not from the side to avoid spritzers beneath the stencil.
When I was happy with the colour gradients I used a lightly dump pencil and watercoloured a bit to get a smooth blending.

To finish the card I stamped my sentiment out of the "Birthday Sentiments" Set on another piece of white cardstock and gut in "in shape", used corner jumpers to get nice round shapes and adhered it onto the Chrysantemum.


For the background of my panel I used a simple way: a fabric tape in two fitting colours with a gap between the stripes (in the size of the "Wishes" sentiment). The fabric has a nice haptic texture and is a great possibility to get some extra interest into a mainly CAS design.

To finish the floral layer with some round clear epoxy shapes.

I hope you got an inspiration to get some "fresh air" into your crafty space! - Let's sprinkle!

Hugs & Greetings from Wiebke

Wednesday 12 June 2019

Uniko Stencils with glimmer paste and Foils - by Rahmat

Hello friends, Rahmat here. I am up with some inspirations using the Uniko Stencils today.

I have used glimmer paste and foils here.

The first card is made using a grey card stock, I sponged worn lipstick distress oxide on the card front and used a clear glimmer paste on top, its super glittery, and very hard to picture.
I have used the Happy die with glitter card stock, and lined it with a grey framed die.
I kept the colors limited to grey and pink.


Watch the shimmer on these cards here

https://www.instagram.com/p/ByMuwn2AAAY/

-------------------------
I have used 2 shades of green distress oxides here, and again used the clear glimmer paste over the stenciled design . The sentiment is from 2 sets and I stamped in different shades.


-----------------
I have used the star stencil here and did foiling using the blue foil. The sentiment is heat embossed on vellum and a strip of white card stock in blue fluorescent  powder from  WOW.

 ---------------
This one is the negative from the above foil, I added it to a toner sheet to get the negative blue transferred and then I used it again with the rainbow foil for the stars.
The sentiment is heat embossed on vellum, and I have left out the "STARS" part, I am hoping that people can figure that out with so many rainbow stars.


I hope you like my inspirations today!


       Thank you for stopping by, I really appreciate your kind  feedback :) Have a great day!