Showing posts with label Stencil Sunday. Show all posts

Sunday, 14 June 2026

Stencil Sunday - Doodle Flowers

Happy Stencil Sunday.


It seems like all I have said this week is, it's been a while since I. And Stencil Sunday is another post I feel I haven't done for SO long.

I am back today with a stencil feature.


This month in the Uniko VIP Facebook Group, the challenge is to ink up those stencils. I chose the Stencil - Doodle Flower

I've not inked this stencil up for ages and it was so much fun. I used Honeysuckle, Poppy and Marmalade for my colours and for my sentiment I used a varierty from the coordinating Doodle Flowers clear stamp set.


That's all from me today, but I will be back with more to share tomorrow.

Crafty Hugs


Sunday, 1 February 2026

Stencil Sunday - Let The Celebrations Begin

Hello February. 

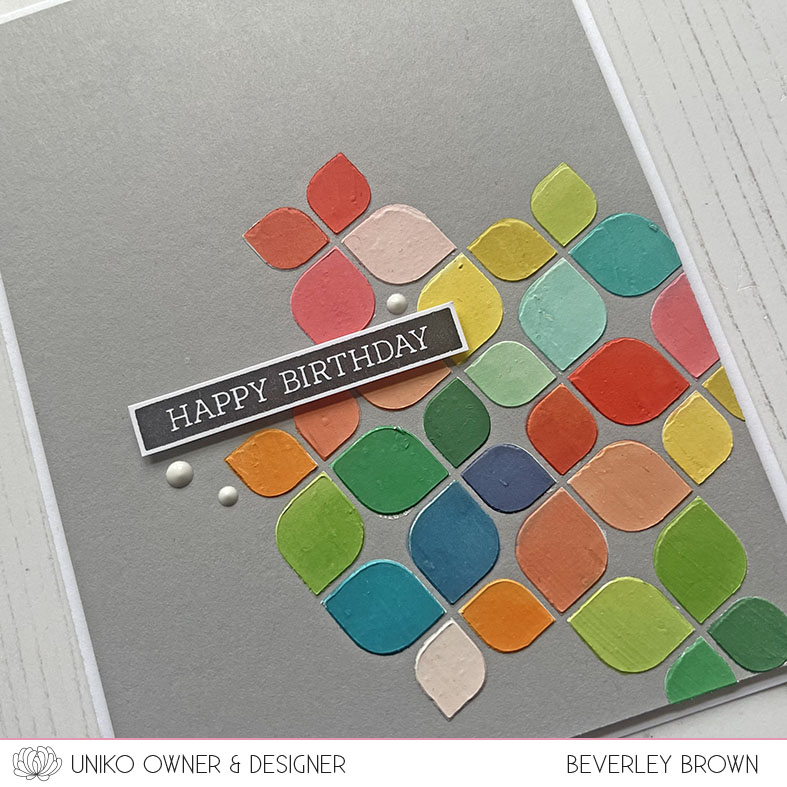
Welcome to the first Stencil Sunday of February. Today I am kicking off Uniko's 14th Birthday Celebrations with some more January Release inspiration. 

I couldn't resist inking up the Stencil - Layering Bauhaus Spring Blocks.


I have a new video up on the Uniko YouTube channel HERE making this fun spring celebration card. I opted for Birthday as it's Uniko's Birthday month, but you could easily swap out the sentiment for something spring themed.


That's all I have today, be sure to stop by tomorrow for more inspiration. 

Crafty Hugs


Sunday, 14 September 2025

Seasonal Stencil Sunday


Happy Sunday.

Today I have another Seasonal Stencil Sunday card and YouTube Video to share with you. In my last video using this stencil Layering Bauhaus Christmas Blocks, HERE, I talked about some other ideas and this was one of them.


This time I wanted to use some of the images on single inchies. I used a Stampin' Up! Stitched Shapes Die, the set comes with squares, circles and ovals I believe. And I have had them for years. 

The smallest square die is just the right size, though the border adds a little technical difficulties that slowed down the process a little during the video! 


It turned out pretty good in the end and I finished with a sentiment from Christmas Sentiments and a few enamel dots as well. 

I've another fun idea up my sleeve using this stencil and or the original Layering Bauhaus Blocks, but I'm saving to share that one when I am back from my vacation.

Just a little reminder...


Not long now till I am back! 

Crafty Hugs


Sunday, 31 August 2025

Seasonal Stencil Sunday - Double Ink & Flip

Happy Sunday.

Today I have a seasonal stencil Sunday card to share with you, a double Ink & Flip Christmas Tree card. I've had this idea to pair the new Ink & Flip Christmas Tree Pattern with one layer of the older Layering Geometric Christmas Tree.


And it turned out just how I imagined. 

I went for some non-traditional colours for this card, using Concord & 9th Grapefruit and Sorbet for the background pattern, then Eucalyptus and Rainforest for the focal tree. 

The focal tree is adhered to the card using foam tape and I finished with a sentiment from Simply Said Blocks Christmas stamped in VersaFine Clair Morning Mist and a trio of Sorbet enamel dots.


I think there is a lot of fun to be had with this combination of stencils with colour and texture. If you fancy watching how this card came together I have a short over on the Uniko YouTube Channel HERE.

Have a lovely Sunday.
Crafty Hugs

Sunday, 24 August 2025

Stencil Sunday - Patchwork Bauhaus Christmas Blocks

Happy Sunday. 

Today I have a fun card to share with you that I also created in a video and shared over on the Uniko YouTube Channel today HERE.

Recently I have seen quite a few patchwork style designs while browsing Pinterest and I had a fun idea to create a card in this style and use the new Stencil - Layering Bauhaus Christmas Blocks in the design. 

Here's how the finished card turned out. 


Fun, isn't it? 

I had no idea how this card would turn out, but I just went for it and I think there is so many ways you could develop this card design. For example you could add the images from the stencil to inch squares cut out and added with dimension or add tone on tone patterns to the coloured squares incorporating the original Stencil - Layering Bauhaus Blocks


Just a little heads up in case you've not seen the Uniko newsletter, social media or don't watch the video straight away...


Check back tomorrow for more inspiration and some Bank Holiday Bargains over on the website!

Crafty Hugs


Sunday, 8 December 2024

12 Days Of Christmas Inspiration & Giveaways - Day 8 Stencil


 Hello & Happy Sunday.

Today I have a couple of fun stencilling ideas to hopefully get a bit more creativity from the stencils you have in your stash.


I've been loving this Stencil - Christmas Folk Snowflake this year and I couldn't resist using it again. For this card I used a heart stencil (MFT I think) where you get both the stencil and the heart mask. 


I used the heart mask and temporarily adhered it to my card before laying the folk snowflake over the top. I used my current favourite Cranberry ink to stencil with.

My sentiment is a mix from Everyday Love Sentiments, Everyday Family and Christmas Sentiments. To finish I added a few little heart gems.


As usual I have a video over on Uniko's YouTube Channel with a slight variation on this technique and I have used another Uniko Stencil favourite! 

The giveaway today is the 2 Uniko Stencils I have used today and my question for you is, what is your favourite stencilling technique? 


And before I go, a reminder about our Fabulous Festive Offers as they end tomorrow. 

Firstly, FREE Worldwide Shipping minimum spend has reduced to just £30 to qualify for free shipping. This is normally £75 for those outside the UK and £60 in the UK.

This is perfect for my lovely customers in the EU and Northern Ireland.

PLEASE NOTE - Due to GPSR that come into effect on 13th December 2024, I will no longer be able to ship orders to these destinations. The last day to order is Midday GMT Monday 9th December 2024 to give time for your orders to be processed through the Royal Mail system.
 It's a busy time of year, so can take longer. 

I am looking into this to try and find an option that isn't too expensive and I am attending an online event that will hopefully answer questions and give me more insight. Please stay in touch via this newsletter and Uniko socials for updates 😊

Special Offers 🎉

THREE for £15 on the following £6.50 value collections, BIG & BOLDEveryday SentimentsFlower Power and Simply Said Blocks. You can mix from any of these collections to qualify for the discount. 

THREE for £12 on stencils valued at £4.50

Discounts will automatically be applied to qualifying orders, so no code necessary. Offers expire at Midday GMT Monday 9th December 2024.

Crafty Hugs


Sunday, 24 November 2024

Simple Festive Stencil Sunday

Hello & Happy Sunday.

Today has been a tidy up and a little reorganise in the studio. Mainly because I could hardly see my desk or the floor! But I did manage to squeeze in this card as inspiration came to me.


I've been loving vellum again recently. I love how it softens the background a little, but still makes the pattern behind visible. 

I dusted off the Stencil - Christmas Folk Snowflake and I love the design in this striking Cranberry colour. Not wanting to take too much focus from the pattern I added a simple sentiment trio from Christmas Sentiments (back in stock next week). I adhered the sentiments with foam adhesive onto the vellum. Then attached the vellum to my card using double sided tape and hidden behind the sentiments.


I finished the card with a simple holly cluster from Winter Foliage, which has yet to leave my desk. It is definitely one of my favourites for the season. 

That's all from me today, I've a bit more tidying and the roast to sort!

Crafty Hugs


Sunday, 13 October 2024

Stencil Sunday - Ink & Flip Layering Geometric Christmas Tree

Hello & Happy Sunday 

Today I thought I would share this idea I had using the newest Ink & Flip Layering Geometric Christmas Tree Stencil.


So my idea was to section the Christmas tree focal layer down the middle, having one half on a trimmed piece of card adhered using foam tape and the other right half inked onto my card base. I also wanted to add some sparkle using glitter paste, for this I used Nuvo Glimmer Paste in Moonstone over the inking. The colours I used for the Christmas Tree are Parsley and Evergreen. 


The result worked out well, but with the application of glitter paste, the depth of the foam adhesive raised section isn't as prominent. In hindsight I should have used thicker foam tape. 


To finish I added the 'Tis The Season sentiment from Simply Said Blocks Christmas and also a sprinkling of Poppy enamel dots. This wasn't the quickest card to make with the addition of the glitter paste, but the result was worth it.

That's all from me today, time for me to head into the kitchen and get some Sunday baking done and the roast dinner! 

Have a lovely day.

Crafty Hugs

Sunday, 15 September 2024

Stencil Sunday - Instagram Vote Result

 Happy Sunday 😃

So yesterday on Instagram I put a vote in my stories asking what I should use for today's Stencil Sunday feature. 

The options were, Ink & Flip, Pure Florals, Flower Power or Geometric. I was keeping an eye on the votes and at one point it was a 3 way tie 😬 I did prepare myself for that, but in the end Ink & Flip won by one vote! 

So here is what I made...

As you can tell I opted for the newest Ink & Flip Geometric Hexagon Layering Stencil, though I opted to use just the detail hexagon layer. 

I've actually had this layout idea in my head for a while to add a smaller hexagon detail with the tiny bee from Flower Power #9 and I chose the Just Because sentiment from Simply Said Blocks II

Even though summer has decided to return again this weekend, I opted for some more autumnal yellow and orange tones, Spiced Cider, Cayenne, Sunflower and Stardust. 

That's all I had time for today, but I will share the other cards I made today using 2 of the other options during the week. 

If you haven't seen how this Ink & Flip works, be sure to checkout the video over on the Uniko YouTube Channel HERE

Crafty Hugs


Sunday, 24 September 2023

Stencil Sunday - Layering Bauhaus Blocks

Happy Sunday.

A late post from me today, but I squeezed in a little crafty time this afternoon and couldn't wait to share what I made. It's been ages since I took inspiration from a card challenge, but when I saw the current CAS Colours & Sketches Layout HERE and seen below I was inspired to ink up the Stencil - Layering Bauhaus Blocks, which is due back in the studio tomorrow.


Here's what I came up with...


I started by die cutting 3 small squares,  they are roughly 3cm square. I then masked off each of the Bauhaus blocks on the stencil I wanted to use and went through each layer using Altenew inks Mangrove Root, Sea Forest and Marshland from the Natures Wonders collection.


I used the line stamp from Background Builders Classics and stamped it in the lightest shade, Misty Moor from the same ink collection. The sentiment is from Bauhaus Blocks and I used foam adhesive to secure the squares in place and also adhere the panel to my base card. 


Thanks for stopping by.
Crafty Hugs


Sunday, 23 July 2023

Stencil Sunday - Flower Power #1 Festive Style!

Happy Sunday!

It's been a while since I did a Stencil Sunday post and I've been meaning to ink up the Stencil - Flower Power #1 for a while, so that's just what I did. And of course, I made it festive.


I usually go for a white background, but decided to 'soften' the look of this card with a Kraft card base instead. For the inking of the stencil I used Poppy, Cranberry and Mushroom and the sentiment is stamped in VersaMark and heat embossed in white. 


For the centre of my modern poinsettia flower I used a trio of larger dots from an upcoming clear stamp set and I finished off my card with Black Gloss Nuvo Drops.

I hope you are having a lovely weekend.

Crafty Hugs 

Sunday, 13 November 2022

Stencil Sunday - MOD Background Builder

Hello & Happy Sunday!

I'm on a creative roll and I am back today with a couple of cards I made yesterday while I had a few Bean free hours. I couldn't resist inking up the newly released MOD Background Builder. This stencil has been super popular and there are not many left on the shelves as I type.

I have so many ideas using this stencil, I have just two of them today. I will save the others for another post soon ;)

First up is this colourful birthday card. 


I've been itching to use the Gina K Texture Paste through this stencil since I came up with the stencil design! I love how this paste makes adding colour to a darker card base super easy.


The process is a little slow, as you have to wait for the paste to dry and then applying the colour can be time consuming. However, I think you will agree the results are so fun. To finish the card I added a sentiment from Simply Said Blocks and my favourite Nuvo Drops.

Today I really wanted to show the versatility of this stencil and how it can be used with other Uniko products and for a variety of occasions. For my second card I went monochrome and created a sympathy card.


I used a light grey ink to add the MOD Background Builder to the upper left corner of my white card base.  I then chose the silhouette foliage from Just Because to stamp up the side of the card. I used a trio of grey inks and my MISTI to ensure solid stamping. My sentiment choice is from Everyday Sentiments.


That's all from me today & thank you for stopping by.

Crafty Hugs 

Sunday, 31 July 2022

Stencil Sunday - BIG & BOLD and Soft & Pretty!

 Happy Sunday!

It's been a while since I did a Stencil Sunday feature, so I thought I'd share a couple more cards I made using the 2 new stencils released on Friday. If you missed the release day fun, you can catch up HERE.


For my first card today I have used Tropical Leaf #2 and Squared. I've been wanting to try this technique for a while using two stencils and took it a little further by creating kind of spotlight effect.


First I used Crushed Olive Distress Oxide ink through the monstera leaf. I then positioned the squared stencil and inked through with Forest Moss Distress Oxide ink. 


I love a bit of fussy cutting, so trimmed out my leaf. I then decided to use the squared stencil on my base card. So I positioned where I wanted the leaf to go and placed the squared stencil over the top to line up the squares. I taped down one edge and removed the leaf to stencil the background using the same Forest Moss ink.

It was then easy to line up and adhere the leaf using foam adhesive. I thought the Wish Big sentiment from Simply Said Blocks III was quite apt to pair with this grand monstera leaf! 


For my second card today I have gone soft and pretty pastels using Scattered Polka Hearts to create a congratulations card.


I love the small detail blending brushes you can get, they make for easy ink application when you want to create a rainbow effect with small stencils. I used a variety of Altenew light shades of ink to randomly colour the heart background.


I then stamped, fussy cut and adhered the floral heart from Always & Forever to the panel using foam adhesive. The sentiment is from Everyday Sentiments and I stamped it in a medium grey so it stood out, but wasn't quite as harsh as black.

That's all from me today. Though with all the rainy weather we have had this weekend, I have made quite a few cards I will be sharing over the coming days! 

Crafty Hugs