Friday 30 September 2022

Festive Friday, BA Inspiration using Winter Foliage

Good morning, Julie here with a little bit of inspiration for your Christmas makes. 
Here are a couple of ideas using foliage stamps from Winter Foliage and Season of Beauty.


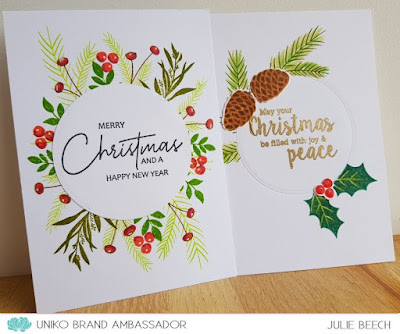
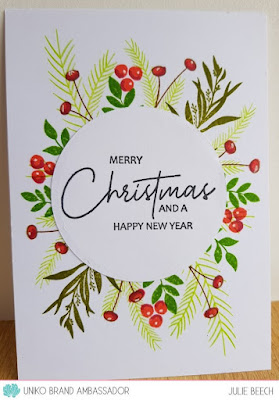
My first card was inspire by those turnabout stamp sets you can get but without using the jig and no masking!!!


I drew a circle in pencil roughly in the position I would later place my sentiment panel on an A6 panel of white card and stamped a variety of foliage in various green inks. I used some really old foliage stamps that are now sadly retired, Nature's Treasures 1 as well as the two newer sets to get a variety of textures no masking was required here. I simply used my MISTI, stamped one branch of the evergreen bough, then rotated my panel 180' and repeated. I did the rest of the green foliage the same but added the red berries, Season of Beauty and Winter Foliage free hand.  The berry stems were stamped in brown before colouring the berries with Copic marker, the holly berries I simply stamped and then shaded with a darker Copic marker. A few dots of white gel pen complete.
When dry, I rubbed out my pencil circle and added the central panel. I found the die cut circle in my bits box, used the sentiment from Christmas Wishes stamped in black ink and simply covered up the messy bit in the middle by gluing it flat onto the panel!

This second card was inspired by the latest sketch at CAS Colours and Sketches.


This time I cut a mask from a Post it note and then used the same die to emboss my A6 white panel.
I then added the mask and stamped the holly leaves and evergreen foliage. I stamped the holly berries and a couple of pine cones and used the dies to cut them out. The evergreen boughs were coloured in with a couple of green pencil crayons as were the veins on the holly leaves for extra interest.
Removing the mask, I stamped the sentiment from Season of Beauty in Versamark and embossed in gold EP before adding the berries and cones with glue.

So that's it from me for this month, hope I've given you a couple of ideas to kick start your Christmas makes if you haven't started!

Stay safe and keep crafting 'til next time.

Thursday 29 September 2022

Throwback Thursday - Doodle Flower

Hello & Happy Thursday!

Today I thought I would do a little Throwback Thursday.  I chose the Doodle Flowers clear stamp set as my muse and this card...


Do you remember this card? 

On it I used the heat embossing, masking and blending technique and too those to create this new version. 

What do you think?


This time I went for a different layout and different colours. I used scotch masking tape, stamped and embossed the Doodle Flowers and then I used Catherine Pooler Serene, Sparkling Berry and Merlot. 


I finished off the card with these foam mounted sentiments from Everyday Sentiments. A simple design, but I think it has impact. 

It was certainly fun to revisit and give a new spin on a card I have made before.

Crafty Hugs


Tuesday 27 September 2022

Two For Tuesday - Pure Florals Cosmos

Happy Tuesday! 

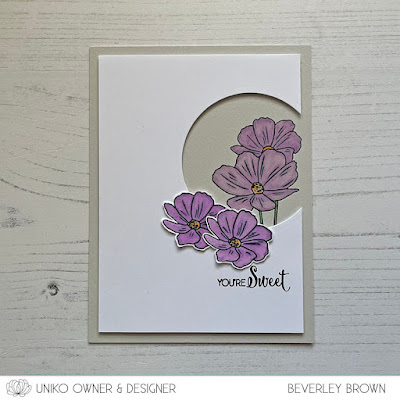
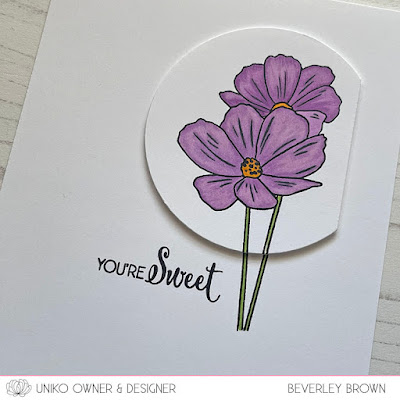
I seem to be on a creative Two For Tuesday roll, and this week it is Pure Florals Cosmos getting the creative attention. 


It's been a while since I took my time and did some Copic colouring. I kept things simple, just choosing a trio of purples to colour the cosmos blooms. But created a little interest by making a window style card and also colouring onto a stone coloured card base. 


Having cut a window on this first card, this sparked the idea for my second card. This one is very CAS and uses the partial cut window for the spotlight effect.


I kept the cosmos colours exactly the same, just shading and adding more of the darker purple for the cosmos layered behind.


Pure Florals Cosmos is just one of the clear stamp sets coming in the next batch of restocks due in the studio, if the order goes to schedule, on Friday. 


That's all from me today.

Crafty Hugs


Monday 26 September 2022

Brand Ambassador Inspiration - Three Ways with Pure Florals: Lily

Good morning

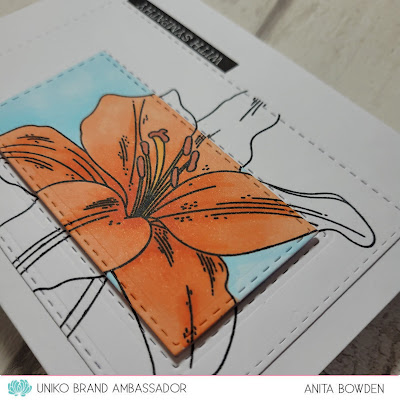
Anita here with some floral inspiration for your Monday morning.  I recently bought an autumnal bouquet of flowers and within it were some stunning orange lilies.  So that's where the inspiration came from for these cards, using the gorgeous Pure Florals: Lily Clear Stamp Set.

I have used the same image on all three cards but used a different technique on each.  On all three cards I've used sentiments from the Simply Said Blocks II Clear Stamp Set.


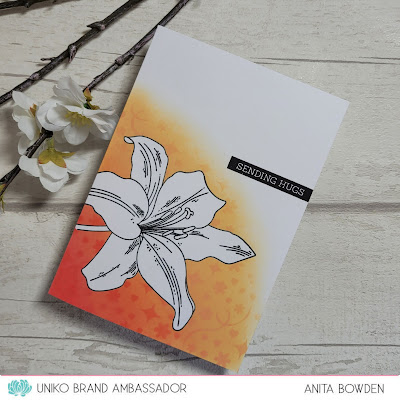
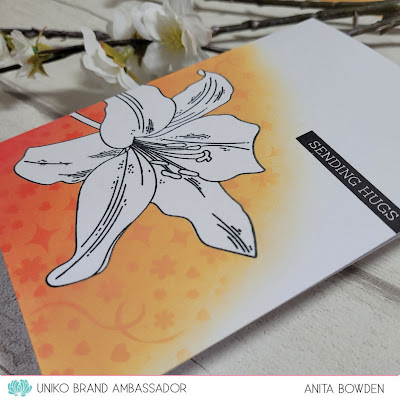
First up, I left the image uncoloured and added colour and interest around it...


I stamped the flower directly onto the card base and then stamped and fussy cut a mask to cover it.  I then ink blended the background using three shades of Distress Oxide ink, before then inking through the Party Confetti Stencil using the same inks to add some interest.  Finished with a sentiment stamped in black.


For the second card I used the negative mask which was left over from the same masking sheet...


On a white cardstock panel I stamped the lily and then used the mask to cover up the background.  The lily was then coloured using Distress Oxide inks once again and a little Copic colouring for the stem and stamens.  I die cut the panel using a scalloped rectangle and then stamped the sentiment before adhering the panel flat to the card base.


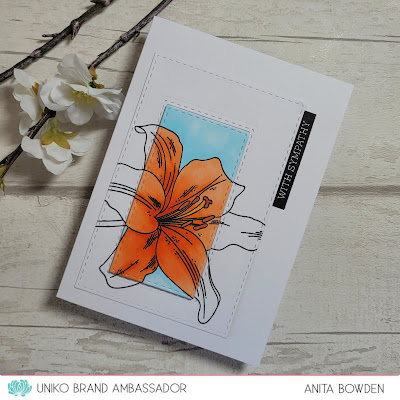
Finally, a little spotlight colouring...


I stamped the image onto some white cardstock and die cut with a stitched rectangle die.  I then die cut a smaller rectangle from within it and coloured this part with Copic markers.  The sentiment was stamped to look like a tab before adhering the uncoloured panel flat to the card base.  Then the coloured section was popped up on 3D foam.


There are so many techniques to use with stamped images and I love looking for new ways to 'stretch' what I have in my stash.  I hope that has given you some ideas.  My colouring skills aren't the best so ink blending or even leaving images uncoloured can still look effective.

Wishing you all well for the week ahead and sending crafty hugs


Saturday 24 September 2022

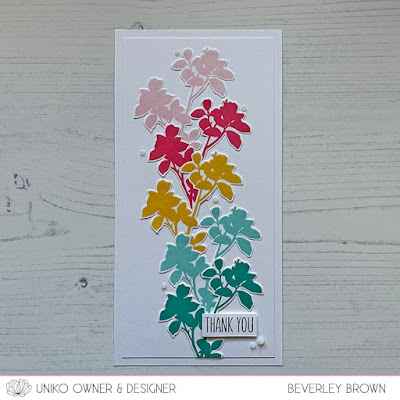
Slimline Thank you!

Happy Saturday.

Autumn is here, I love the change in season. The cozy nights, the crisp air & change in colours. But I am still all for the bright rainbow colours!

With The Beans out for the day with their grandparents, I've been in the studio preparing for the Autumn & Winter season, but I also had some creative time. It's been a while since I used this set, so decided to ink up the Just Because clear stamps to create a rainbow slimline card. 


I enjoyed inking, stamping & fussy cutting to build this card. But dies are definitely on the mind for this set! 


I used Concord & 9th Ballet Slipper, Honeysuckle, Buttercup, Aqua Sky and Oceanside. I then added a the Thank You sentiment from Everyday Sentiments and finished off with some sparkly clear Nuvo Drops. 


What's coming up?

October sees a fresh batch of show prep with the Stamping Together show in Port Sunlight first on October 8th, just 2 weeks away! 


This is one of my favourite shows and I can't wait to get back & see some of you there. AND I am excited to have a little giveaway for one of you to win.


WIN A PAIR OF TICKETS TO ENTER THE SHOW
AND 
£10 spend at the Uniko* stand! 


Simply comment on this post here on the blog, Instagram or Facebook. I will choose a lucky random winner from those left across the platforms next Saturday 1st October 2022. 

* The £10 spend is gifted by myself as a little extra. Please only comment to win if you are able to attend the show. The winners name will be given to the show organisers to enter for free.

You can purchase tickets HERE too.


THEN...

Sunday 9th October 2022 Uniko will be 'almost' on home turf at Newcastle again for Stamperama! All the details and ticket purchase can be found HERE


On Sunday 16th October I will be demoing on the Dies to Die For stand at Stamp Magic in Doncaster. There will be a small selection of Uniko products available to purchase on their stand. 


A busy, but exciting month ahead! So watch this space for a bunch of restocks arriving next week.

I think that is all I have to share. Thanks for stopping by.

Crafty Hugs


Friday 23 September 2022

Floral Friday - Hello Lovely

Happy FriYAY! 

With an extra Bank Holiday due to Queen Elizabeth II funeral on Monday, this week seems to have gone by in a flash. 

Today I have another card I made last week using Hello Lovely


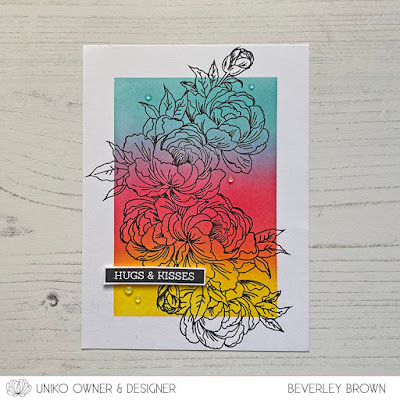
As you know I am often inpatient when it comes to colouring, so I often overlook stamps (even ones I have designed) that require patience to colour! Mainly because I forget about all the fun and quick ways to add colour. 

I think todays card really shows how colour can be applied in a fairly quick way to add impact to a detailed floral image.


I masked off my white base card around the edges and used my 3 favourite colours, Oceanside, Honeysuckle & Buttercup to ink blend my background. I removed the mask and then used a stamping platform to stamp the Hello Lovely floral in black ink. 

The sentiment is from Simply Said Blocks III and I added some clear gloss Nuvo Drops to add some subtle accents.

Thanks for stopping by today.

Crafty Hugs


Thursday 22 September 2022

Thoughtful Thursday

Happy Thursday.

Today I have a sympathy card to share. The colours, floral choice and theme inspired by the passing of  Queen Elizabeth II.


I chose Pure Florals Lily as my flower choice as to family Queen Elizabeth II was known as Lillibet. I stamped the lily onto my white card panel in black ink and created a mask to place over the stamped image. 


I then ink blended some soft purples around the lily and then stamped a variety of the sentiments from the set onto the card using the two darker shades of purple. I used Altenew Shades of Purple ink collection. The panel is then mounted onto a purple card base.

Thanks for stopping by today.

Crafty Hugs


Tuesday 20 September 2022

Brand Ambassador Inspiration - Techniques with Embossing Glaze

 Hi there,

 do you love Embossing Powders as I do?
Have you ever heard of the special one called Embossing Glaze?
If not - it's a translucent but colourful Embossing Powder with some more special effects.

In the first card I made for you I created amore or less translucent rainbow with the "Rainbows & Clouds" Stencil over a very soft pastell blue background.
But first I had stamped and heat embossed the "Large Background - French Script" in white.
After the melting process of the powder I used the Stencil again and added some fluffy clouds with white Embossing paste.
The sentiment "Time to celebrate the good times" is one of the "Birthday Sentiments", heat embossed in a fitting light blue.
For some more interest I added some clear little rhinestone drops as raindrops.


The second card has a very similar layout, but I stamped the script background in gray (without embossing), just added the rainbow with the same Embossing Glaze colours as before.
I planned to add embellishments in the same colours, so I took twelve white sequins, added sticky ink to them, dipped always two of them into one of the powders and heathed them up. Then I put a drop of clear glitter glue to them.
The sentiment of the "All Occasions Set #3" is stamped with the same Ink I used for the background on Vellum and then I added the same colour of Embossing Glaze to it (hickory smoke).
I glued the edges of the Vellum on the backside of my layer and embellished it with my "special gems".

For the next card I created a blended Sunset scene and added plants and shadows with different stampsets - "Just because", "Happy Days" and "Natures Treasures I".
The lighter shadows of the black embossed plants are made with the Glazes.

For this glazed "Pure Florals - Peony" I added several times Embossing Ink with a Dabber and then thin layers of Glaze.
I was able to mix and match the colours with every layer and then melted every one on top of the black stamped flower.
With every layer it went darker and more intense! So beautiful! Love this kind of "watercolour look".

 
The last card is a bit different to the peony. I used the "Pure Florals - Gerbera Stencil" and one of the Peony sentiment stamps.
This time I didn't add the embossing Ink with a dabber (I tried, but it was too much ink for a stencil and turned out in a mess!), instead I used a pen and "coloured" the areas very quick and in a distressed way. I added and mixed the red and orange Glaze powder for the petals and the yellow for the center.
Melted every layer and as a last step I added black Embossing Powder to get some wild and dramatic lines to the flower.
Love this big and bold flower!

Hope I brought you some ideas to use the Glazes in different ways... there are many more to try!
For those of us who love Embossing Powders they are a very "nice-to-have" and "test and try" medium to play with.

Greetings from Wiebke

Two For Tuesday - You Are, Yes You

Happy Tuesday! 

A few weeks ago when the clear stamp restocks arrived, I had a little creative spell and I made a few cards for the Harrogate Crafterama show, which I forgot to share here on the blog. 

One of the stamp sets I reached for was You Are, Yes, You. Here are two cards I made using it...


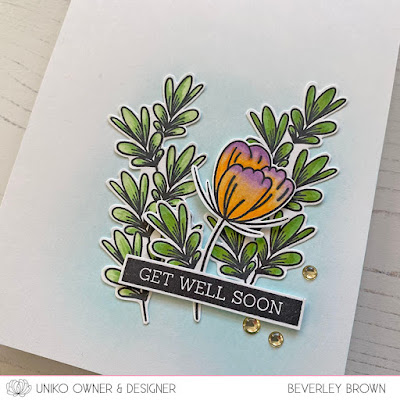
First I started out by creating a mask of both the single leaves. I then stamped and masked to create branches. Colouring them with Copic Markers and fussy cutting them out. I then stamped the flower and did the same.


I adhered the branches onto my card base which I had softly ink blended with a light blue. The flower is adhered with foam adhesive. The sentiment is from Simply Said Blocks II and I added a few rhinestones to finish.


For my second card I kept things really simple. I started by using the Mid Century Modern Shapes stencil, inking the 3 circular shapes in lime, orange and aqua.


I then stamped the flower and leaf in black ink, along with one of the mix and match sentiment choices. I felt it needed a little simple embellishment, so stamped the trio of dots from Floral Vines. This panel was then adhered to the card base using foam adhesive.

Such a fun little set that has lots of pairing opportunities, but also has a lot of potential on its own. 

Thanks for stopping by today.

Crafty Hugs


Monday 19 September 2022

Brand Ambassador Inspiration : Pure Florals Gerbera

 Hi there!

Hannelie here with inspiration using the ever so popular Pure Florals Gerbera stamp and die set !


On the first card I used :


On the second card I used :


On the second card I used the background block splatters to stamp the watercolors all around the edge of the card. I first applied the distress ink to my glass cutting board, spritzed it with water, and stamped with the three colors randomly around the edge. After it dried completely I used my Misti to stamp the outline images and sentiment. To add some interest, I used a die to cut out the rectangle and popped it up with some craft foam.


On the third and last I used :

I sometimes think we forget to use all the stamps from a floral set. The leaves in such sets are so valuable especially during Autumn when we love to make cards showing off the the splendor of the season !

Thanks for popping in today! 

I do hope you leave here inspired   ♥

Hannelie