Monday 29 August 2022

Brand Ambassador Inspiration - Holiday Memories

 Bonjour !

Izzy here. In order to make the holiday longer, in my mind at least, I made three cards representing what they looked like.

I'm not wrong if I say that for everybody, this summer has been very hot and sunny. And we were lucky enough to spend our holidays far from all the fires that occured. We were on a little island where the bicycle is a principle. So we parked our car when arriving and we used only our bicycles for the rest of the week...


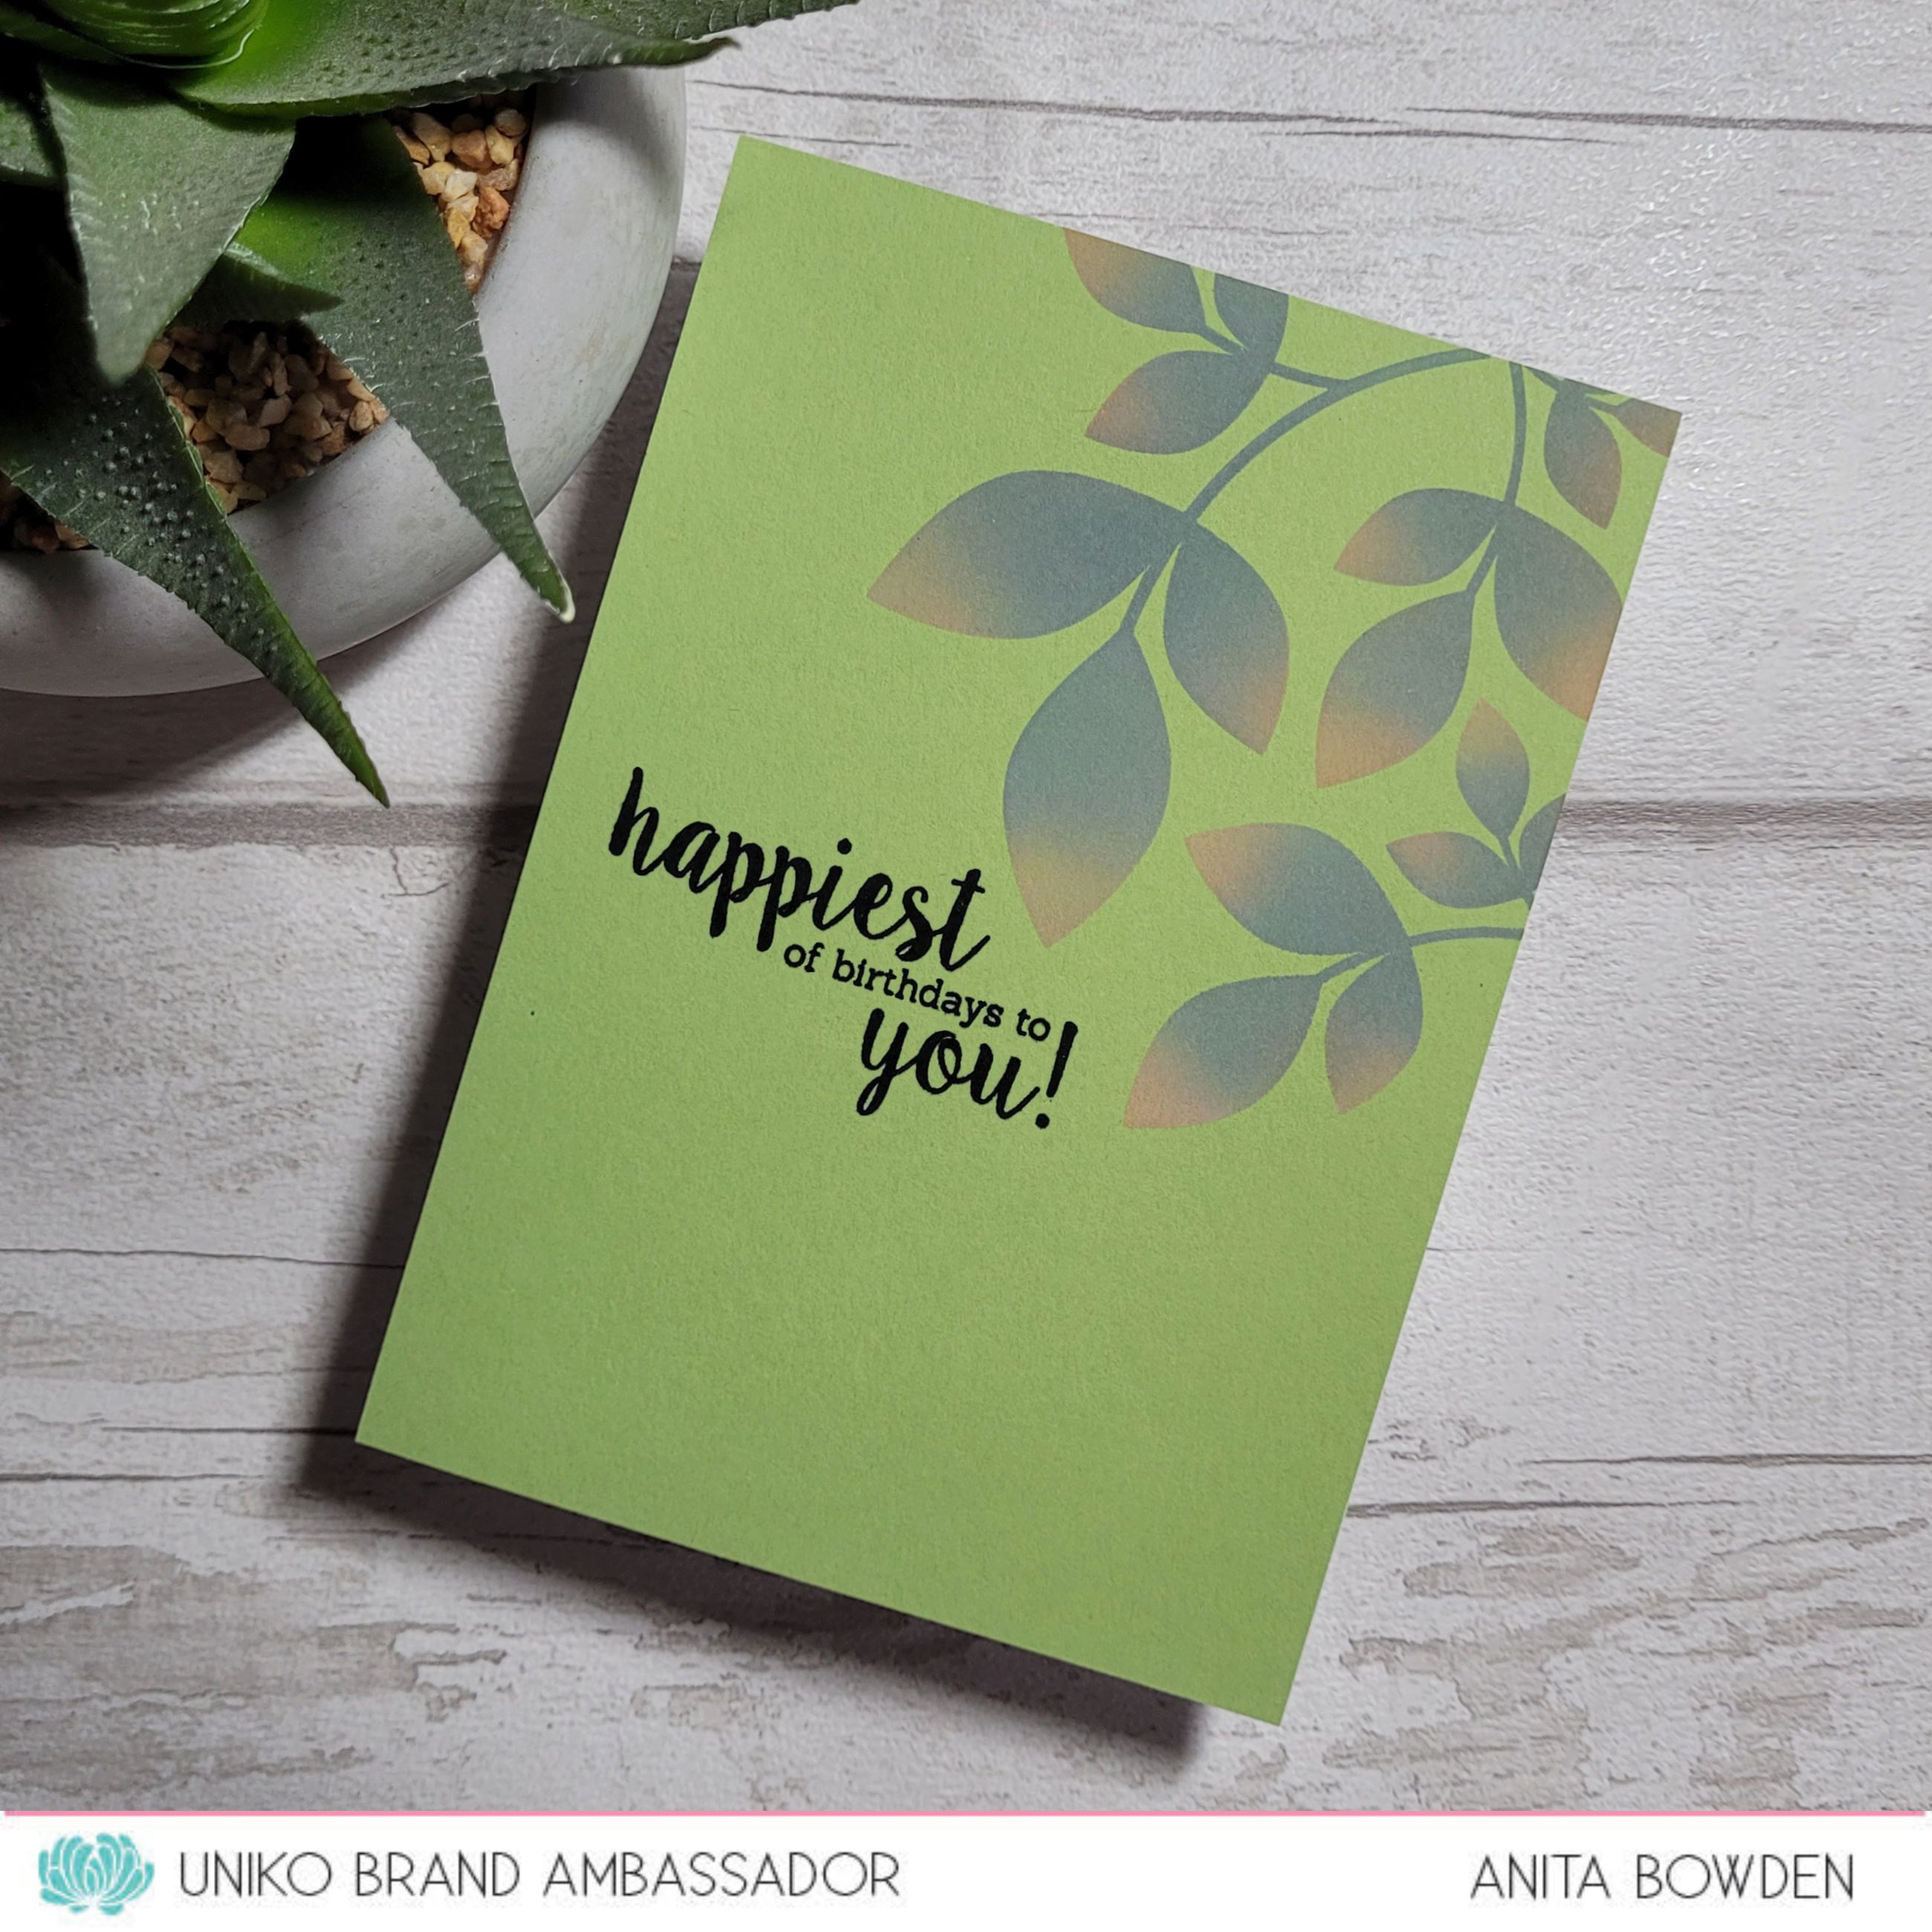
For this card I used the Background Blocks Rays from the last release for the sun rays. Then I used the Background Builders Arts Décoratifs to represent the blue sea and the grass.

We cycled between the vineyards and the salt marshes and we visited the small villages full of flowers, and among other things with magnificent passion flowers...


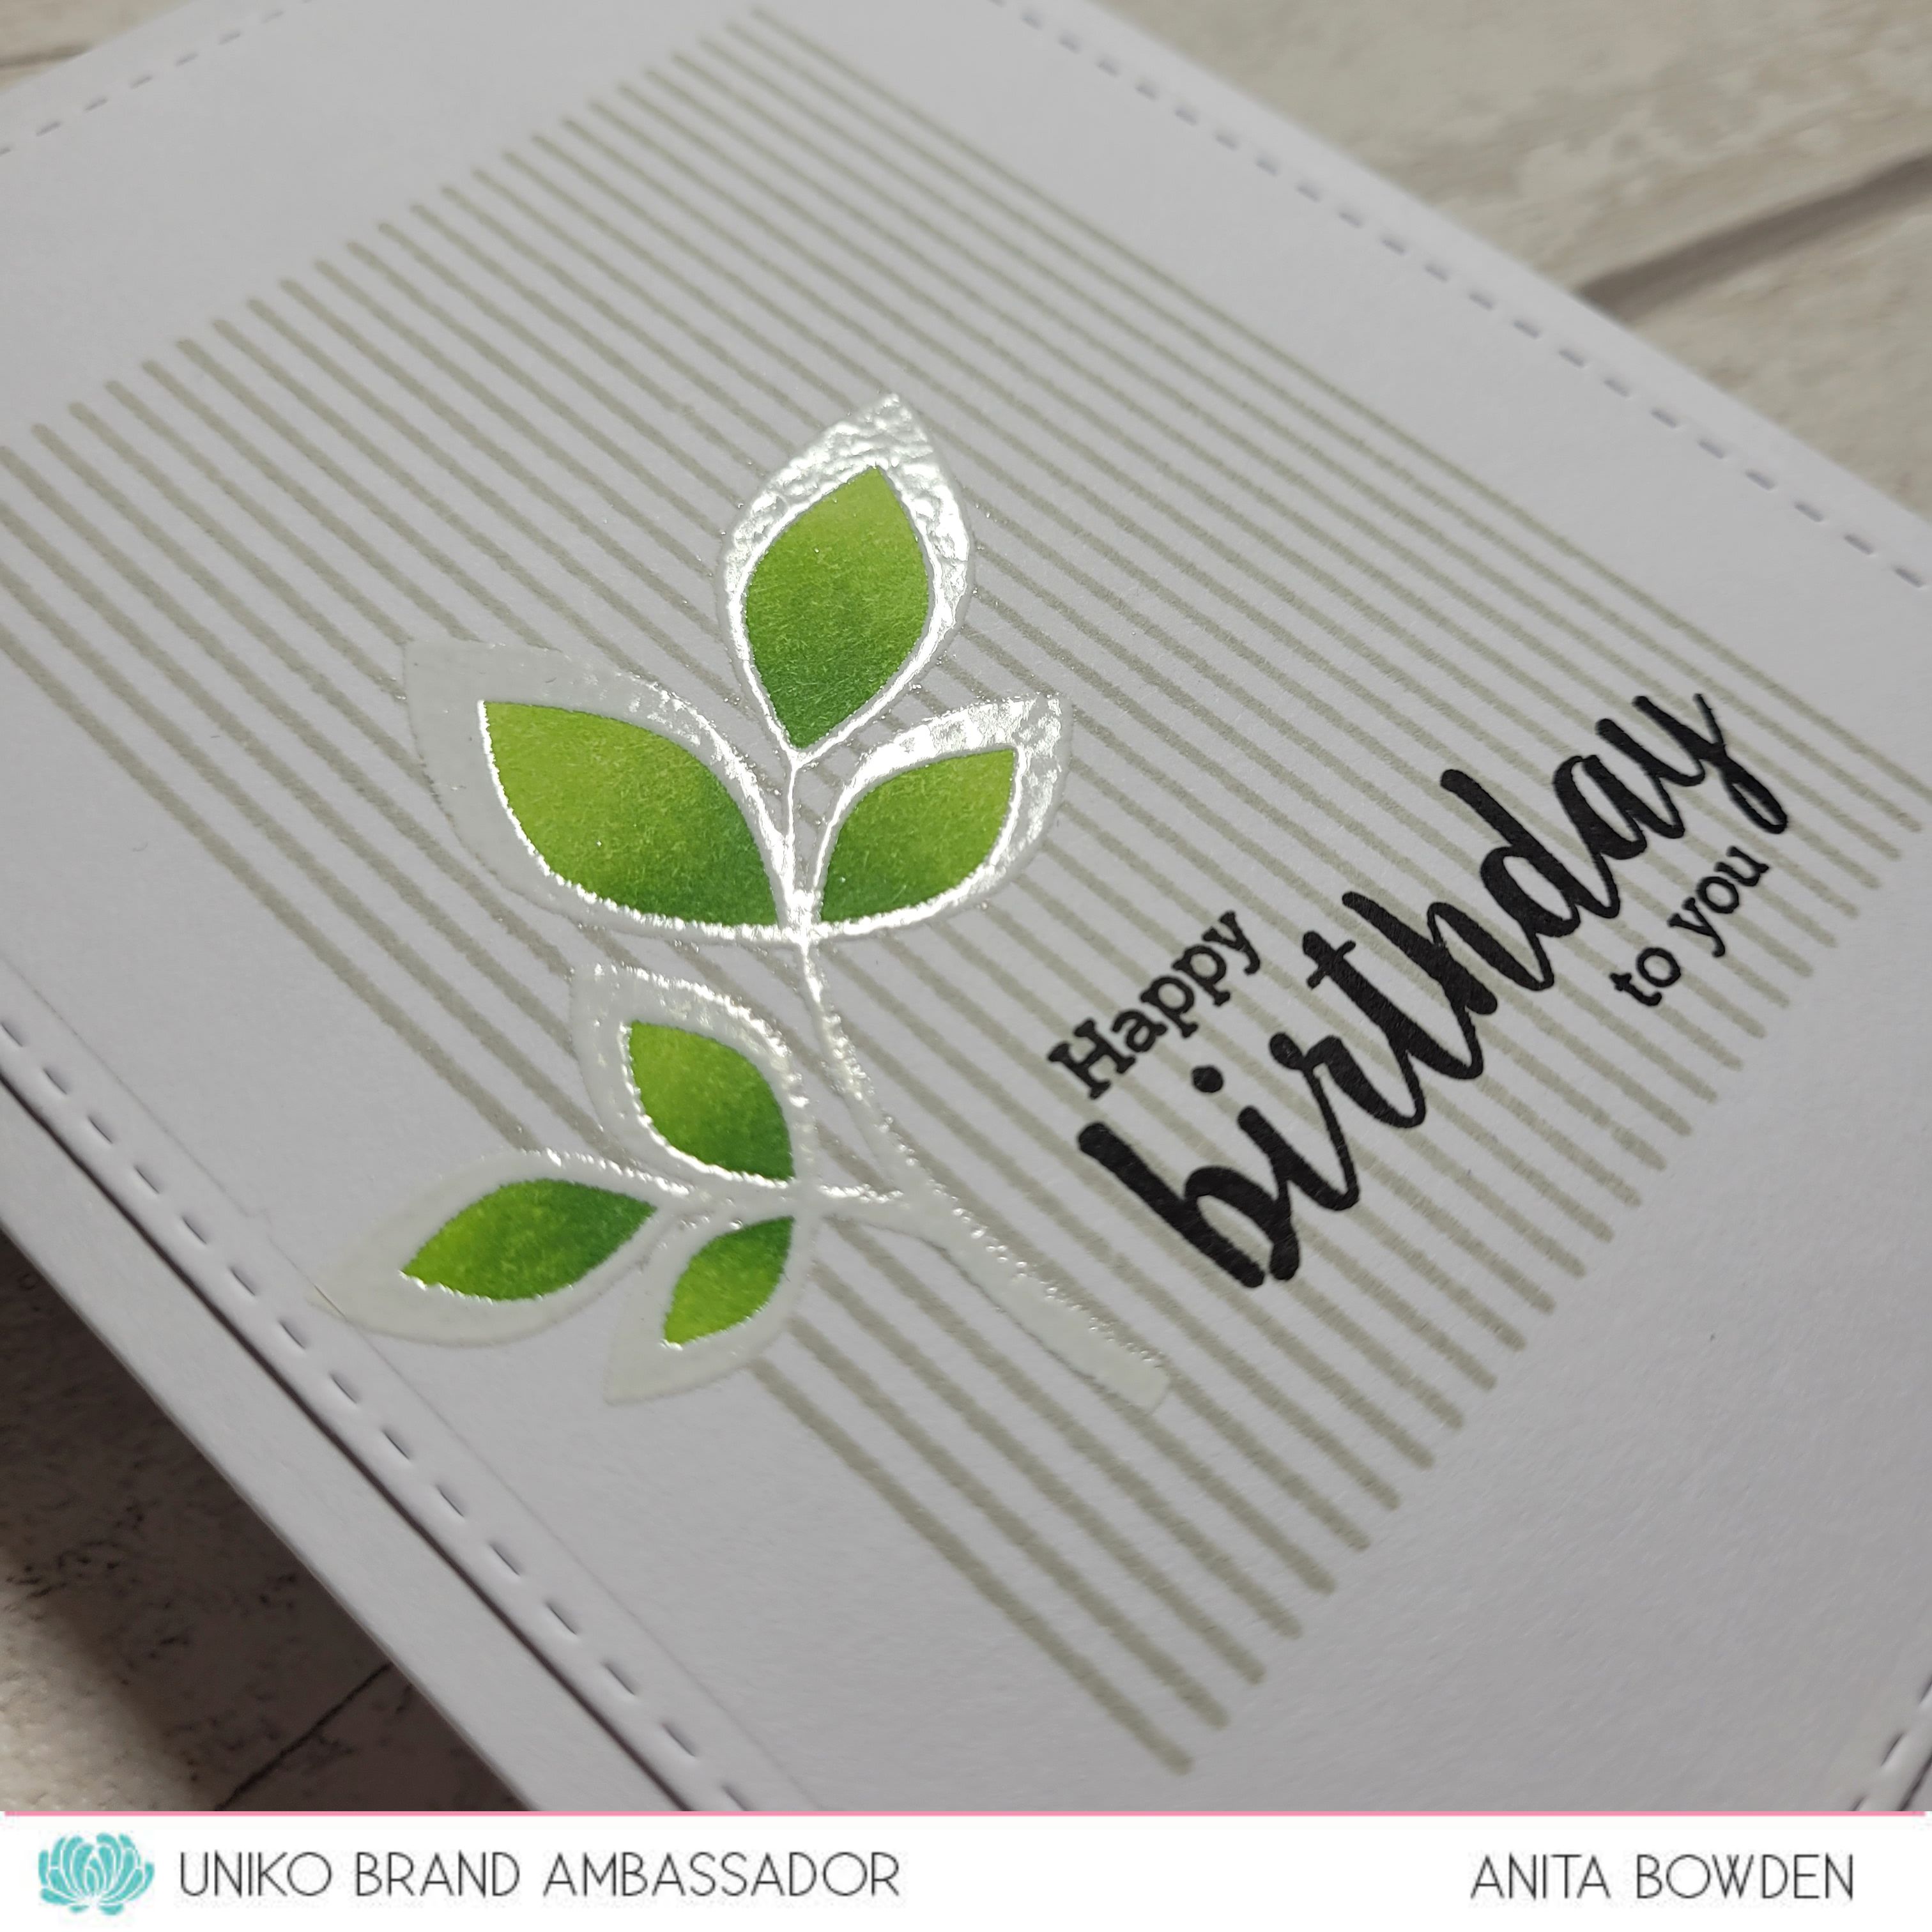
For this second card I used the beautiful set Passiflora. I stamped the leaves and the different parts of the flower on white card stock and I cut them with the matching dies.

Paddle, walks and ice creams were also part of our daily life...


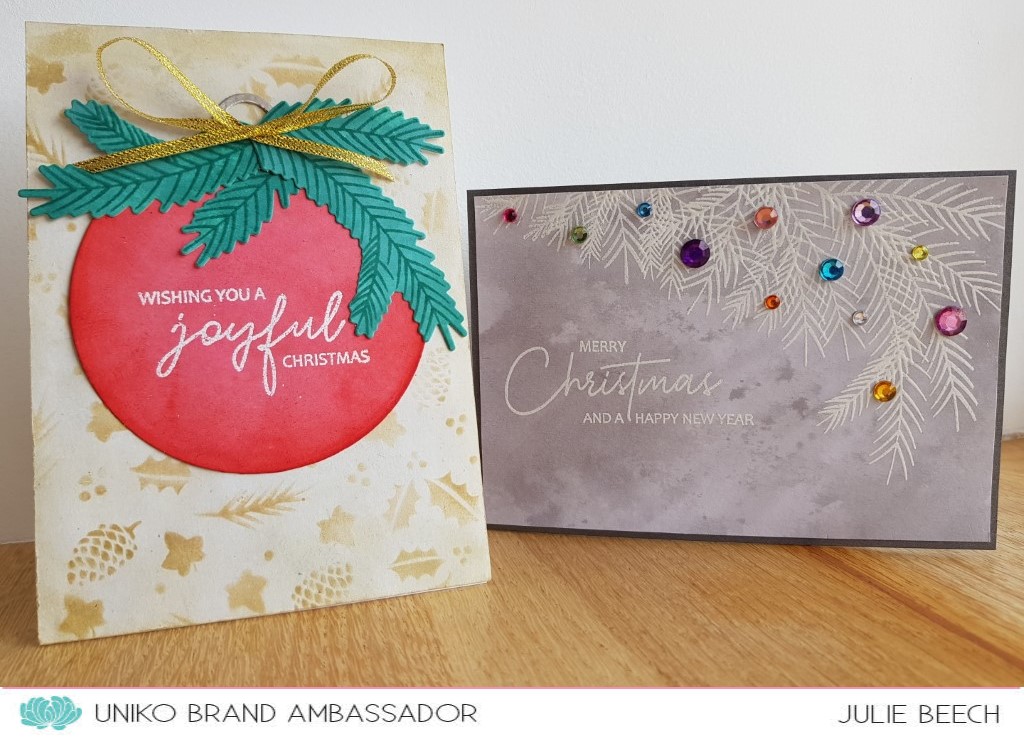
I used some of the images of the Block Party Summer to make this last card. I stamped and white embossed them on white card stock and I coloured them with colour pencils. I also used the Background Blocks Nautical Stripes that I stamped in blue shades. I foam mounted it on a white card. To finish I fussy cut the images and I adhered them on top.

I hope that you too enjoyed your summer break as well as these inspirational cards.
Thanks so much for visiting Uniko !


Wednesday 24 August 2022

Brand Ambassador Inspiration - Natures Treasures II

Good morning!

Anita here with some Brand Ambassador inspiration for you and for today's projects I've chosen to use an oldie but definitely goodie.  The Natures Treasures II Clear Stamp Set is one of my most favourite leafy sets in my stash, I just adore the design, and love the fact that Uniko also have the same design in a stencil and mask set too. 

For all three of my projects today I've also used sentiments from the Birthday Wishes Clear Stamp Set.

Ok, first up I've done a little masking and paired the leaf image with the Background Blocks Pinstripe Clear Stamp...


Firstly, I stamped the leaf image in a pale ink before colouring the inside of the leaves with Copic markers.  I then masked the leaves in order to stamp the pinstripe background without going over the centre of the leaves.  Once dry I then re-stamped the leaf image in Versamark before heat embossing in white.  I finished by stamping the sentiment in black before adhering the die cut panel to the card base.


Next up I used the stencil...


This one layer card was super simple to make and for a change I chose a coloured card base.  I used the two different sized images from the stencil to ink blend the leaves in Distress Oxides in Iced Spruce and Dried Marigold.  Finished with a sentiment stamped in black.  


And finally, just some stamping and embossing..


I stamped the leaves in green and re-stamped with some subtle brown ink on the tips of the leaves, then stamped again with the green to blend it out.  I stamped the flourishes from the set and heat embossed these in gold and copper, and finished once again with a sentiment stamped in black.  


I hope you like these and that it encourages you to dig out some older items in your stash.  I'm not quite ready to say goodbye to summer yet but autumn is starting to creep in, we've had such dry, hot weather here in the UK so some of the leaves are already beginning to change.  So that's where I got my inspiration for these cards.

Enjoy the rest of your week.  We have a bank holiday this coming weekend here in the UK so I'm certainly looking forward to that extra day off!

Stay safe, sending crafty hugs


Monday 22 August 2022

Merry Monday, BA Inspiration using Winter Foliage and Christmas Wishes

 Good afternoon, Julie here with a little festive inspiration for you. 

I was inspired by the latest challenge at CAS Christmas Card Challenge and a video I saw on You Tube. In the video the designer used homemade coloured card to create batch Christmas cards and the ladies at CAS Christmas have the cue word Pine, so off I went!

Initially I got out all my sets which included pine branches but mainly used the large pine branch from Winter Foliage to create my two cards. Here are my designs.


My first step was to create my coloured panels. I did this by washing a selection of festive and neutral coloured DIs over some panels of white card, smooshing the leftover ink onto the panels to use up the ink and create some subtle texture. Once these had dried overnight under a heavy weight to flatten the panels, I used two of the neutral panels to create my cards.

CARD 1

The soft grey panel was created using Hickory Smoke DI and I stamped the large branch from Winter Foliage with Versamark along the edge, embossing with white EP. A few of the gaps were stamped with the smaller pine branch from Season Of Beauty. The panel was then trimmed down from A6 to leave a border when added to my dark silver grey A6 card base and the sentiment from Christmas Wishes added to match. For decoration on the boughs, I used some old silver crystals from Home Bargains, that I coloured with Copics and attached them to my branches. The soft colours complement the grey and white of the base.

CARD 2

This time my background panel was made using Old Paper DI which I inked over with the Winter Foliage stencil and the same Old Paper DI and glued to an A6 base card.
From a panel made using Pine Needles DI I cut two branches using the Winter Foliage dies and stamped the foliage in Evergreen Bough DI a couple of times. I used a handmade jig, simply a piece of rectangular card with a die cut aperture, in my MISTI to make sure the die cut stayed in place. 
The bauble was cut using a circle die from a panel of card made using Festive Berries DI. I did 2 layers of red as the initial covering as it wasn't quite dark enough for my purposes. A silver hanger was cut using a magazine freebie die.
The red die cut circle was edged with some more Festive Berries DI and the sentiment stamped and embossed in white EP. The first branch was added as is, but the second branch was cut in two before being added. A small gold ribbon bow completes and the whole bauble was then added to my background.

So that's about it from me, I hope I've given you some ideas to create your own cards.
Thanks for stopping by.

Friday 19 August 2022

Brand Ambassador Inspiration - grid-paper in different styles

Hi there,

here in Germany, in my federal state Brandenburg, the summer vacations will end soon... so I thought about getting crafty with some school relevant things - one of the first subjects in my mind was math - and grid paper!
Do you know the great Background Blocks Stamp with Grid pattern?

I made three different cards in different styles, but every one is made with this great background stamp and with grey as basic colour.


The first one is a masculine card, combined with the Background Blocks Cogs. Both Blocks I havn't used in the full size - I added a masking tape to my paper to keep the rest of the paper clean.
In the focal point I used a cool glaucous colour and different greys.

The upper half of the card is stamped with the patterns, in the lower part I added three times the same sentiment, embossed it in two different colours, fitting to the cogs.
To give the card a bit "more" I added some black dimensional dots in the centers of the cogs.
A quick card to make, anyway with some specials for guys!

UNIKO-BrandAmbassador-Inspiration

As occasion for the other two cards I've choosen "Get well soon".
In the first one I affirmed the stenciled and pencil coloured bloomy eyecatchers with two sizes of rhinestone drops and a metallic nuvo drop in the middle. The sentiment is embossed in silver - so it's a bit sealing with the grey wiped background and isn't dominating the scene.

UNIKO-BrandAmbassador-Inspiration

And for the last card for today I used similar stamps but in a different colour scheme. I returned to the more masculine colours light green, light blue, petrol.
The accents are big glittered half globes and hand drawn stamina.


The half globes are made out of selfadhesive clear rubber bumpers (or antishock dots?) from the DIY store (they are used to protect furnitures and/or doors from damages) and pure glitter.
They are bigger than usual crafty accents and you can mix your own choice of glitter or just use clear glitter and a coloured background to make them fit perfectly to your project!
Making them was a fun little extra crafting time!

UNIKO-BrandAmbassador-Inspiration

What kind of design you can imagine with a grid paper background?
Hope I was able to inspire you and try something new!

Have a creative time! 

Greetings from Wiebke


Tuesday 16 August 2022

Brand Ambassador Inspiration - Pattern Building Christmas Tree

Morning All, 

Steph here with my Uniko Brand Ambassador Inspiration post for August. My apologies for not managing to do a BA Inspiration post in July, time ran away with me as July is the busiest month of the year with birthdays, Carnivals and anniversaries. 

So on to today's post and I decided I wanted to get on board with the wonderful Christmas cards I've been seeing all over the Uniko blog in July. I was going to use one of the Christmas themed background builders sets but then I remembered the more recently released Pattern Building Christmas Tree stamp set and I thought it would be perfect for the cards I had in mind. I've tried to use the set in a different way so that you can really see how versatile this type of set is.


For this first card, I die cut a circle from copier paper and laid this onto my stamping card before selecting various stamps from the set and inking up in different colours. I simply moved the circle mask each time I wanted to create a new bauble. I used the straight line stamp for the 'string' and the tree frond for the top of the bauble. Even the 'Merry Christmas' sentiment is from the set but I did add the 'Happy New Year' from the Uniko Christmas Sentiments stamp set. 


For my second card I used up some scraps of coloured card and stamped or heat embossed the Pattern Building Christmas Tree stamps across them before die cutting into squares or rectangles. I added thin strips of black card across these to look like ribbon on presents. I stamped the sentiment in the top right hand corner but the card looked a little blank so I stamped the trees from the (now retired) Uniko Christmas Pop stamp set. (If you wanted to try and recreate this card but don't have the Christmas Pop stamp set, you could use the Uniko Christmas Pop Trio stencil instead). 


For my third card I threw all the patterns plus some more created using Uniko Background Blocks Diagonal StripesUniko Background Blocks Pinstripe and Uniko Background Blocks Nautical Stripes. I cut all the patterned pieces to the same size and arranged them onto a large green square before adhering to the card front. Finally I stamped the sentiment from the Uniko Christmas Sentiments stamp set, die cut into a circle, backed onto a green scalloped circle and adhered to the card front. 

I have kept all the designs flat as I post a lot of my Christmas cards and with the price of everything seeming to be going up, up, up, I wanted to make sure my postage costs weren't ridiculous at Christmas time! 

I'm hoping this has got you all in the mood for some Christmas crafting!

Much love
Steph x

Saturday 13 August 2022

Brand ambassador inspiration : Hello Lovely : Three ways

 Hi there!

Hannelie here with inspiration on how to use a large floral stamp in three different ways... all with alternative ways to add color !

First card :


Second card:


Third card:


I used Hello lovely clear stamp set on all three cards, stamped with my Misti and Versafine Black Ink.
Inks used : Distress ink : Picked Raspberry - Spiced Marmalade - Mustard Seed

For the the first card, I used a piece of torn paper/card stock to mask the area where I wanted to add color. I then started the ink blending and stamped the image over the blended ink area. I finished off the card with a birthday sentiment from Simply Said Blocks.

For the second card I used octagon dies. I used the smaller die to cut a mask for ink blending. I removed the mask and stamped the image. After stamping I used the larger die to cut it out, leaving an uncolored , but stamped frame. I layered it over glittered paper, also cut with the larger die, but rotated to only show a glimpse of glitter. The sentiment is from the same floral set.

For the third card, I used the Bright Butterflies stencil to add color, and stamped just a part of the large floral image on the bottom part of the panel. The birthday sentiment is from the Floral vines clear stamp set

Thank you so much for looking! I hope you leave with a lot of inspiration to get more out of those large floral stamps... without 'real' coloring!

Enjoy the weekend ♥
Hannelie

Thursday 4 August 2022

Brand Ambassador Inspiration - A Bit of Sunshine & Rainbow Doodling

 Hello!

It's Jane here today.

How are you enjoying the last two releases from Uniko?

Today I have a couple of cards to share using the Sunshine & Rainbows and Background Blocks Rays stamp sets.


I've really been getting into doodling this summer and both my cards have this incorporated.


Once the stamping was complete I used black and white gel pens to add some extra detail.


What do you think? Is this something you might give a try? Be sure to share on social media if you do using #unikoltd.

Thanks for looking today.

Stay safe and keep crafting!

Jane
x