Showing posts with label Big & Bold Happy. Show all posts

Wednesday, 27 March 2024

Brand Ambassador Inspiration - 3 Stamp Sets 1 One-Layer Card

Good morning, Anita here.

I'm back with some Brand Ambassador Inspiration today.

I was recently tasked with making an 18th birthday card for my godson and masculine cards are the kind I find the most difficult, so to make one for an older teenager was even more daunting!  I had a rummage through my Uniko stash and decided to combine three stamp sets: Big & Bold Happy, Background Blocks Halftone and Explosion!

And other than the number dies I adhered, this is a completely flat, one layer card with all the elements stamped directly on the card base.


I began by stamping the explosion in orange ink and then created a mask to protect it while stamping other elements.  I stamped the "happy" in blue/grey ink and then the halftone images in olive green and berry shades.  I removed the mask before stamping "birthday" in black and finished the card by adhering the die cut numbers.  All inks I used here are Altenew and the dies are from Spellbinders.

I was really pleased with how this one turned out and I hope this gives you some inspiration for those trickier masculine designs.

Enjoy the rest of your week, and with the Easter weekend approaching we are already past the halfway point of the working week.  Mustn't grumble, eh!  I hope you have some lovely plans for the long weekend.

 

Tuesday, 23 January 2024

Brand Ambassador Inspiration - Masculine Birthday Cards

Good morning everyone, 

Steph here and this month I'm using Uniko Big & Bold - Happy stamp and co-ordinating die set to make masculine birthday cards.


My first card teams the Uniko Big & Bold - Happy bundle with Uniko Bee Happy stamp set. I stamped the gorgeous little bees, the honeycomb hearts and the ‘bee day’ sentiment using the Bee Happy stamp set and fussy cut each one before adhering to the base panel which I had die cut using a generic honeycomb die. I then used blue ink to stamp the ‘happy’ sentiment and die cut using the coordinating die. 


My next card uses the ‘happy’ die cut as an aperture with coloured strips of card adhered behind. This is a great way to use up card scraps. The stamped elements are all from the Big & Bold - Happy stamp set. 


Taking inspiration from my previous card, I created a striped background and added a die cut ‘happy’ using both the inner more detailed die and the outer edging die. Again the sentiments are from Uniko Big & Bold - Happy stamp set and I finished the card with a die cut frame. 

Hopefully I’ve given you some new inspiration and you are digging out the Big & Bold - Happy stamp and / or die set for a play soon. 


Much love
Steph x

Monday, 1 January 2024

Happy New Year!

Happy Monday & Hello 2024.

Today I want to wish you ALL a very happy, healthy and creative New Year. I hope you all enjoyed the festive period and you are looking forward to what 2024 will bring. I'd say we had a quiet festive period & New Years Eve, but can you really with two 9 year olds 🥴😂

I'm learning to sneak away for a little quiet time and making a quick card like this one today...


I've reached for my 'go to' clear stamp sets for New Years cards, Big & Bold Happy and Organic Wishes, which is perfect for fireworks.


I stamped & heat embossed the Organic bursts with sparkly Stardust embossing powder before adding a little colour of Light Calypso Coral and Bermuda Bay. 


I finished off with the Big & Bold Happy die cut in Grapefruit & White card adhered using foam adhesive, along with the New year stamped & embossed in sparkly Stardust to match the fireworks.

Have a lovely day & I hope you find time to create today.
Crafty Hugs


Sunday, 7 May 2023

Brand Ambassador Inspiration using Fun Flowers Spray mask and stencil

Good morning, Julie here with a little bit of BA Inspiration on this Coronation weekend, hope the British weather hasn't put too big a dampener on your celebrations.

We had a bit of a disaster at home over the May Day Bank Holiday, our newly installed fibre optic broadband stuttered and finally failed. According to BT we had a signal to the unit but we needed a technician to visit, they should have it fixed by May 5th!!! Panic ensued as I thought about all my DT posts in the pipeline, a new month is a busy time for me and then, what do I do with all the free time?

So on Sunday, after doing as much housework as I wanted to do on a BH, I went to my room to have a play and ended up with this card.


I created some masks from Post It paper and got inky! I used a range of Altenew inks, Bamboo and Olive for the foliage, Eastern Sky and Azurite for the blue flower, Puffy Heart and Purple Wine for the pink and Fresh Lemon and Honey Drizzle for the yellow one. Each section was inked with the main stencil before the mask was placed in the stencil and the darker colour added. Masks, made by stencilling onto Post its and fussy cutting each element allowed for a neater finish.

The center of each flower was added freehand with a brown Copic marker, E49 and white gel pen. I also added some detail to the leaf spray with Copic marker YG17. Each spray was then fussy cut and added to an A6 panel of white card. I was unsure whether to add this panel to a white 5 x 7 base card but decided in the end to go for a bright turquoisey blue, trimming off the over hang.

The sentiment was stamped in black on white then the happy was die cut and mounted onto a gold mirror card happy shadow before I added it to the card.

Anyway as you can tell from this post, the man from Open Reach came, removed DUST from the optical connection, drank a cuppa and left, 30 mins max! Full high speed broadband resumed but the new phones are still pants! Apparently our hub is too far away from the phones for them to work on the WiFi, our old phone line was cut when they installed the fibre cable, not that they were great when it rained, damp in the line apparently. It certainly showed us how reliant we are on the internet these days, even watching TV was curtailed, no Prime or Netflix or iPlayer for us until service was resumed. When I turned on my computer, my inbox was full of rubbish that had accumulated whilst we were offline, stuff I usually delete when I turn it on in a morning!

So have a good rest of the Bank Holiday and get crafting!

Friday, 24 February 2023

Brand Ambassador Inspiration - Masculine Birthday Cards

 Bonjour !

Izzy here, I hope that you are enjoying all the great Grand Prize Giveaways and the fabulous discount that Bev is offering to celebrate the 11 years of Uniko.

To go on with the celebration, I made two masculine birthday cards. If you are like me, I always struggle when it comes to make a masculine card but fortunately some colour combos help a lot.

For my first card, I used two stencils, Balloon Bash & Party Confetti that I combined together,  as well as the Big & Bold Happy bundle.


On a white card stock I first blended the blue/green inks through the Balloon Bash stencil to make the balloons shapes, then I placed it back and I layered the Party Confetti stencil and I blended the same inks on top.

For the sentiment, I die cut the Happy word in a metallic paper and I stamped in black the birthday word. I also added the black thread with a fine black liner.

To finish my card, I stamped this image on a teal card stock and I stamped the little circles that come from the Big & Bold Happy stamp set.

For my second card, I used two stamp set from the last release, Background Blocks Linear and Mid Century Modern Frames.


I kept this one very simple and I get inspired here by the colours of the last challenge at Color Hues. 
So I simply stamped the lines on a white piece of card stock and I coloured some parts with lime and cyan markers.

Then on another piece of card stock I stamped one of the frames together with a sentiment and I also coloured it with the same markers.

To finish this card, I flat adhered this panel on a double white card and I fussy cut the frame and I foam mounted it on the card.

That's all for me today. And don't forget you still have time to join in either the Grand Prize giveaways (HERE and HERE) and/or the Linky Party.  

Have a lovely day and thank you so much for stopping by.


Tuesday, 7 February 2023

Brand Ambassador Inspiration - Birthday Celebrations

Birthday celebrations you say?! 

Why yes! You may have noticed that it’s Uniko’s 11th Birthday this month so my Brand Ambassador Inspiration post is all about birthdays and Uniko (I have used the Uniko colours as well as products). 

So firstly, HAPPY BIRTHDAY UNIKO! 

Make sure you haven’t missed the Birthday Linky Party from the 1st of the month. And check back here on the Uniko blog for the next two Saturdays to be in with a chance of winning some Uniko goodies! 

So for my first card today I used Uniko Balloon Bash and Uniko Background Blocks Party Confetti stamp sets.

Secondly I have used Uniko Big and Bold Happy stamp and die set, stamping and die cutting the large ‘happy’ sentiment. 


Finally I have used Uniko Balloon Bash stencil teamed with Uniko Big & Bold Happy stamp and die set. This time just die cutting the sentiment without stamping it.


Hopefully these have put you in a party mood! There have been already been lots of birthday celebrations on the Uniko blog but make sure you keep checking back as Bev and the Brand Ambassadors have lots more lovely birthday celebrations to come. 

Much love
Steph x


Friday, 24 December 2021

12 Days of Christmas Giveaways - Day 12


Happy Christmas Eve!

Welcome to day 12 of the 12 Days of Christmas, Giveaways. 

If you missed day 1 and you're wondering what this is all about, be sure to check out all the details HERE and you're welcome to catch up and comment on the previous days. You can find links in the right hand sidebar.

Firstly, I want to thank everyone for all the wonderful comments here and on social media. For supporting my small business and sharing your love of Uniko with others means the world to me and it keeps my little business going during these challenging times.

So with all this happiness in my heart I had to use BIG & BOLD Happy for my final cards for this event!


Yep, another couple of Happy New Year cards! I couldn't resist using the Pantone Colour of The Year 2022 as my theme again.


I went for a similar layout for this first card to the one I used for BIG & BOLD Merry, HERE. I enjoyed how quick an fun it was to stamp!


For my second card I went super CAS, lots of lovely white space. I also used the coordinating Designer Dies BIG & BOLD Happy.


So today's giveaway* is...


To be in the chance of winning simply leave a comment on this post and or any of the social media platforms I will be sharing the giveaway!

I will be back here on the blog tomorrow to wish you a Merry Christmas and also share some news . Have a wonderful Christmas Eve.

Crafty Hugs 


* As it is a giveaway the prize is open to participants worldwide. The item will be marked as a gift from me personally to avoid customs charges. An alternative prize will be offered if the winner already owns any of the prize offered on the day they win. You have until midnight Thursday 30th December 2021 to comment. Winners will be announced on the blog on Friday 31st December 2021.


Sunday, 14 February 2021

Brand Ambassador Inspiration - Happy Valentine's Day

 Bonjour !

Izzy here with two cards for this Valentine's Day.

For my first card I combined the following products ...


I got inspired by the colours of the Colour Throwdown challenge and by the Time Out challenge photo inspiration.

First I stamped the background stripes block in black ink on a white card stock. I cut it and I foam mounted it on a white double card.

 Then I decided to make a gradient from pink to red when stamping the hearts. I fussy cut them and I glued them on the striped background. 

I finished by stamping the sentiment the same way, I fussy cut it and I glued it. 

For my second card I used :


For this card I got inspired by the sketch of A Place to Start challenge. I started with the background, using the stencil over a white card stock and blending distress inks. I flat adhered it to the fuchsia card base.

For the heart, I used a leftover of an alcohol ink panel that was still on my desk from a previous card. I stamped the heart with Versamark and I heat embossed it with Silver Pearl powder. I love how it lets see through the alcohol ink mouvement.

I die cut a label that I glued onto the stencilled background. Then I fussy cut the heart and I foam mounted it.

To finish, I stamped the sentiment in black and I glued some tiny hearts die cuts coming from the same Alcohol ink panel.

And since it's Uniko's birthday too, I couldn't finish this post without a birthday card ! For that I had fun using on the same card the products of the February releases of the last three years.


I kept the same shades of colour for this card. I placed the stencil on a double white card and I coloured with Distress inks. 

Then I stamped the flowers silhouette in black and I heat embossed with glitter powder. I also stamped the sentiment the same way and I cut it with the matching die. I used the sentiment die background on Vellum paper.


On this picture it is easier to see the shimmery of the black silhouette and sentiment.

To finish I glued the sentiment on the card and I added three sequins. 

That's all from me today. I wish you all a lovely day ! 

Thank you for stopping by.


Thursday, 14 May 2020

Brand Ambassador Inspiration - happy & colourful

Hello

Wiebke here with a happy and colourful post to brighten your day!

It's also a happy bithday surprise for Beverley!
 
I'm so 
HAPPY HAPPY HAPPY HAPPY
to have you in my life! 😘


I made this bunch of clean and simple cards in a really short time! How I did it? By using all the "left overs" to create second cards!

The materials for all four cards are similar:
  • a self made rainbow-colour paper
    made of multimedia paper (it doesn't warp as much as normal cardstock when it get's wet) & Ranger Distress Oxide Inks (and a blending brush or tool) & a clear iridescent embossing paste (just added a thin layer with a palette knife)
    To create this paper you'll need a bit of time, but below I have some alternative ideas!
  • the Big & Bold Happy Dies
  • fitting stamps - I used Big & Bold Happy, Happy Days and bee Happy (guess why! 😉)
 
:-:-:-:-:-:-:-:-:-:-:-:-:-:-:-:-:-:-:-:


To avoid lots of glue-time for the thin areas I used adhesive sheets, but needed a bit of glue here and there anyway!

For the first two cards I cut out the bigger "shadow" word of my sparkling paper first, then placed the smaller die on this hello and cut again to create the thin edge of the word. - This was the difficult part - to line it up exactly for an even edge!
But with the help of some low-tack painters tape (I used the pink one from Tesa) it wasn't a real problem! 

The rest was easy!
To adhere the thin layer in the original shape and without wonky lines I used the other one as guide before I adhered it on a second cardbase.
All sentiments were stamped in black ink. I love to use my stamping tool for these jobs - You can position all the stamps perfectly with the gridlines on the lid and you can stamp twice for a perfect black impression without any problems of missplacing!


The black lines of the box are drawn with a thin black marker and and a T-ruler.
The small butterflies I punched out of the scraps of the sparkling paper and placed them as a fluttering crowd above the word die cut.

 :-:-:-:-:-:-:-:-:-:-:-:-:-:-:-:-:-:-:-:

Here on the next picture you can see in the reflection, how much this selfmade paper is sparkling! (It's always hard for me to catch this with a camera.)


For the second two cards I directly cut out the smaller die of the sparkling paper. 
On the cardbase I brushed the same colours I used before to create the sparkling paper, but with a lighter hand for a softer, less intense shadeing.
The more intense happy on a white shadow paper I placed there, added the two sentiment-parts and the card was finished!


The last card is made of the leftover again. I cut out the "frame" with a knife and a metallic ruler, rounded the corners by hand and adhered it on the cardbase.
This time I used the cute bee insted of a sentiment - just as a "be(e) happy".

:-:-:-:-:-:-:-:-:-:-:-:-:-:-:-:-:-:-:-:

Hope you like this idea of making quick'n'easy cards!


Some more ideas to stretch this technique:  

You needn't use a selfmade sparkling rainbow-paper.  
You can also use 
  • a patterned paper or 
  • a monochromatic shading
  • a paper with or without sparkling
  • ...
When you havn't a iridescent embossing paste, use
  • a sparkling embossing powder
  • a sparkling spray (maybe selfmade with some mica powder)
  • a thin layer of glitter glue or glossy accents (maybe with some glitter?)
  • ...
When you hon't want to make "happy" cards, use one of the other Uniko Big & Bold die sets!
"wish" or "snow".
 
:-:-:-:-:-:-:-:-:-:-:-:-:-:-:-:-:-:-:-:


Thanks for looking by today!   💓💛💚💙💜
Have a great and creative time and be happy!
 

Hugs Wiebke


Wednesday, 26 February 2020

Brand Ambassador Inspiration - More Birthday Fun!

Hello there! 
It's Sarah here with my Brand Ambassador Inspiration post for February and you're no doubt aware it's Birthday month here at Uniko so we've been featuring lots of birthday related cards, particularly using the new release goodies that became available on Sunday. 

Sadly we're nearing the end of the birthday month but it's still worth sharing a few birthday creations I thought - although this trio features older sets instead of the new releases!

I love the BIG & BOLD sentiment sets, especially those with dies so here goes using BIG & BOLD Happy plus BIG & BOLD Wish along with Organic Wishes (made into birthday fireworks / party poppers)! 


In addition to the BIG & BOLD sentiments I've created a frame for the focal sentiments using some smaller images from the set as well as Balloon Bash - just because you can't beat balloons for birthdays!


Next up using the BIG & BOLD Wish set - who says candles can't be upside down!!! 


... and the last one featuring BIG & BOLD Wish teamed with Organic Wishes to create some celebratory fireworks!

Thanks for calling by and I hope you've enjoyed all our Birthday inspiration and celebrations on the blog this month and lastly, DON'T FORGET there's still time to enter the HUGE prize giveaway to 'WIN stamps for a year' details on THIS post!


Saturday, 28 December 2019

Brand Ambassador Inspiration and a Happy New Year

Morning Uniko fans, Julie here with another Brand Ambassador inspiration post.

I hope you've all had a wonderful Christmas break and Santa brought you some fab crafting goodies. Hopefully this period between Christmas and New Year, one droll Radio 1 DJ labeling it Twixtmas, is a quiet time and you get a chance to play with them!

Anyway, in the quieter Christmas run up, I made this card using some non Christmas Uniko stamps.


When I first saw the Organic Wishes set, the seed heads reminded me of bursting fireworks so I decided to use them for this card. I also added some smaller flower centers from Mid Century Florals and Big n Bold Happy.
I used a selection of glittery embossing powders to emboss those images on a panel of black card. Those include an ancient glitter green by Funstamps, Personal Impressions red super sparkle and hologram super sparkle, and finally WOW metallic platinum sparkle, Champagne sparkle and fool's gold.
The sentiment banner was stamped with black on white using Christmas Sentiments and the 2020 was cut from fun foam and glittery gold paper before adding to the trimmed down stamped panel.
Finally the finished panel was added to a white top fold base card. 

That's all from me for 2019, so may I take this opportunity to wish you all a happy, healthy and craft filled 2020!

Friday, 25 October 2019

Festive Featured In Friday!

Happy Friday!

It's been a strange week here at Uniko HQ, it feels as though Friday has come round quick, but at the same time it has been a long week!

Today I am sharing about another Uniko feature, this time in the NEW issue of Die Cutting Essentials magazine which hit the stores yesterday.


For this feature Kirstie the editor of the magazine wanted something festive, but as I didn't have my newest Designer Die release to hand, I set to using the super popular BIG & BOLD Happy Designer Dies which I released back in February this year.


With this die collection being released when Uniko was celebrating their 7th Birthday and the majority of projects shown using this product have been birthday related, it was the perfect opportunity to show how they can be used for other occasions, including Christmas!

Here are a couple of the cards from the feature in the magazine...


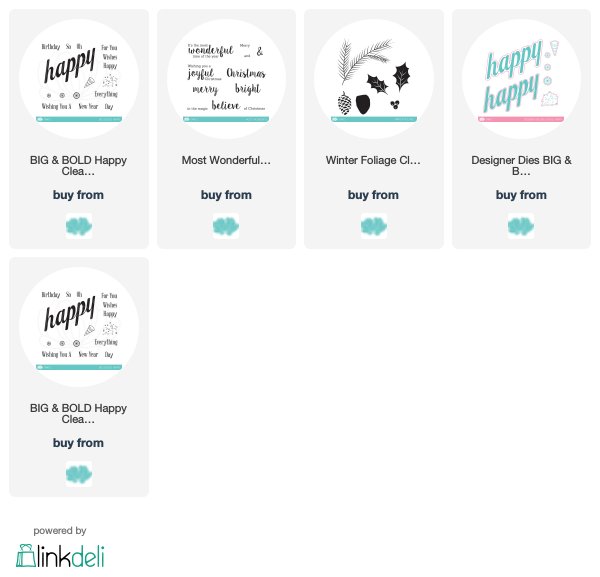
For this first card I used the die which cuts out the word happy and I have paired it with the holly from Winter Foliage and the Christmas sentiment from Most Wonderful. As I didn't have any glimmer or foil card to die cut the word from the match the heat embossed Christmas sentiment, I used VersaMark ink to smother the die cut and heat emboss with the same powder. I repeated until I achieved a lovely smooth coverage.

Next, I couldn't resist making a shaker card! 


For this card I used the coordinating BIG & BOLD Happy clear stamp set for the stamped background and sentiment.

I'm HAPPY to report that the BIG & BOLD Happy Designer Dies are back in stock and available on the website :)

That's all from me today, but I do hope you will pop back tomorrow at 9am to join myself and the Uniko Brand Ambassadors for the October Post Release Blog Hop & GIVEAWAY!

Until then, thanks for stopping by today!
Crafty Hugs