Showing posts with label English Country Garden Butterflies clear stamp set. Show all posts

Tuesday, 13 July 2021

Brand Ambassador Inspiration - English Country Garden Butterfly II Stencil

Morning everyone,

Steph here with a Brand Ambassador Inspiration post and today I’m using the newly released Uniko English Country Garden Butterfly II stencil. I loved all the butterfly stencils when I received them and had lots of ideas of how I’d like to use them so here they are:


I have used Distress Oxide inks to sponge through the stencil one at a time from lightest to darkest. Each time I repositioned the stencil further to the right before inking. After the inks had dried I stamped the sentiments from Uniko You Are, Yes You stamp set in white ink over the butterflies. As it’s a flat make, I mounted the panel onto a card blank with foam tape for some dimension.


My next card uses the inner part of the stencil as a mask. For this card I have simply sprayed some solution made up from Peacock Cosmic Shimmer Pixie Powder and water. I also tapped the powder over the card and sprayed again to get some more concentrated areas. I stamped the sentiment from Uniko Pure Florals: Cosmos stamp set and layered the finished panel onto green card stock and then a card blank.


My final card uses the outer stencil again but this time I have stamped the Uniko Background Blocks Party Confetti with the stencil in place. I removed the stencil to stamp the sentiment from the Uniko Birthday Sentiments set and added a butterfly stamped using Uniko English Country Garden - Butterflies set. I then mounted the panel onto a black card base. 

I hope these have given you a few ideas of your own to have a go with the gorgeous stencils. I’d love to see what you create.

Much love

Steph x


Tuesday, 29 June 2021

Two For Tuesday & a WINNER!

 Hello & Happy Tuesday 😊 


I'm back today with another Two For Tuesday to share with you, but first I have the randomly selected comment winner to announce from the recent June 2021 Stencil Release, Brand Ambassador Blog Hop & GIVEAWAY we had HERE.


Thank you to everyone who took the time to join in on the hop and for all the lovely comments left. Thank you also for all the wonderful orders, I look forward to seeing Uniko stencil creations pop up on social media.


So, without further ado let's get to the winner. I used a random number generator to select the lucky comment after I went through and totted up. AND the lucky comment is...


Tiina Kalliokoski / tweety.cardworld 

Hi Bev. I just love what you have done with the Pure Floral Rose and with the Butterfly. Gorgeous colours and so skilled colouring. Can’t really decide which of them would be my fav if I had to choose – luckily I don’t have to. I’m so happy I found your products and this blog. At the moment I have only one big gorgeous Uniko stamp but when I need to refill my stash I know where to find what I need. Regards, Tiina a.k.a tweety.cardworld (on IG).


Congratulations Tiina! 

Please send me an email (bev@uniko.co.uk) no later than10th July 2021, with your postal address to claim your prize.


Okay, now for some creative eye candy! 


Today I decided to ink up English Country Garden Butterflies clear stamps & dust of the coordinating Designer Dies too to create two cards. Both have a CAS feel to them but I've used colour in different ways on them.


For this first card I thought it would be fun to double up the large & small butterflies. I rarely reach to stamp on coloured card these days, so reached for my favourite trio of colours in my scraps box and got to stamping & die cutting. I added a little contrast by stamping the smaller butterfly on white card.


I haven't been one to jump fully on board with the slimline card, but in order to fit 3 larger butterflies on a card the slimline style was perfect. I added sentiments from the Simply Said Blocks series and some eagle eyes might notice something on this card?! 


Next up I wanted to use the butterflies more as and accent to a sentiment. It's been ages since I inked up BIG & BOLD Hello and it seemed the perfect choice. 


The bold hello is inked and heat embossed in clear sparkling embossing powder. I then stamped the trio of large butterflies and selectively coloured them in three colours using three shades of each colour. Super quick and simple colouring. 


I finished off this almost one layer card with an accompanying sentiment from BIG & BOLD Hello stamped and embossed in white, popped up with foam adhesive and a trio of rhinestones. 

It's been lovely inking up and playing with these older Uniko stamps & Designer Dies again. That's all from me today, thanks for stopping by today.


Crafty Hugs


Wednesday, 3 March 2021

Brand Ambassador Post : English Country Garden Butterflies

 Hi there!

Hannelie here today with a trio of butterfly cards !


It's been a while since I tried a new technique. I tend to stick to my usual ways. Time to do something about it...  I'm talking about print making with die cuts! So easy with a fun watercolor look! I will definitely do it more often in the future.


Card #1


Card #2


Card #3


All together!


I used : 


Thank you so much for popping in! I hope you'll leave here feeling inspired to try something new (to you) !

Hannelie

Thursday, 23 July 2020

Uniko Brand Ambassador Inspiration: Inspired by Twofer Challenge Card #29~Butterflies...English Country Garden Note and Birthday

Hello,

Carol here, welcoming you to my Uniko Brand Ambassador post, where I'm defaulting to what I do in missing-mojo situations: drawing inspiration from other designers or, in this case, from challenges.  Today, my muse is none other than Twofer Card Challenge #29, where this month's theme is Butterflies!  A perfect opportunity to use the lovely English Country Garden stamps & dies to create two cards, with two different designs, for two different occasions.  


Here they are....


My first card features an alcohol inked background, with some gold alloy added for extra shimmer, as a canvas for a gold-embossed three-layer vellum butterfly. The sentiment, also gold embossed, is from Simply Said.


I am completely (as in totally, full-on) smitten with slimline cards, so I *had* to make one! Here, I prisma pencil coloured three butterflies, die cut and positioned them inside the circles, then added a birthday sentiment from Simply Said.


Here they are again...the shimmer of the alloy and pearlized inks is soooo pretty.


Hopefully, I've inspired you to use your Uniko butterflies in different ways, for different challenges/occasions! They really are wonderfully versatile!

Wednesday, 22 July 2020

Brand Ambassador Inspiration, English Country Garden stamps and dies

Morning all, Julie here with another Brand Ambassador inspiration post.
Last month I used the English Country Garden stamps and matching dies to create a couple of cards, this month I'm back with a couple more.


I've used the large butterfly die from the set to first to cut out a vellum butterfly which I then stamped and embossed and secondly created a mask and inked and stamped through it.

Here's the first inspired by this card I saved ages ago.


I loved the movement that the die cut sweep created. Using an Avery Elle curved die to create the sweep out of linen effect card, an inset panel was added, made by inking a panel of white card with Picked Raspberry and Seedless Preserve DOx, splashes of water and over stamping with the large butterfly in the same colours of DI. The sentiment from Pure Florals - Peony, was stamped in the same two colours for the large 'sending' and black for the small one. I heat embossed the lighter pink with clear EP before moving slightly to create the shadow by stamping again with the darker pink ink, it creates a subtle 3D effect. A few PP sequins complete.

Wild flowers were the inspiration for my second card.


The technique used here has been around for ages, all I did was cut a piece of copy paper the same size as my base card, then cut out the butterfly using the same large die. The resultant mask was then taped over the card and the background inking added using Salty Ocean and Mowed Lawn.
I used the small elements from Organic Wishes to stamp the silhouettes in black before removing the mask and stamping the sentiment from English Country Garden.

That's about it from me today, hope I've inspired you to look at your stamps ad dies in different ways and have a go yourself, this month's challenge is all about the garden, so why not join in!?

See you back here again soon.


Tuesday, 23 June 2020

Brand Ambassador Inspiration - English Country Garden

Good morning friends, Julie here with a little bit of Uniko summer inspiration.
I needed to make a card for my daughter's birthday, so decided to use the English Country Garden stamps and matching dies to create a floating frame design. I also ended up with an extra card from the left overs, definitely a win win!


So grab yourself a cuppa and settle down to a photo heavy post!

To start I die cut a stack of blanks of both the large and small butterflies before stamping them and colouring with Copics.
I find the best way to batch stamp is to use my MISTI and the waste from the first die cut to create a jig, so that I can place the blanks back in and then stamp away, replacing the blank after each stamping. I saved my jig from a previous project.
Once I had enough butterflies, I arranged them over a panel of copy paper trimmed to 41/2" by 61/2", not worrying if they hung over the edges. 
Using some Press n Seal, I overlaid the butterflies and pressed down especially between gaps. The Press n Seal allows you to lift the project up and then trim away the over hanging elements. 
This is how it looks part way.


This is it fully trimmed.


Without removing the Press n Seal, I cut a rectangle from the center with a die, it will cut through all layers if you take it steady!


Put the center to one side and flip the frame over and carefully remove the white copy paper, adding foam tape to the different elements.


After removing the backing from the tape, place on a 5 x 7 base card and press firmly once in position. Then very carefully remove the Press n Seal. You can stamp a sentiment directly into the center of the card but I chose to add a layered one to add some extra interest and bling. The sentiment is made up of bits from three different sets, You Are, Yes You, Birthday Sentiments and Festive Sentiments and heat embossed with platinum EP. A few holographic gems were added to complete.


Now back to the middle we put to one side. To frame the central panel, I decided to cut a thin frame using a rectangle of matching card and a slightly smaller rectangle die. I found that its easier that way than cutting the center out and trying trim down to size. If you do need to trim then I found replacing the die cut center works well in keeping the frame from distorting too much.

Instead of popping these butterflies up on foam, I simply glued them down flat onto a 5 x 7 card base, adding the frame and a simple sentiment strip from Simply Said. 


Here are the two finished cards together.


I do apologise for the photo heavy post but I hope it has inspired you to have a go yourself, its such an effective technique and you don't need to use butterflies, any die cut images will work.

So that's all from me, keep safe and sane 'til next time.


Sunday, 12 January 2020

Brand Ambassador Inspiration - Originally Organic Additions

Hello! 
Sarah here with my first Brand Ambassador Inspiration post of 2020! 
Firstly, I'd like to wish you all a Very Happy New Year. I hope you've all enjoyed the festive season and ready to move on to a little 'spring time' theme. I certainly am with all the dark and miserable early mornings we're experiencing of late in the UK!
With Spring in mind I'm featuring the beautiful Originally Organic Additions Collection. The set has coordinating dies and easily teams up with lots of other Uniko sets; as I've done here using a sentiment from the Wonderful Day set plus a die-cut butterfly from English Country Garden: Butterfly collection.


For the first one I stamped the 'heart' image directly onto my cardbase using the Misti to line up a second panel to use for the negative die-cut areas of the card and for the image on the second card. The images are coloured using Promarkers with some added detail using Polychromo pencils plus a touch of glamour dust. 


The first card shows the focal 'heart' image slightly off-set and tilted to the left whereas this one has the image straight on the cardbase and popped up on 3d foam. I die-cut the centre section in turquoise cardstock to coordinate with my colour scheme and having heat-embossed the sentiment in-laid it inside the 'heart'

I hope you feel inspired by these ideas. Personally I find this set brilliant for many occasions; due to the 'heart' style image. It works well for weddings, anniversaries, mothers day as well as general birthday / every day cards. Adding the dies into the mix opens up loads more opportunities for shaker cards and other techniques making it super versatile. 

Thanks for calling by and I hope you too have a wonderful day!


Saturday, 28 September 2019

DT Inspiration - Where do you get your inspiration?

Good morning and welcome.
It's Julie here today with an idea on how to use your Uniko stamps and dies.
How do you kick start your mojo? I must admit that sometimes I need to make a card for a DT and I have absolutely no idea what I'm going to make. Sometimes I might go look around on Pinterest but mostly I look to challenges to kick start my thoughts. I have my favourites that I bookmark and usually I manage to find something that starts the synapses firing. If I can link a few together then all to the better, I love it when one idea sparks off another.
It was a colour challenge that gave me the first clue, I knew what my palette would be, then when I saw a photo challenge featuring butterflies, I knew I should get my English Country Garden set out!
Here is my finished card.


The picture I had in my mind of the finished card was of a spotlight technique, with the colourful butterflies popping up against the grey background, but how to do it?
I started by inking up both the small and large detailed butterflies with Altenew's Limestone and stamped an A5 panel of white card. I then die cut the centre away with a pierced rectangle die.
Because I wanted to use my Zig watercolour brush markers to colour, I needed to make the out lines waterproof, slight problem.
To solve this, I decided to die cut some blank butterflies in both sizes using the matching dies and then stamped and heat embossed them. I could now place the die cut rectangle back into the panel and use the pale grey butterflies as a guide to place the now watercoloured die cuts. Once Happy with the placement, I popped each butterfly and part butterflies up with foam pads. When stuck, I removed the centre panel and trimmed away the excess, glued the large panel onto a slightly smaller piece of white copy paper then adding back the die cut rectangle. This secures the loose panel and the front could then be added to a base card. A small strip of black card was stamped with Happy Birthday from Birthday Sentiments and heat embossed with fine white EP and placed to one side of the design.

So that's it from me, hope I've inspired you to get out your stamps and dies. If you are in need of a kick start why not check out the Uniko challenge?

Wednesday, 29 May 2019

Easy Twofer using the Floating Die Cuts technique

Good morning .......

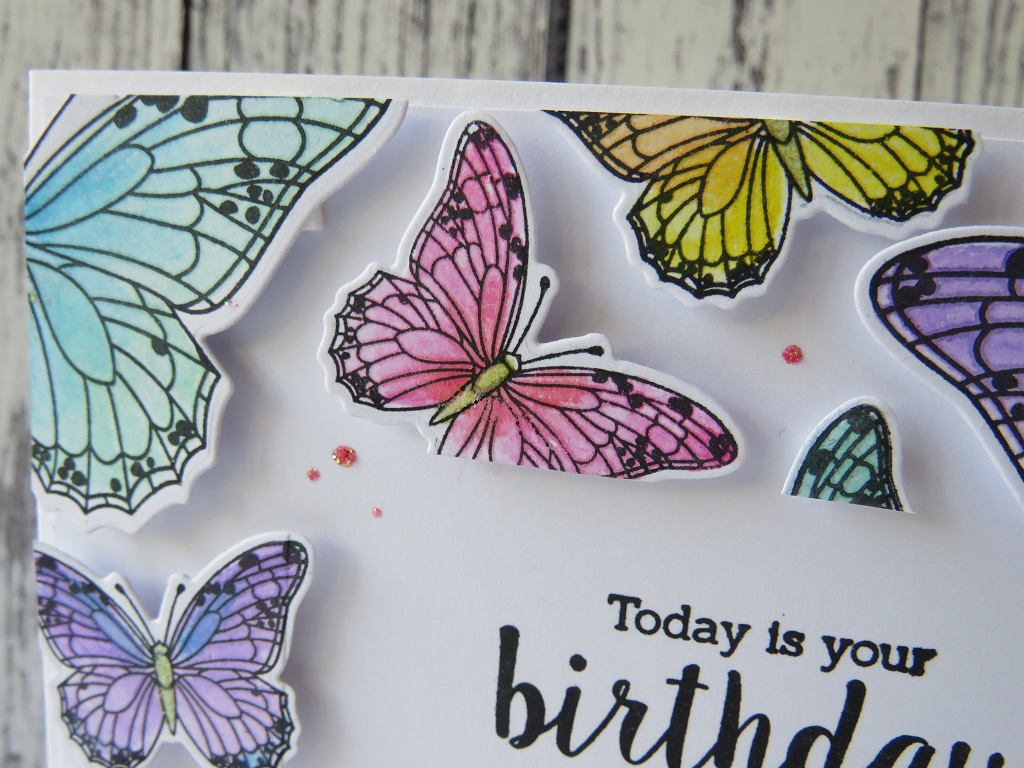
It's Linda here, with a fun little project using the English Country Garden Butterflies clear stamp set, and the matching Designer Dies that were released earlier this month.

I'm sure you've seen, what some people are calling ........ Floating Die Cut Frames.  A really fun technique of using stamps with matching dies to create cards where the die cuts look like they are just floating.
It's also a great way to create two fabulous cards in one, which is always a winner for me.


I first saw Jennifer McGuire using this technique on YouTube, and thought it would be perfect to use with these stamps and dies

To start, stamp a whole bunch of the butterflies, using both sizes, onto plain white cardstock  (if you don't like colouring, you could always stamp these directly onto coloured cardstock instead)
Using the matching dies, cut out each one.

Cut a piece of white cardstock to fit the front of your cardblank (mine was  a 14cm square card)  On to this arrange the die cut butterflies, filling the whole piece of card, leaving a little bit of space in between each of the butterflies, and making sure that some of them go over the edges.

Now for the magic ingredient ...... GLAD Press n Seal


I discovered this through Jennifer McGuire and I managed to find it on Amazon.  It's kind of like cling film, but one side is sticky, a bit like low tack tape.

Place this over the top of the butterflies, trying not to move them around, and press down.
Trim off any excess around the edges of the card.

Next, use a die to cut out the centre, I used a square but you could use a circle, a rectangle, an oval, even a heart.  Place this on top of the Press n Seal and secure with low tack tape.
Before running it through your die cutting machine, remove the piece of cardstock from the back.  Don't worry, your die cuts will stay in place.

Once you've die cut the centre, take the middle bit out, and then place foam pads on the back of each of the pieces left, forming the frame (this is where I realise I should really have taken step by step photos, but hopefully you're following me)

Place the frame back onto your piece of white cardstock and carefully remove the Press n Seal.   The foam pads will hold the die cut pieces in place and they will look like they are just floating on your cardstock .......


I only coloured my butterflies after I'd placed them onto my card but, if you find it easier to colour them before all the die cutting that would work too.

I stamped a sentiment in the centre of the frame .....


and added some dots of glitter glue in between the butterflies.


I love how this turned out ......


I did mention a twofer ....... well check this out


Take the left over die cut piece (the center bit) which will still have all your die cuts in place on the Press n Seal.   Simply add foam pads to the backs of all the pieces as before, and then attach it to the front of a cardblank.  Gently peel off the Press n Seal ...... and voila!


Floating butterflies in a perfect square!

Add some colour (if you've not already done so) and a simple sentiment ......


And finish with a few splatters of matching ink


I hope that all makes sense.
If you're like me, you'll give this a go, and then start looking through your stamps to see which have matching dies that you can use for this fab technique.

Have fun!

Thanks for popping by ...... have a great day.

Cheerio until next time ....