Showing posts with label Scattered Polka Dots stencil. Show all posts

Sunday, 16 March 2025

Brand Ambassador Inspiration - Organically Zesty

Good afternoon, Julie here with some BA Inspiration.
Today I've got my Color Hues DT hat on as well as my Uniko one on, as it's my turn to host their latest challenge. I chose lemon and lime as the colours and what says this more than the lemon from Organically Zesty! 
Here are a couple of ideas using the lemon stamp from the set. When I went back to the release, I couldn't believe it was way back in May 2022! Here's my first idea using a watercolour technique for the background and to colour the image.


I started by stamping the lemon in black onto MM paper and heat embossing with clear EP. It's just so much easier and cleaner than using black EP. I also stamped over the top again whilst still in my MISTI with Versamark and more clear EP to ensure there was full coverage.

Instead of getting my watercolour paints out I smooshed Altenew die inks onto an acrylic panel to form a palette. If you have reinkers it makes life so much easier, but I don't have any. I first added water to all the leaves then added a wash of Limeade and then some darker Lime ink. A grey Zig watercolour marker created the shadows. A mix of Lemon Yellow and Maple Yellow was used for the lemon, adding texture with a dry brush and the darker yellow ink. Again my Zig brush marker created shadows on the lemon and blossom. The white of the blossom is just the bare paper showing.
The lemon was then fussy cut and put to one side whilst I made my panel.

I found some scrap acetate sheet from some packaging to which I added some of the green ink and then spritzed lightly with water before carefully flipping and stamping onto a panel of white card. I repeated the process until I was satisfied with the coverage. The panel was die cut with a scalloped edged rectangle and mounted with pads onto a white base card followed by my lemon and a sentiment strip stamped with one from the set.

This is the second card I made with the same stamp but set it onto a black panel through which I'd inked with white pigment ink and the scattered polka dots stencil. A simple white panel stamped with another of the sets sentiments was glued in place and the lemon, made the same as the one above added on pads.


I decided to use this second design for the Color Hues challenge, which one would you have chosen?

Well that's all from me for today, happy crafting.
 

Wednesday, 20 May 2020

Brand Ambassador Inspiration- A Masculine Birthday Card

Good morning folks, Julie here with another Brand Ambassador post.
Today I would like to share this masculine, CAS card with you and the steps I used to create it.


I don't know about you but I'm starting to run out of my favourite cardstock, so I decided that I would use some of my odds and ends that I save from other projects and some larger A4 sheets that have been in the stash for more than 7 years! So I started with a small panel of white card from the scrap box, which I taped under my abstract triangles stencil.


I found it easiest to stick it from the back with masking tape, so needed to add a little talc to stop the sticky tape from catching on my MISTI when stamping. The stencil was then placed in my MISTI and I then stamped the largest of the sentiments from Birthday Wishes set repeatedly through the stencil with black ink. As the ink will sit on the stencil, take are not to smudge the residue when moving your stamp around. 
I carefully removed the tape from one edge of the stencil and placed a panel of scrap paper under it and carefully rubbed away the excess ink with a cloth. The stencil was still attached by one side so it acted like a hinge allowing the stencil to remain in place. After carefully removing the scrap paper, I placed the stencil back over the inked panel and replaced the tape and inked through with Salty Ocean DI. Once dry I carefully removed any excess ink from the stencil before placing the Scattered Polka dot stencil over and securing.


Blueprint Sketch DI was then added through the two stencils to create yet another layer.


The photo above shows what the panel looked like after the polka dot stencil was removed.


Finally, the Abstract triangle stencil was removed to reveal the finished panel.

When using small patterned panels, I find a piece of copy paper cut to size very useful, allowing you to position each of the elements before adding to the final base card. You can roughly plan the final design without ruining your base card.
I trimmed a panel of textured card to create two panels, adding two strips of scrap card inked with Blueprint Sketch and stamping Happy Birthday from Simply Said in black before popping up them over the stenciled panel on the copy paper with fun foam. The base card was made from the same textured white card.


The instructions sound quite complicated but I do encourage you to have a play, use up your scraps like me. 

That's all from me for the mo, so stay safe and well until next time.


Sunday, 18 August 2019

DT Inspiration - Use a Stencil with watercolour pencils

Hello and happy weekend to everybody!

It's time for another DT-Inspiration!

As always I made cards with a stencil for you.
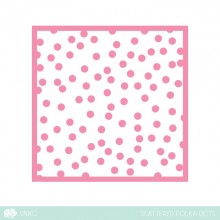
This time I used the Uniko Stencil "Scattered Polka Dots".

Let's get started!
I traced the stencil edges with my watercolour pencils on a mix media paper (it's a great paper for different kind of techniques qith many different colours or mediums).
To activate the watercolours I added droplets of clear water on every little circle with a pipette, waited a while and then moved the water very carefully with a small brush to mix every droplet with the solved pigments.

Cause these added waterdrops were so beautiful, I took some photos before and after I mixed the colours.
See it here:
Different shades of blue with waterdrops on top.
The whole blue-dotted paper with waterdrops.
The unsolved and the solved colours with waterdrops on top.
My plan was, to wait until the droplets were dry and then use the paper.
It took a long while (was an over-night-process!) but then all the water was gone and I had little watercoloured dots... They were beautiful, but in my mind were still the pictures of the little "water-hills"... and these flat colour-dots wer not really spectacular!
So I decided to change my plan, added Glossy Accents on the one and clear Nuvo Drops on the other paper and let it dry again.
The result was almost as amazing as the water-version!

I combined both backgrounds with the "Big & Bold Happy Stamps and coordinating Dies" and the second one also with the "Wonderful Day Stamps".
The stamped parts of the sentiments were heat embossed both times.

*~*~*~*~*~*~*~*

For the first card I coloured the front of the happy DieCut word with the same two blue watercolour pencils and added water like I did for the background. To speed the process a bit I used my heat tool to dry the water this time.
I cut and adhered my polka dot background on the cardbase.
Then I adhered the blue "happy" layer on the shadow DieCut of the word and glued it with little dimensional pads on the card front.
To finish the bold word I covered it with glossy accents (like the background dots).
While this layer was drying I stamped and heat embossed the Everything anf adhered it also with dimensional pads on the front of the card.
(The dimensional pads were necessary cause of the dimensional drops of the background.)
 
Finished blue "Happy Everything" card.
Detail of the blue "Happy Everything" card - DieCut with glossy coating.


*~*~*~*~*~*~*~*

For the second card I coloured the stencil edges in rainbow colours, spread over the page.
I mixed the water and the pigments as I did on the other card, but during the drying process there developed darker rings on the outside. I like this optic, cause it reminds me more on the look of the waterdrops. So I just added the clear Nuvo Drops.

Rainbows always makes me happy, So I included this feeling in my sentiment and heat embossed "Oh happy day!" on a banner-strip of Vellum.
The watercolourd drops were mounted on a bit bigger piece of light green cardstock and then on the card base.

Colourful "Oh happy day!" card
Detail of the different elements.

*~*~*~*~*~*~*~*

I think this technique works great with a stencil with small open areas, but maybe a bigger  pattern will give also great results?! Let's give it a try!
I hope I inspired you to stretch your creative muscles and try (or re-use) a not-so-popular-technique with your stencils! - Would love to read in the comments, what you tried out and which results you got!


Have a great and creative day!

Greetings from Wiebke

Thursday, 28 February 2019

DT Inspiration - Celebrate with the Scattered Polka Dots Stencil

Julie here with a couple of cards using the Scattered Polka Dot stencil.
ScatteredPolkaDotStencilPP

My first card started off quite awhile ago with an experiment using some glossy white embossing paste on black card. The panel had been put in a box with some other backgrounds for use later, so I retrieved it and decided to have a play around with it. Here's the result.


The white on black looked a little stark so I decided to use my Copics to colour the dots to create a jazzy panel. If you have a steady hand you could just colour freehand but I decided to replace the stencil over the embossed panel before adding colour. Your stencil can be cleaned with a little Copic blender solution or isopropyl alcohol in a well ventilated space and away from naked flames. 
The finished panel was then added at a jaunty angle to a plain white A6 card, trimmed and the sentiment from Birthday Sentiments stamped underneath. My die cut SMILE was cut from red and white card and glued together so that the red peaks out slightly, before adding to the panel.

This second card uses the same stencil but the background was created using a homemade wreath builder jig and Distress Oxide ink. (Here's the link to set of instructions if you would like to make one.)


Basically all I did was ink through the stencil onto a panel of white card, then rotated it in the jig and repeated using a different colour.  I did add some fill in dots freehand but when I was satisfied with the coverage I trimmed it down to size and popped it behind a die cut frame. 
Finally the sentiment was stamped using the same Birthday Sentiments set.

So that's all from me and I hope you've been inspired to think about using your stencils in a different way.