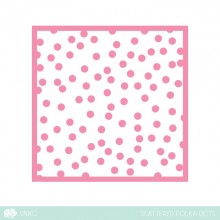
Julie here with a couple of cards using the Scattered Polka Dot stencil.
My first card started off quite awhile ago with an experiment using some glossy white embossing paste on black card. The panel had been put in a box with some other backgrounds for use later, so I retrieved it and decided to have a play around with it. Here's the result.
The white on black looked a little stark so I decided to use my Copics to colour the dots to create a jazzy panel. If you have a steady hand you could just colour freehand but I decided to replace the stencil over the embossed panel before adding colour. Your stencil can be cleaned with a little Copic blender solution or isopropyl alcohol in a well ventilated space and away from naked flames.
The finished panel was then added at a jaunty angle to a plain white A6 card, trimmed and the sentiment from Birthday Sentiments stamped underneath. My die cut SMILE was cut from red and white card and glued together so that the red peaks out slightly, before adding to the panel.
This second card uses the same stencil but the background was created using a homemade wreath builder jig and Distress Oxide ink. (Here's the link to set of instructions if you would like to make one.)
Basically all I did was ink through the stencil onto a panel of white card, then rotated it in the jig and repeated using a different colour. I did add some fill in dots freehand but when I was satisfied with the coverage I trimmed it down to size and popped it behind a die cut frame.
Finally the sentiment was stamped using the same Birthday Sentiments set.
So that's all from me and I hope you've been inspired to think about using your stencils in a different way.


Pretty cards!
ReplyDeleteLovely cards! :)
ReplyDeleteFun! Love the different looks from one stencil.
ReplyDeleteI am in AWE of that first card!! The lovely use of the embossing paste is so cool!
ReplyDeleteStunning!!!
ReplyDeleteTwo fabulous cards using the fun dot stencil, Julie!
ReplyDeleteBrilliant showcase of this stencil Julie. Shows just how versatile it can be.
ReplyDeleteFabulous, Julie ! Love the vibrant coloured dots over the black panel but you stole my heart with your second card, I LOVE this combo of colours. Fantastic ! x
ReplyDeleteI didn't know that you could color embossing paste with alcohol markers. Always enjoy learning of another way to use my supplies!
ReplyDelete