Showing posts with label Embellishments. Show all posts

Wednesday, 13 February 2019

DT Inspiration - ink blending with a Stencil

Hello, Wiebke here with two moncromatic birthday card in a Clean and Simple style. Both created with a stencil and some ink blending.


Today I'll show you how to improve your blending skills with the help of a Stencil.
 
Do you like ink blending? - NO?
Why?- The smooth blending between different colours is always difficult!

When you agree with these answers, I may have a great solution for you: Take a stencil, Inks and a Blening Tool and give it a try!
I'm sure the result will show you, blending is something you can learn.

When you aren't familiar with blending, you can start with a pure mono cromatic card to get a feeling for this kind of "colouring" and add more colour(s) in the next projects.
The colours should be different shadings of the same colour family (like light blue + blue + darker blue) OR colours adjacent in the colour wheel (like yellow + orange + red / yellow + green + blue / a whole rainbow of 6 colours).

I love to blend with Ranger Distress Oxide Inks, cause they blend really easy and they forgive you a lot...!
This doubles the positive effects for this blending-project!
Mandala stencils are perfect for beginners, cause we'll work in circle motions, fitting to this form.

The first step you have to do is to avoid any movement of the stencil. I love to take a soft painters tape to fix stencil and paper together. When you finished the blending it's easily removable without any tearing of your finished Mandala.

Now we start the blending. It doesn't matter if you start with the lightest or the darkest of your colours and also, if you start on the inside of the Madala or the outer edge.
But it's important to move your hand in easy circle motions over the paper and add the colours - one after another. You can add colour several times to get a darker shading.

Avoid spressing  the Blening Tool with lots of power into the inkpad - the more ink is in the blending foam the worse the blending will be.
To get soft colour-gradients, layer the colours one over another on the edges of every area.

So, what's the miracle?
Stencils have little areas with crisp edges and you won't see smaller "uneven" blendet areas as clear as on plain paper. The white lines and areas are so helpful and seperate the areas for you!

After you have cut the finished paper down to the size of your cardbase, you can start to embellish the Mandala with little pearls, rhinestones, enamel dots,... or selfmade dots (Stickles, Nuvo, ...)
You also can conceal tiny little mistakes with your embellishments if necessary.

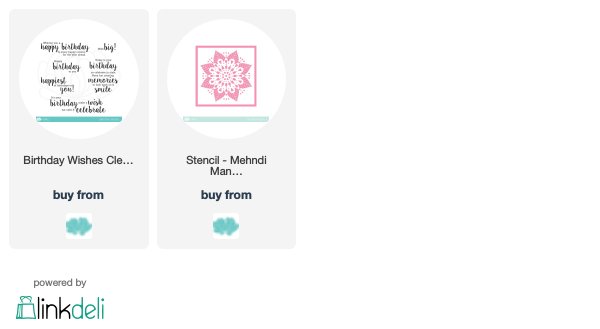
For both of my cards I used the same Stencil - Mehndi Mandala and a Sentiment stamp - out of the NEW set Birthday Wishes.
But ee how versatile these products and how different the cards are!


The yellow Mandala reminds me of flowers or sunrays. I think we all crafe for spring and warmer temperatures, right?

For the Mandala I used hese Oxide Inks: squeezed lemonade, mustard seed and wild honey.
I used little epoxy stickers - a round one for the center and little drops for the heart-shaped areas and some little pearls to embellish the Mandala.
The sentiment is stamped on an extra piece of paper and then cut and folded to a little banner. To get a bit dimension it's adhered with 3D pads.


The blue Mandala looks like a snowflake or icy crystal. Perfect for birthdays in the cold winter time!
 
 
As embellishment I used clear and blue mini rhinestone drops and insert them in the pattern of the Mandala.


I stamped my sentiment with the darkest of the Oxide Inks and added immediatelly clear embossing powder.
For the Mandala I used these Oxide Inks: mermaid lagoon, broken china, tumbled glass.


Hope you like this kind of project and you'll give it a try!

Happy greetings from Wiebke


Wednesday, 5 September 2012

More Super FREE Butterflies...

Hey!

I'm back today with a couple more cards to share using the Super FREE Saturday BRIGHT Butterflies collection. If you missed out on all the fun when it was released you can check it out HERE.

A little recap of what's included...


There are 3 patterned papers and a sheet of full colour printable embellishments. Now for a couple more cards using them...


For this card I matted my card base with one of the patterned papers and then I used matching Pool Party card stock from SU! and die cut a couple of butterflies. I stamped the sentiment from FONTiments - Birthday and added some hand stitching.


For this next card I used another of the patterned papers paired with a sentiment banner which is one of the full colour embellishments...


This is a good card layout to use scraps of patterned papers. I just cut a small strip to adhere to my card base then added a plain layer of white CS to the right hand side using foam adhesive so that the paper could be seen. Printed & cut the embellishment banner and added a few rhinestones.

Here is a close up of the sentiment banner...


That's all from me today, I will be back again tomorrow with another product focus. Thanks for stopping by.
Hugs

Sunday, 26 August 2012

My Style 2 Ways...

Happy Sunday!

I hope your all having a lovely weekend and that you enjoyed the festivities here on the blog yesterday?! I certainly had fun & I'm looking forward to receiving emails for DT applications and seeing projects linked to Super FREE Saturday. If you missed yesterday's post check it out HERE.

Today I have a few more cards to share with you which use the BRIGHT Butterflies Super FREE Saturday collection available to download HERE. I have made 2 cards which I think show my style but in 2 different ways...

On this first card I have stepped out of my comfort zone a little but still kept it CAS to a degree...


I started out by using Rose Red Ink to splatter lightly across my card blank - Arrrgh! Messing up a lovely white background - totally out of my comfort zone! 

I then used stripes of the patterned paper from the collection and CS matching the colours to create a 'Washi Tape' kind of effect. I tore the edges on the right hand side - which is a step out of my comfort zone! Tearing = messy which doesn't fit in my neat organised head! LOL! 


Next, the sewing machine was dusted off & I stitched a zig zag down the edge! A very rare occurrence on a card, mainly as I'm in a rush and can't be bothered to add stitching! I then layered the butterfly cut out from the journal card with a die cut butterfly. I enlarged the journal card quite a bit to get the butterfly bigger. Some rhinestones dotted about & a sentiment from Extra Time finished the card off nicely! 

For my next card I used the current Freshly Made Sketches sketch I used on Friday seen HERE and HERE. I kept the card super CAS & super simple ...


I selected the floral paper from the collection and used 2 Martha Stewart Butterfly punches to punch out the butterflies. The sentiment is from Pure Florals: Gerbera. 


Yet each card is clearly different in the degree of Clean & Simple I feel both cards represent my style of card making & I love them both! 

I hope you've enjoyed today's projects & that I inspire you a bit when it comes to making cards?! Thanks for stopping by today.
Hugs
Supplies:

Stitched Butterfly Card

Card Stock: WPlus9 White, SU! Pool Party, PTI Spring Rain
Ink: SU! Rose Red
Stamps: Uniko Studio Extra Time
Accessories: Uniko Studio Super FREE Saturday BRIGHT Butterflies digital collection, Sewing Machine, Rhinestones, PTI Butterfly Die


Wonderful You Card

Card Stock: WPlus9 White, SU! Pool Party, PTI Spring Rain
Ink: SU! Pumpkin Pie
Stamps: Pure Florals: Gerbera
Accessories: Uniko Studio Super FREE Saturday BRIGHT Butterflies digital collection, Martha Stewart Butterfly Punches, Rhinestones

Saturday, 25 August 2012

Introducing ...

Hello & Happy Weekend!

Today is a fun day on the blog as I have a few NEW things to tell you about & some announcements too. It's going to be a rather long post, so grab a cuppa & get ready for the fun to begin...

The first thing I want to introduce to you is a NEW monthly feature here on the blog / website called ...


Super Free Saturday is what is says ... Super Fun & most of all FREE!

Each month I will have a small digital collection available to download from the website HERE. The collections will vary as to what they will contain but I can ensure there will be plenty for you to create a project or two. The Super FREE Saturday collection will be featured here on the blog & also by the Design Team on their blogs.

How about I introduce you to the first Super FREE Saturday collection ...


BRIGHT Butterflies collection features 3 patterned papers seen on the left of the image above and 6 printable elements. All the files are JPG and can be used in Adobe Photoshop or Word so you don't have to be an expert at digital stuff just print & make. Simples! 

Like all the digital collections available from Uniko Studio the colours match Stampin' Up! colours. The colours in this collection are Bashful Blue, Pool Party, Rose Red, Daffodil Delight, Pumpkin Pie & Regal Rose.

How about a few projects to give you some ideas ...


If you are a regular blog reader you will know that I LOVE butterflies! I also love tags & labels so I couldn't resist putting one in the collection! The sentiment is from Extra Time & fits nicely into the section on the label.


This next card uses one of the journal cards ...


I used a punch from SU! to add the spiral note book definition to the journal tag & a mini bulldog clip to hold it together. The Sentiment is from FONTiments - birthday.


I've one more card to share with you today before the Design Team share their projects using the collection ...


This card uses the stitched butterfly paper & one of the banners. I enlarged the banner slightly & adhered it to the card using foam adhesive.


The design team have some projects to share too so pop on over to their blogs to see how they've used Bright Butterflies ...


To make the whole Super Free Saturday a bit more fun I have added a linky tool for you to add a link to your project thats on your blog, online gallery & if you don't have either of them drop me an email with a photo of your project & I'll add it to the Uniko Studio Flickr pool HERE and link it up for you! I'd really LOVE to see what you all do with the FREE stuff!


Now, you'd think that was enough excitement for one day but, I've got more! Yep, it's all happening here at Uniko Studio! 


Calling all card makers, scrappers & crafters!! Uniko Studio is looking for some more talent to add to it's team of designers. It's open internationally so have a look at the details, it could be you I'm looking for! 

To limit the length of this post the details of the Uniko Studio Design Team Call is HERE which can be found on the page tab at the top of the blog & there is also a link on the left sidebar.

Well, I think that's enough for one day, I've worn myself out with all the excitement today! I look forward to receiving all your DT applications & looking at your Super FREE Saturday creations! 

Thanks for stopping by today.
Hugs
Supplies: 

Just Because
Card Stock: WPlus9 White, SU! Regal Rose
Ink: Memento Tuxedo Black
Stamps: Uniko Studio Extra Time
Accessories: Super FREE Saturday BRIGHT Butterflies, PTI Limitless Layers Dies & Hibiscus Burst Satin Ribbon, Rhinestone

Sending Best Wishes
Card Stock: WPlus9 White, SU! Regal Rose
Ink: Memento Tuxedo Black
Stamps: Uniko Studio FONTiments - Birthday
Accessories: Super FREE Saturday BRIGHT Butterflies, SU! Punch & Mini Bulldog Clip, Mini Rhinestones

Simply The Best
Card Stock: WPlus9 White, PTI Autumn Rose
Accessories: Super FREE Saturday BRIGHT Butterflies, Foam Adhesive & Mini Rhinestone