Showing posts with label Pure Florals Gerbera. Show all posts

Thursday, 4 June 2026

Colourful Gerbera Throwback

Happy Throwback Thursday.

Today I am sharing another card we made at one of the May Uniko Stamping Retreats. I originally made this Pure Florals Gerbera card in August 2012 and this is the original.


Originally I used Papertrey Ink colours, I loved these inks back in the day. And the sentiment is from a retired Uniko stamp set called Fontiments.

Here is my remake...


This time I used Concord & 9th inks in Honeysuckle, Oceanside and Buttercup. I also used a stamping platform so I could add a little highlighting to the flower centres using Spiced Cider which I dabbed onto the stamp using a dauber. 


My trio of panels are slightly larger too, this was a good choice as I could stamp more of the flower. My sentiment choice is from Floral Vines

It was fun recreating an older card. Especially with the advancement of paper crafting tools, I didn't have a stamping platform back in 2012. Plus, I've learned some fun techniques over the years too. 

That's all from me today.

Crafty Hugs


Monday, 3 February 2025

Pure Florals Inspiration with Uniko Alumni Brand Ambassador Rahmat Gouse


Happy Monday.

I hope you are enjoying all the festivities and inspiration so far, and I am delighted to be starting the week off with some Alumni Brand Ambassador inspiration from the one and only Rahmat Gouse.

Rahmat joined Uniko in September 2016 having been a avid follower, participant in Uniko challenges and customer. Rahmat soon fell in love with the Pure Florals collection and worked her beautiful colouring skills with the florals. 

So I am delighted to share some more stunning cards Rahmat coloured and made especially for today...


I love Rahmat's colouring, and fussy cutting, and creative talent brings these florals to life. Be sure to follow Rahmat on Instagram HERE if you use that social media platform.


Products Used
Pure Florals Rose
Pure Florals Gerbera
Anniversaire Arts Décoratifs
Sentiments Outlined
Stencil - Quilted
Stencil - Stylised Floral


A big thank you to Rahmat for joining us today and taking part in the Uniko 13th Birthday Celebrations. Be sure to leave some comment love here on the Uniko blog and across social media platforms if you use them. I will be randomly selecting comments through the month to win some prizes.

Crafty Hugs


Sunday, 2 February 2025

Uniko Birthday Inspiration Through The Years - Part 1


Happy Sunday.

I'm here today continuing the 13th Birthday Celebrations with some more inspiration. It's took me a while to think of a theme of some kind, but I finally got there. The other week, I finally got round to cateloging all the Uniko Releases, I will have a product PDF available soon. 

So I thought I would share a birthday card using a product that was released that year. Today I am sharing three cards using a product from 2012, 2013 and 2014. I've then made a new card inspired by the original.

Let's have a look.


First up 2012 and I chose this card using Pure Florals Gerbera. Pure Florals Gerbera was originally released in July 2012 and is the longest standing product that is still available in store when it's not sold out! 

It remains to be one of the most popular florals in the Uniko collection and a favourite of mine too. So it was a delight to ink it up again for my post today. 

Here is how I was inspired by my original card.


I started out by ink blending similar colours to what I used on my original card onto a small panel. The colours I used are Buttercup, Marmalade and Honeysuckle. I adhered the panel to my card base using foam adhesive.


This time I decided to use the outline Gerbera, stamping in black ink and die cutting with the coordinating die. Again, I adhered the flower to the card using foam adhesive and stamped a celebrate sentiment from Everyday Sentiments.

To finish I embellished with some Papertrey Ink buttons like my original card and some sparkly tiny rhinestones. It was lovely to use buttons again, it's been a very long time since I did! 


Next up is 2013 and I chose this card using Bright Butterflies.


And here is how I was inspired by it... 


I was surprised, but also delighted that I kept this little note page die. This time I die cut it from white card and opted for a kraft card base. I also chose one of the other Bright Butterflies to stamp and this time layered with a die cut vellum butterfly.


Eleven years and my favourite trio of colours, all be it a different brand are still going strong! I used the Happy sentiment from Christmas Sentiments and the Birthday from Everyday Sentiments


Lastly for today I chose Explosion! clear stamp set released in 2014 and this card to spark new inspiration.


For my remake I decided to use some ink smooshing instead of a halftone background. The original background on my inspiration card was created using Background Builders Round In Circles and an array of blue colours to create an ombre effect. 


For my ink smoosh I stated with Buttercup, then Honeysuckle and then Oceanside. I stamped the Explosion! and again used the coordinating die to cut the explosion out. 


This time I added the OMG! sentiment from the Explosion! clear stamp set and coloured with Copic Markers. I adhered the explosion using foam adhesive and again I used the Happy sentiment from Christmas Sentiments and the Birthday from Everyday Sentiments

I really enjoyed revisiting some older much loved Uniko products and looking back at my old makes, techniques and paper crafting supplies. 

I hope that you have enjoyed the inspiration today and this little look back at Uniko's past. I will have more to share in this mini series throughout the month.

Crafty Hugs


Sunday, 24 December 2023

Uniko's Customer Top 10 of 2023 - Number 8

Happy Christmas Eve! 

Are you all set for 🎅🏻 I think we are almost sorted. Today is also my father in laws birthday, so it is celebrations all round. Anyway, I'm back today with Uniko's Customer Top 10 of 2023 - Number 8. If you missed what it's all about, then check my post HERE.

Today we head to the 1920's Art Deco era with Background Blocks Arts Decoratifs being the 8th most purchased clear stamp in 2023.


This Background Block made its debut in February 2020 with a Christmas version being added to the collection in July of this year. The Art Deco style remains a popular trend with its beautiful geometric lines lending themselves wonderfully to masculine makes. 

Today I decided to put a floral spin on this block and paired it with an all time favourite flower, Pure Florals Gerbera.


I usually like to add colour to the block, but today I decided to keep it black and white. I stamped the block and then decided to change the size of my card, so I simply trimmed the block out and adhered it to my 12.5 cm square card panel.


For a quick colour option I used the solid bloom from Pure Florals Gerbera and used a dauber to blend the colours from Buttercup, Sorbet in the centre to Honeysuckle and Dragonfruit to the flower petals.


This series is a good opportunity for me to make a start on my birthday cards for 2024, so I chose the Happy Birthday sentiment from Simply Said.

Thank you for stopping by & enjoy the inspiration during this often busy period. Remember it's okay to take time for you. I have certainly enjoyed the small crafty break away from the chaos and over excitement there is in the house today! 

Crafty Hugs


Tuesday, 18 July 2023

Brand Ambassador Inspiration - Pure Florals: Gerbera

Good morning, 

Steph here today and for my Uniko Brand Ambassador post this month I wanted to use a big floral but keep the colour scheme simple with just pink, black and white / silver.

My first card uses black ink to stamp Uniko Pure Florals: Gerbera onto pink card. I teamed this with Uniko Sentiments Outlined which I filled in using a silver gel pen. Finally I added pink enamel dots and layered the panel onto a black card blank.


Next up I swapped the pink card for black and the black card blank for a light pink one! I heat embossed the Gerbera using white powder, masked and stamped the leaves before heat embossing those in white too. I added light pink pencil to the floral and stamped and heat embossed the sentiment using light pink powder. The sentiment is from Uniko Doodle Flowers stamp set. 


My final card for today sticks with the colour theme but this time I have used white watercolour card and brushed three areas with pink. I over stamped these with Gerbera's and layered the panel onto a black card blank. I heat embossed Uniko Birthday Sentiments onto black card and adhered this to the panel. 

Thanks for joining me today and I hope you have gained some ideas for creating with Uniko Pure Florals: Gerbera stamp set yourself. 

Much love

Steph x

Tuesday, 20 September 2022

Brand Ambassador Inspiration - Techniques with Embossing Glaze

 Hi there,

 do you love Embossing Powders as I do?
Have you ever heard of the special one called Embossing Glaze?
If not - it's a translucent but colourful Embossing Powder with some more special effects.

In the first card I made for you I created amore or less translucent rainbow with the "Rainbows & Clouds" Stencil over a very soft pastell blue background.
But first I had stamped and heat embossed the "Large Background - French Script" in white.
After the melting process of the powder I used the Stencil again and added some fluffy clouds with white Embossing paste.
The sentiment "Time to celebrate the good times" is one of the "Birthday Sentiments", heat embossed in a fitting light blue.
For some more interest I added some clear little rhinestone drops as raindrops.


The second card has a very similar layout, but I stamped the script background in gray (without embossing), just added the rainbow with the same Embossing Glaze colours as before.
I planned to add embellishments in the same colours, so I took twelve white sequins, added sticky ink to them, dipped always two of them into one of the powders and heathed them up. Then I put a drop of clear glitter glue to them.
The sentiment of the "All Occasions Set #3" is stamped with the same Ink I used for the background on Vellum and then I added the same colour of Embossing Glaze to it (hickory smoke).
I glued the edges of the Vellum on the backside of my layer and embellished it with my "special gems".

For the next card I created a blended Sunset scene and added plants and shadows with different stampsets - "Just because", "Happy Days" and "Natures Treasures I".
The lighter shadows of the black embossed plants are made with the Glazes.

For this glazed "Pure Florals - Peony" I added several times Embossing Ink with a Dabber and then thin layers of Glaze.
I was able to mix and match the colours with every layer and then melted every one on top of the black stamped flower.
With every layer it went darker and more intense! So beautiful! Love this kind of "watercolour look".

 
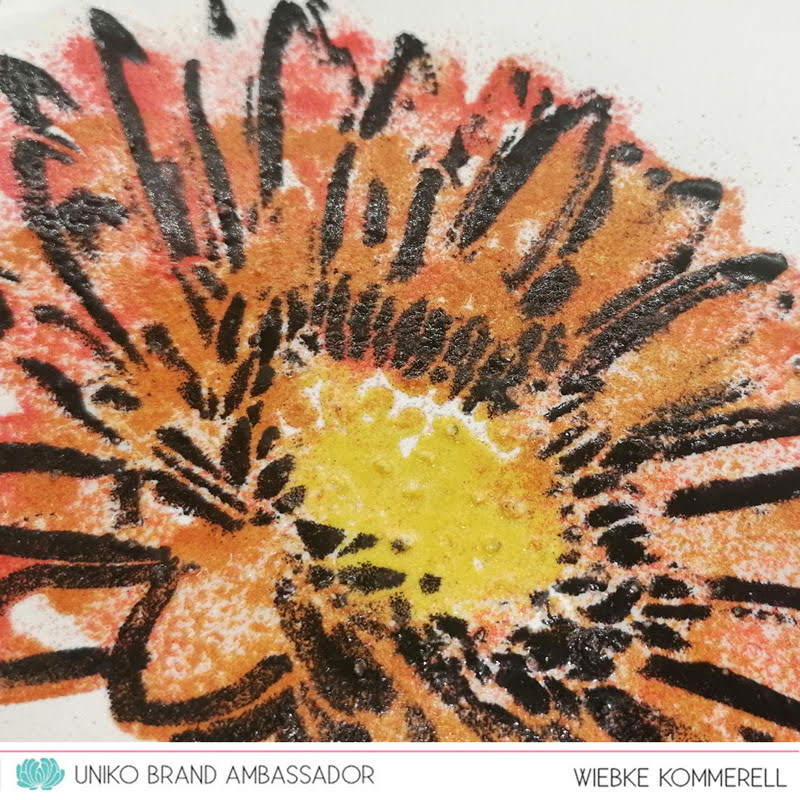
The last card is a bit different to the peony. I used the "Pure Florals - Gerbera Stencil" and one of the Peony sentiment stamps.
This time I didn't add the embossing Ink with a dabber (I tried, but it was too much ink for a stencil and turned out in a mess!), instead I used a pen and "coloured" the areas very quick and in a distressed way. I added and mixed the red and orange Glaze powder for the petals and the yellow for the center.
Melted every layer and as a last step I added black Embossing Powder to get some wild and dramatic lines to the flower.
Love this big and bold flower!

Hope I brought you some ideas to use the Glazes in different ways... there are many more to try!
For those of us who love Embossing Powders they are a very "nice-to-have" and "test and try" medium to play with.

Greetings from Wiebke

Monday, 19 September 2022

Brand Ambassador Inspiration : Pure Florals Gerbera

 Hi there!

Hannelie here with inspiration using the ever so popular Pure Florals Gerbera stamp and die set !


On the first card I used :


On the second card I used :


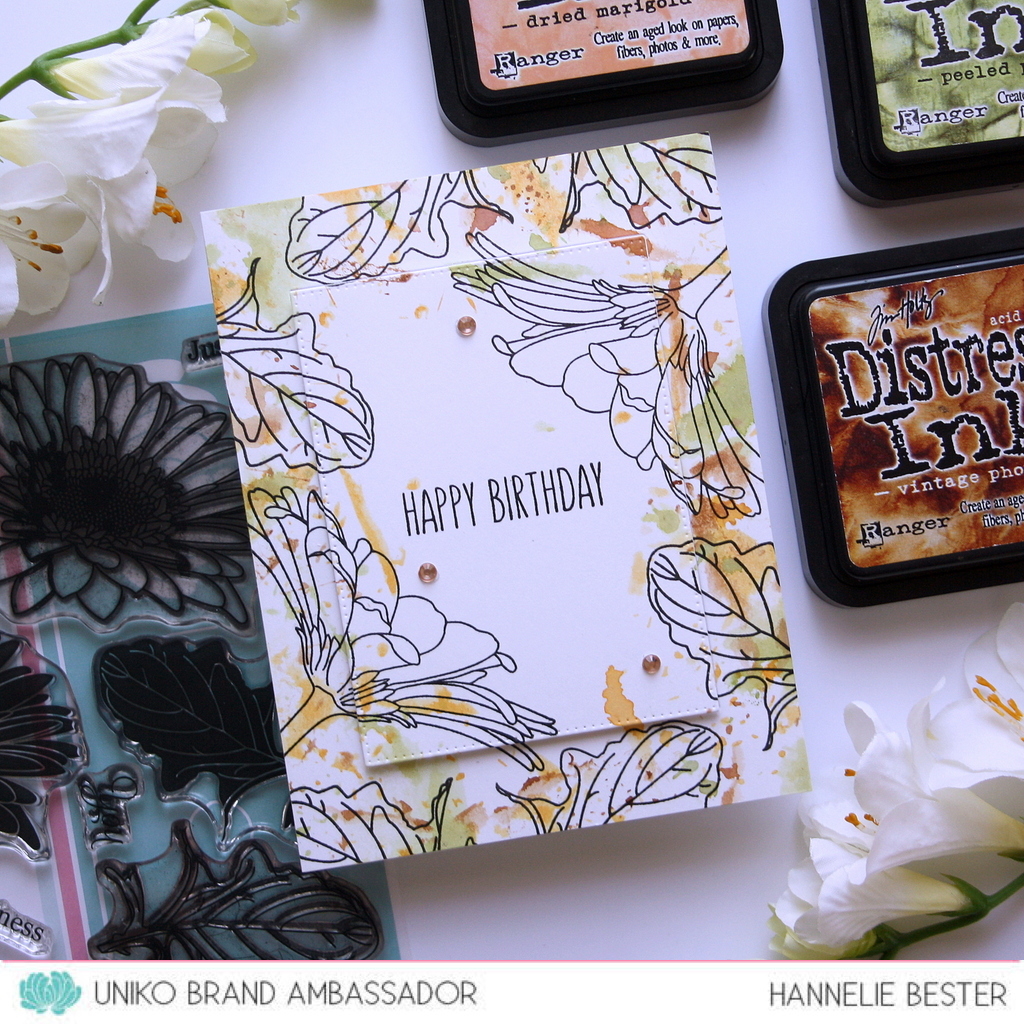
On the second card I used the background block splatters to stamp the watercolors all around the edge of the card. I first applied the distress ink to my glass cutting board, spritzed it with water, and stamped with the three colors randomly around the edge. After it dried completely I used my Misti to stamp the outline images and sentiment. To add some interest, I used a die to cut out the rectangle and popped it up with some craft foam.


On the third and last I used :

I sometimes think we forget to use all the stamps from a floral set. The leaves in such sets are so valuable especially during Autumn when we love to make cards showing off the the splendor of the season !

Thanks for popping in today! 

I do hope you leave here inspired   ♥

Hannelie


Sunday, 6 February 2022

Uniko 10th Birthday Celebrations - Featuring Alumni Sandie Munro


Happy Sunday! 

Today it's the second of our Alumni features and we're welcoming back Sandie Munro and her classic CAS style. Sandie joined Uniko in November 2014 and was welcomed with open arms as she took on the task of organising and revisioning the Uniko Challenge.

I know you all love her cards and will be as delighted as we are that she's joining in with our 10th birthday celebrations.

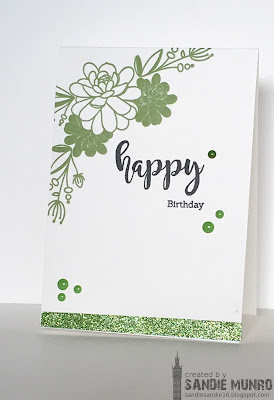
First let's take a look at the card she chose to CAS(E) made way back in March 2015. It showcases the beautiful Pure Florals Gerbera stamp set.


The design layout was switched round for her new interpretation using Happy Succulents as the focal image and a greeting from Birthday Sentiments.


How amazing are both cards! Bound to sparkle up your creativity and a real treat for all CAS lovers. We'd love to see your cards, maybe inspired by Sandie, in our Linky Party .

Huge thanks for dropping by today.

Stay safe and keep crafting!

Jane

x

Thursday, 25 February 2021

Introducing... Stencil Pure Florals Gerbera


Hello & Happy Thursday!

Welcome to Day 1 of the 9th Birthday February 2021 Release product introductions. If you missed any of the sneak peeks, you can catch up HERE, HERE and HERE. I am kicking off with a highly requested stencil to add to the Uniko Pure Florals line up, the Gerbera! 

Pure Florals Gerbera was Uniko's first Pure Florals stamp set and it remains a popular sell out in the shop, hence why it is currently unavailable. Converting the flower to a stencil took a little bit more work, but it was totally worth it and I am over the moon with how it has turned out. 

Let's have a look at it in action...


Super clean & simple for my first card today as this Gerbera is born to shine and have full focus! As you can see it is quite a delicate stencil, much like the previously released Uniko Pure Florals Chrysanthemum Stencil


To keep some of the detailed parts of the stencil from moving and not needing to use stencil adhesive, I inked from the centre of the flower outwards using my brush. In doing so I achieved a really nice depth to the pink colour with minimal effort! 
With Mother's Day fast approaching, I added the Happy Mother's Day sentiment from Simply Said. I was also heavily inspired by Uniko's brand colours.

For my last card today I went a little less clean and simple...


This time I decided to pair the Gerbera with the Large Background French Script to almost create a pretty piece of paper that has been written over the top with fancy handwriting. 


I used the same colours to ink my stencil and the same process of inking from the centre outwards to achieve the beautiful depth of pinks. 


I thought it would be nice to show you the size of the stencil against my card. It is a 6 x 6 inch stencil, so like the Chrysanthemum it is grand and will take centre stage on your projects. Below is a comparison with the Pure Florals Gerbera stamp! So quite a size difference.


Short and sweet from me today, but I think this Stencil pretty much speaks for itself in its beauty! I'd love to know what your thoughts are regarding the stencil and how you would use it. I might even select a random comment to win a prize.


Don't forget, there is still time to join in on the Birthday Linky Party HERE and also enter to WIN the HUGE Prize HERE!


Until tomorrow, thank you for stopping by.

Crafty Hugs