Friday 29 November 2019

Uniko Challenge Reminder - #56 Christmas, optional twist Tree


Hey!

The Uniko Brand Ambassadors and our Guest Designer are here today to remind you about the November/December 2019 Uniko challenge.

We have a seasonal theme of Christmas for this challenge and if you want to add more to the challenge go with our optional twist of Tree.


Challenge Guidelines:

* You can use any products/stamps to enter the challenge, but we do LOVE to see you use your Uniko products. Plus, there is an extra chance to win a prize if you do ;)

* Email entries welcome, just email a photo of your card to bev@uniko.co.uk and I will add it to the Uniko Flickr gallery and link up!

* Share the challenge graphic in your post and link back to the challenge if possible ;)


We're super delighted to have Nonni joining us for this challenge as our Guest Designer and she has created a sensational and very atmospheric Christmas card to inspire you to play along.


The Uniko Brand Ambassadors have been super busy creating cards to give you ideas and spark your creativity. 

Hannelie


Jane


Rahmat


Sarah P


Wiebke


Now, if you need more incentive to play along with the challenge here are the details of the prizes.  

THE PRIZES
  • Main Winner Chosen By The Brand Ambassadors - £25 eGift Certificate
  • Random Twist Winner - £5 In Stock Clear Stamp Set of Winners Choosing
  • Random Uniko Stamps Winner - £5 In Stock Clear Stamp Set of Winners Choosing
  • Top 3 Chosen By The Brand Ambassadors - 150 Loyalty Reward Points

You've got plenty of time to play along with this month's challenge. The deadline for submission is midnight (GMT) on Friday 27th December 2019 (7.00pm EDT).


Thursday 28 November 2019

Brand Ambassador Christmas Card Inspiration

Hi, it's Julie here with a little bit of Christmas inspiration at Uniko.
Whilst trying to come up with some different ideas for Christmas cards, I remembered this card using a turnabout stamp and it also reminded me of this card I made a couple of Christmases ago.
Here is my take, using some Uniko goodies.


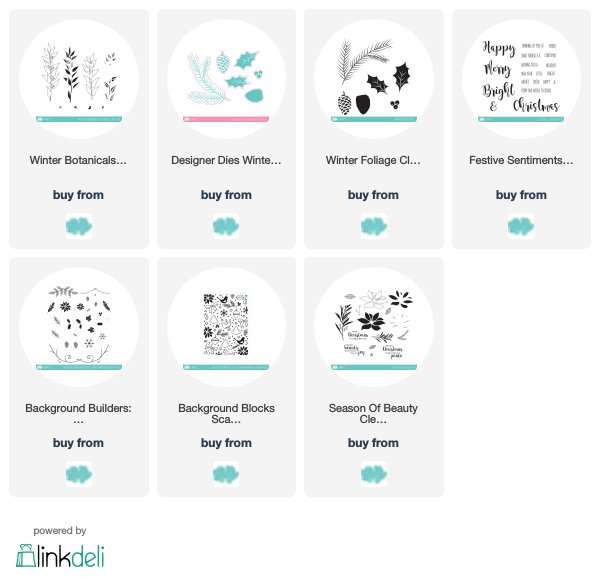
Using a black, A6 side folding base card and after giving it a healthy going over with my anti static pad, I arranged some foliage radiating from the centre of the front panel. I used the large solid stem from Sweet Broom and the small spray from Season of Beauty, then infilled with part of the evergreen bough from WinterFoliage
Using my Misti, I stamped with Versamark then heat embossed with white EP. Flipping the card 180', I repeated the process. To fill in the other corners I placed the same elements on the card front but had to carefully mask off some of the stems so that they didn't overwhelm the centre and repeated the process of stamp then emboss. There was a slight gap in the centre which I filled with some small evergreen boughs from the Background builders: Vines Winter Additions.
On a panel of Vellum I stamped the Merry Christmas from Festive Sentiments and embossed with red EP, then added a die cut thin frame before adding it to my base card. It looked a tad empty, so added a couple of punched holly sprigs before adding Nuovo drops for some more a festive finish to the base and vellum panel.

My second card uses the Background Block- Scandinavian Christmas stamp. 
The different images on this stamp reminded me of decorations on a Christmas tree, so I decided to make a card along those lines.
Here is the end result.


To begin, I took a scrap of acetate my OH was throwing away, and made a stencil by die cutting a simple tree shape.
Using my MISTI, placed an A6 red card base under the stencil, secured it with the magnets and stamped the image with Versafine and used some fine gold EP to heat emboss. The sentiment in the same gold EP is from the Pure Florals Poinsettia set. When finished, I noticed there was a mark in the card stock along one edge, so although I wanted it to be a OLcard, I had to trim the panel down and add it to another base card. Waste not want not! I also decided to add some Fired Brick and Vintage Photo DI to give my red card stock a little more richness

Hope I've given you some inspiration for those Christmas cards you need to make. Happy crafting.


Monday 25 November 2019

Brand Ambassador Inspiration - Tone on Tone Christmas

Happy Monday .......

I hope you've had a lovely weekend ...... only four more to go before Christmas! I can't believe it's December next weekend!

It's Linda here this morning, with a couple of ideas for some pretty tone on tone Christmas cards.
If you're like me, and still have cards to make ...... how about these


I don't use coloured cardstock for stamping on very often, but when I do I always love the results, especially tone on tone designs.

I've used the new Season of Beauty Clear stamp set from the last Uniko release, for both of these designs.

First up ...... festive red and gold, always a winner for Christmas designs


I used Hero Arts Cranberry cardstock and stamped with Crimson Red Versafine ink.


This stamp set includes layering stamps to create a beautiful poinsettia.  For this design I just used the full image stamp (the first layer) and the outline stamp.
I stamped the flower all over a piece of cardstock using the red ink, and then I used the outline image and stamped this in a gold ink, over the top.


The layering stamps are really easy to line up, but as you can see I wasn't too bothered if I got the outline slightly off


I sprinkled a little bit of Chunky White Embossing Powder over the top and heated this from underneath, to give a little snowy effect.

A few dots of gold glitter glue to the centres of the flowers  .......


And I finished with the sentiment stamped on a piece of white cardstock, die cut, and then attached to the front using foam pads.


For the second design I went for a pretty turquoise shade ....... Hero Arts Mist cardstock, and stamped with the Catherine Pooler Aquatini ink


I started with the sentiment this time ...... heat embossed in white


I then stamped the pretty foliage branch all over the card using both the large and the small versions


A few dots of white enamel accents here and there, and some sparkly gems.


And I finished off with some white ink sponged around the edges of the card, and a little touch of the Aquatini, before matting it onto a white cardblank.

Thanks for popping by ..... enjoy the rest of your day and have a great week.
I think mine's going to be spent making Christmas cards!

Cheerio until next time ......

Sunday 24 November 2019

Brand Ambassador Inspiration - Christmas cards or not

Bonjour !

It's Izzy here today with 3 cards using products of the last release. Needless to tell you that Christmas approaching, I make cards to add to my Christmas stash. Nevertheless, I'm quite often inspired by challenges around in blogland.

Lately I had a card to make as a DT for a challenge asking to use torn paper and I made the following card thinking that Uniko was still the sponsor. Here is the card.


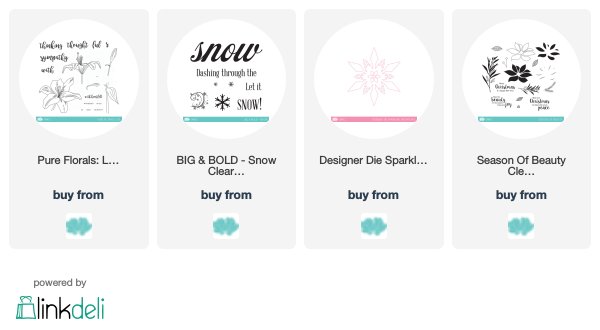
I love this big and gorgeous Designer Die Sparkling Snowflake so I used it as the star of the show for this card. I cut one in a blue Vellum paper and another one in white paper that I covered with glitter.


I torned a strip in a white paper that has glittery incrusted and I adhered it to a blue iridescent panel. I foam mounted this panel on the double blue card and I adhered the snowflakes on top. The sentiment from the BIG & BOLD - Snow Clear set is stamped and heat embossed with white puff embossing powder.


For the following two cards, I've been inspired by the Twofer card challenge. They asked us to use holiday greenery, and I thought that the greenery of the Season of Beauty set was perfect to illustrate this challenge and to show the versatility of the Uniko stamps.


First I've made this Christmas card. I die cut a square in a red card stock and I stamped and gold heat embossed the sentiment on it. I cut a square in Vellum and I adhered the red square on top. 


Both squares are adhered on the card. And to finish I coloured the berries with a red metallic gel pen. I love how the gold embossed greenery shine over the black card. 


Although exceptionally we were allowed to enter two of the same occasion cards, I opted for a totally different occasion for the second card. This greenery is also beautiful on its own and I found it perfect for a grief card.

I cut a square panel and I stamped the greenery with a very dark grey, then I stamped the sentiment from the Pure Florals - Lily set. 


On the double white card I embossed a square slightly bigger than the free panel. I cut a strip of Vellum that I fixed to the back of the panel with adhesive tape. I did the same with a thin black ribbon. To finish I flat adhered this panel over the white card and I glued a little black knot on the ribbon.

Thanks so much for stopping by and I hope this Christmas or not post will help you to use your Uniko supplies for different occasions. Just try and you will see what results !

Have a great crafty week !


Friday 22 November 2019

Brand Ambassador Inspiration - Dramatic Outlines

Hello Sarah here, with my latest Inspiration post ... I was tempted to go festive makes but in the end couldn't resist playing around with the Pure Florals range and showcasing how fantastic these outline images can be without traditional colouring techniques.

Instead I've created multiple backgrounds using a combination of Distress Inks and Oxides which I think sets the floral outlines off a treat! I can't remember the exact colours I used as I just grabbed some of my favourites and started blending away.

These quick and easy makes use sentiments from the Simply Said Blocks range. The floral outlines are stamped using Versafine Onyx Black ink before embossing with clear embossing powder and just off the edge of the card panel so no masking required.

First up using the Pure Florals: Peony


...  a couple using the Pure Florals Lily


... and finally Pure Florals Rose


I hope you like these ideas and thanks for stopping by the blog today. 


Friday 15 November 2019

Uniko Challenge #56 - Christmas, optional twist Tree

Hey!

Welcome to the November/December 2019 Uniko Challenge.


We hope you'll find our main theme of Christmas really useful at this time of year and maybe be tempted to play along with our twist of TREE too.

We're really excited to have the brilliant and awesome card maker Nonni as our Guest Designer for this challenge. Check out her amazing card:


How spectacular is that?

And of course the Uniko Brand Ambassadors have also created spectacular inspiration cards to kick start your creativity and get you in the mood to play along.


Are you ready to play?

Well, just in case you need some more incentive to play along with the challenge here are the details of the prizes.
  
THE PRIZES
  • Main Winner Chosen By the DT - £25 eGift Certificate
  • Random Twist Winner - £5 In Stock Clear Stamp Set of Winners Choosing
  • Random Uniko Stamps Winner - £5 In Stock Clear Stamp Set of Winners Choosing
  • Top 3 Chosen By DT - 150 Loyalty Reward Points


You've got plenty of time to play along with this challenge. 
The deadline for submission is midnight (GMT) on Friday 27th December 2019.


Hugs,


Wednesday 13 November 2019

Brand Ambassador Inspiration - Stenciled Shadow-techniques

Hello!

I always love to discover new ideas how to use my supplies!

When  I saw some cards with a stamped off-set technique I got the idea to try this also with stencils.
So there we go!

:-:-:-:-:-:-:-:-:-:-:-:-:-:-:-:-:-:-:
 

For my first card I used the "Christmas Folk Snowflake Stencil" (was released one year ago).
I added the light grey pumic stone Distress Oxide Ink with my blending brush.
Then I moved the Stencil a bit, adhered it again with the tape and added the red fired brick with another brush.

To finish the cad I cut my stenciled paper fitting to my cardbase, adhered both ends of a piece of ribbbon on the backside, Then I added the stamped sentiment from the new released "Festive Sentiments Outlined" Set on a smaller piece of cardstock, I cut it in a size, fitting to the snowflake pattern. 
In this sentiment I coloured two of the letters with a marker and added an almost white (kind of creamy) enamel dot.
The layer is adhered on the cardbase with a 2 mm dimensional tape.
 
Stenciled shadow with "Folk Snowflakes"
Stenciled shadow with "Folk Snowflakes" - Detail
:-:-:-:-:-:-:-:-:-:-:-:-:-:-:-:-:-:-:
For the other card I used the technique with a little switch.
I stenciled the snowflakes of the "Let it snow" Stencil in tumbled glass Oxide Ink - again I used my brushes. Then I added Distress micro Glaze on the same position with a small blending tool (I store this one in the glaze container).
Removed and cleaned the stencil, put it back with a little movement and fixed it on the paper again. Then I added the darker shade blueprint sketch Oxide Ink.
The shadow is now more "behind" the first layer of colour.
To finish the card I framed my snowflake layer with a light blue paper and added a strip of the same colour in front with the stamped sentiment of the "Stunning Snowflakes". I also added some white snowflake sequins.


Stenciled shadow with "Let it snow"
Stenciled shadow with "Let it snow" - Detail
:-:-:-:-:-:-:-:-:-:-:-:-:-:-:-:-:-:-:
Hope you like this techniques and give them a try soon!

Hugs & greetings from Wiebke