Thursday 31 January 2019

Uniko Challenge #51 Reminder - Anything Goes, optional twist Love

Hey!

The Design Team and our Guest Designer are here today to remind you about the January/February 2019 Uniko challenge.


We have such an easy challenge at the moment - Anything Goes. But for those of you that like to add an extra layer then go with our optional twist of LOVE.


Challenge Guidelines:

* You can use any products/stamps to enter the challenge, but we do LOVE to see you use your Uniko products. Plus, there is an extra chance to win a prize if you do ;)

* Email entries welcome, just email a photo of your card to bev@uniko.co.uk and I will add it to the Uniko Flickr gallery and link up!

* Share the challenge graphic in your post and link back to the challenge if possible ;)


We have the wonderfully talented Trina P joining us again as our Guest Designer for this challenge.

Guest Designer - Trina P

How incredible and utterly magnificent is her card!


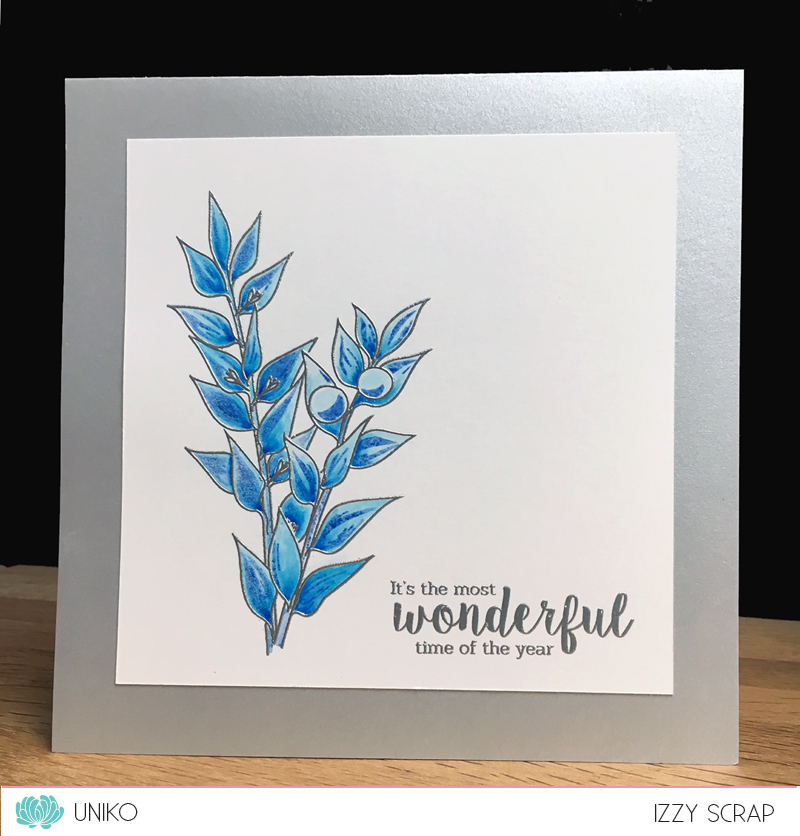
Difficult to follow that but here's some sample cards from the Uniko DT. We hope they will inspire you to play along.


Now, if you need more incentive to play along with the challenge here are the details of the prizes.  

THE PRIZES
  • Main Winner Chosen By the DT - £25 eGift Certificate
  • Random Twist Winner - £5 In Stock Clear Stamp Set of Winners Choosing
  • Random Uniko Stamps Winner - £5 In Stock Clear Stamp Set of Winners Choosing
  • Top 3 Chosen By DT - 150 Loyalty Reward Points

You've got plenty of time to play along with this month's challenge. The deadline for submission is midnight (GMT) on Friday 22nd February 2019 (7.00pm EDT).


Wednesday 30 January 2019

ABC Duck!

Hey!

I've had so much creative energy these past few weeks, in-between feeling poorly with a cold flu bug that is - urgh! It's an annoying bug for sure, because just as I start to feel well again, the next day my sore throat is back and my glands in my neck are swollen again. 

Anyway, enough of my woes, how about a card using the recently restocked Sweet Baby clear stamp set...


It's been AGES since I inked up any of the stamps from Sweet Baby, so I started out by stamping the duck and teddy from the set and set about colouring them with my Prismacolor pencils. This helped me formulate an ideas as to how to use them. 


The alphabet dies are Stampin' Up! Little Letters and I just chose a few pastel card scraps to die cut them. The scalloped edge is a Pretty Pink Posh die. 

I decided to keep the card sentiment free for now, as it is suitable for a few baby/child occasions and the sentiment can easily be added on the lower section of the card if needed.

That's all from me today, the team will be back tomorrow sharing some more Uniko Challenge #51 inspiration with you.

Thanks for stopping by today.
Hugs


Monday 28 January 2019

DT Inspiration - One stencil, three cards

Good morning, Julie here to share some cards made using one of Uniko's stencils and some sentiments. 
I wanted to try a few techniques that I came across whilst surfing the internet over the Christmas break.
Here's the first using the Stylised Floral stencil.


I started by taking an A6 panel of white card and blending some Distress Oxide ink in Fossilised Amber, Abandoned Coral and Picked Raspberry onto it. Once my panel was dry, I placed the stencil over it, securing with some painters tape, arranging it so that the pattern was evenly distributed over the inked panel. Then using an ink blending tool, I inked through the stencil with Seedless Preserves Distress Oxide, and put it to one side to dry, Distress Oxides seem to take a little longer to dry than the regular Distress Inks.

Now to the sentiment, which is my favourite combination of die cut and sentiment strip. I took the Hugs and Kisses stamp from the Pure Florals - Peony set and stamped and embossed it on black card with Versamark and white EP. To get the middle &, I masked off the hugs and the kisses and stamped it after the first part, embossing with white EP. The birthday wishes is also from the Pure Florals - Peony set and was stamped just the same as the other elements. When finished, I trimmed the card to make the thin strip.


My die cut Sending was cut from gold glitter paper and the same black card, the glitter one attached just slightly to one side to give a shadow effect. I wanted to add some sequins or gems but mine didn't match the gold of the die cut, so I made some from the glitter paper by punching some circles then adding some Glossy Accents to them and leaving to dry. A simple way to make your own glitter gems!

The second card uses the same stencil but this time I used a mask to create a focal point.


Using a hexagon die to cut a mask, I added a soft rainbow of colour with a selection of Distress Inks.
Placing the stencil over the mask, I then inked again but a little more firmly to get the rainbow effect.
Removing mask and stencil, I stamped the sentiment from the Pure Florals - Peony with Versamark and heat embossed with white EP. I restamped again a couple of more times as I was using my Misti, to create a deeply embossed effect. The sentiment strip was stamped in black on white and popped up on pads. A few sequins complete.

My final card is a slightly more involved design but uses essentially the same technique of masking, deep embossed sentiment and sentiment strips.


The happy is from the Festive Sentiments set, as is the wishing you and the birthday is from the Birthday Sentiments set.

OK, that's all from me, hope you've been inspired to make more of your stencils!

Sunday 27 January 2019

DT Inspiration - Pretty Butterflies

Hello there, it's Sarah P sharing some butterfly DT inspiration today.

Despite having nothing in particular to inspire me in creating these cards as my mojo is a little lacking at the moment I decided to simply grab my Uniko stamps and flick through to find any sets I didn't feel I'd shown enough 'love'!

I didn't need to flick very far through them to reach the English Country Garden Butterflies set.

It's an older one but totally classic so first up 2 very similar cards using simple stamping of the 2 mini butterflies, using both the outline and block images although slightly off-set with the embossed outline stamping on the first one.


I've teamed both of these cards with sentiments from one of the brand new sets; Wonderful Day, released just before Christmas.

The stamping on this next one uses both outline and block images but with a tone on tone effect, which isn't showing up too well in the photo. I've also applied some tonic shimmer to the butterflies and IRL I can assure you it really does shimmer!


To create a completely different look with the same set I've used the Emboss Resist technique for the next 2. 

First up the butterflies are stamped with Versamark ink before heat embossing with white embossing powder from Hero Arts. Once the embossing was cool I've blended Distress Inks over the top in probably my favourite colours (Mustard Seed, Fossilised Amber, Spiced Marmalade, Ripe Persimmon, Picked Raspberry and Wilted Violet). 

To finish I white heat embossed a collection of sentiments from the BIG & BOLD Hugs and BIG & BOLD Hello sets


I was having so much fun with the resist technique with inky blended background that I decided to make another card, this time using the larger butterfly stamp and blending the colours in reverse. 


Hopefully you'll feel inspired to have a little crafty play time with your own stash. Have a fabulous weekend and thanks for calling by the blog today!

Sarah x


Wednesday 23 January 2019

Uniko Guest Designer - Faye Wynn-Jones

Hey & Happy Hump Day!

This month I've had the honour of Faye Wynn-Jones from Stamping Fluffnstuffas our Guest Designer :) 


FayeWynnJonesCopicInstructorUK


I first met Faye at Happy Stampers Festivals and along with being a lovely person she is a Copic Marker whizz! 

Faye shared a couple of cards using Pure Florals: Peony HERE earlier in the month and is back today on the website blog HERE, sharing another duo of cards. Be sure to head on over for some Copic Floral inspiration.

Hugs 


Monday 21 January 2019

DT Inspiration ...... Artist Trading Coins

Happy Monday .......

Good morning ..... it's Linda here.  I hope you've all had a nice weekend.  Did you do anything nice? The family and I were across in the UK for a wedding.  Hubby's brother and fiancee finally tied the knot.  They've only been together about 25 years so I think it was time don't you.  We had a lovely day.  It's always nice to see the whole family.

Anyway ..... lets get the week started with a little crafty project shall we.  Artist Trading Coins ..... another fun addiction craze to hit the craft world.

Just in case you haven't heard about them, AT Coins are a little like ATC's (Artist Trading Cards) ..... except they're round!!
They're little pieces of artwork created to swap or trade.  They can be any theme or colour you like, they can have whatever you fancy putting on there, you can make them in sets or single ones it's entirely up to you.  They just have to be two and a half inches in diameter ...... cute or what! And just like ATC's you need to put your details on the back ...... title of AT Coin, the date, your contact details etc.

I like to make mine in sets ..... usually in 3s, and I love to use these pre-cut MDF circles. They make a fabulous base to work on.


I've used the gorgeous Pure Florals: Peony from the last Uniko release on these, and I love how they've turned out (will I be able to give them away, that's the question!)
Even though the flowers in this stamp set are quite large, they're still perfect to use on smaller projects.

I started by giving the MDF coins a quick coat of white gesso, and then blended colours of  PaperArtsy's Fresco Finish Acrylic Paints over the top.  Once this was dry I stamped the peonies using Versamark Ink and heat embossed them in white. 


I used more acrylic paints to colour the blooms ..... mixing the paint with a little water to create a touch of shading.  The heat embossing acts as a resist to the paints so you don't loose any of the detail when you add the colour

The words I've used are from Uniko's Originally Organic stamp set.  I used stencil tape to mask off the parts of the sentiments that I didn't need, and then stamped the rest onto plain white card and fussy cut.


I simply attached the words onto each of the AT Coins and then finished off by splattering a little metallic gold ink and some white paint onto the backgrounds


As I said earlier, my coins are MDF, but they don't have to be.  Why not try cutting some two and a half inch circles from plain cardstock, or if you have a punch that size even better.  If you want them to be more substantial just layer two or three together and then have some fun creating your miniature works of art.

Thanks for popping by ..... enjoy the rest of your day and have a great week.

Cheerio until next time .....

Sunday 20 January 2019

January 2019 Non Release Blog Hop WINNER!

Hey!

I'm popping in today to announce the Winner of the January 2019 Non Release Blog Hop! With the help of random.org the lucky comment was no.77 and the lucky commenter is...


Congratulations Sathya! Please send me an email to bev@uniko.co.uk no later than 31st January 2019. I will then get your prize in an email to you!

Thank you to everyone that joined in on the fun and took the time to comment and hop along with us :) 

Next month we are celebrating our 7th Birthday, with the FUN beginning on the 1st and a NEW Release on 11th! 

Hugs


Friday 18 January 2019

Uniko Challenge #51 - Anything Goes, optional twist Love

Hey! 

Welcome to the January/February 2019 Uniko Challenge. 


This is our first challenge of 2019 and we've chosen a really simple theme to ease you back in - Anything Goes. But for those of you that are already into the swing of 2019 challenges and would like more to get your teeth into we've added the optional twist of LOVE.


We have the amazingly talented and super creative Trina P joining us as out Guest Designer for this challenge. I'm sure you all know of her and are just as impressed by her cards as we are, but it's always worth a visit to her blog to check out what's she's been up to.

Guest Designer - Trina P

Aww! How cute is that!

The Uniko DT have also made cards to inspire you to join in and play along.

Bev


Linda


Wiebke 

Are you ready to play?
Well, just in case you need some more incentive to play along with the challenge here are the details of the prizes.
  
THE PRIZES
  • Main Winner Chosen By the DT - £25 eGift Certificate
  • Random Twist Winner - £5 In Stock Clear Stamp Set of Winners Choosing
  • Random Uniko Stamps Winner - £5 In Stock Clear Stamp Set of Winners Choosing
  • Top 3 Chosen By DT - 150 Loyalty Reward Points

You've got plenty of time to play along with this challenge. The deadline for submission is midnight (GMT) on Friday 22nd February 2019 (7.00pm EDT).

Hugs,

Thursday 17 January 2019

Simple Stamping and Stenciling~Uniko Studio DT Inspiration

Hello,

Carol here, 'giving some love' to a variety of my Uniko stamps and stencils today; hopefully, my trio will make you smile and, perhaps, even offer a bit of inspiration (which would thrill me to bits and pieces!).  Nothing super-duper fancy, as you'll see; rather, just a whole lot of inking, a bit of dry embossing and a curved panel die cut.  Clean and simple; the kind of card to make when time is at a premium.

As all three share the same design, I'll just dive in with the basic ingredients and 'how-to'...

Card 1
Lower panel: base of Tattered Rose Distress Oxide 
(I used Bristol cardstock for this section; Michael's heavy weight cardstock for the top portion)
StencilNature's Treasures II; Tea Dye Distress Oxide
Sentiment:  Simply Said


Card 2
Lower panel: dry embossed (hard to see in the photo, but definitely there)
StencilFun Flower
StampFun Flower; stenciled with Ripe Persimmon Distress Oxide; leaves with Versafine Clair)
Sentiment:  Simply Said


 Card 3
Lower panel: base of Distress Oxides - Tumbled Glass, Stormy Sky, Chipped Sapphire
StencilLet It Snow; Stormy Sky Distress Oxide
StampStunning Snowflakes; various ME pigment inks (I love pigment inks...just sayin')
Sentiment:  Simply Said; and 'Winter' from Stunning Snowflakes


So...I'm ready with two birthday cards and one 'just because'! Easy to recreate! If you decide to give these techniques/styles a go, do let me know! I'm always on the lookout for dazzling inspiration and ways to elevate the way I use my Uniko stamps, stencils and dies!

Have a wonderful day!!


Sunday 13 January 2019

DT Inspiration - stenciled resist technique

Hello, Wiebke here to share some inspiration with you!

For today I made a colourful "sound card" with a stenciled resist technique.
The Uniko products I've used are the Equaliser stencil and a combination of the stamp sets Life is a Song & Most Wonderful.
:-:-:-:-:-:-:-:-:-:-:-:-:-:-:-:-:-:-:-:-:-:-:
Magic of Music
Magic of Music - Detail
:-:-:-:-:-:-:-:-:-:-:-:-:-:-:-:-:-:-:-:-:-:-:

About this card & technique:
For the stenciled resist technique I first applied a clear embossing paste through the Equaliser stencil onto the paper. After it was complete dry I started adding the colours - this time I used Zig Clean Color Real Brushes and blended them with a moisturised cloth and a brush and some water.
(When you don't have clear embossing paste you can also use clear embossing powder - apply the embossing ink through the stencil and then add the powder - don't forget to use a antistatic powder tool before!)

The embossed areas will stay white / in the colour of your paper and pop out of any colourful background!
Some colours tint clear products - if you want it really clear you need to check the combination of your materials before!
In this case it was ok for me to get some staining, it reminds me more to the old "Winamp Music tool"! ;-)

I cut down my paper in the shape of the equaliser blocks (with a similar edge around) and adhered it to my cardbase. The sentiment is a combination of two different Uniko stamp sets - Life is a Song & Most Wonderful,
To repeat the clear part of the background I used clear embossing powder for the first part of my sentiment "believe in the magic of" and white powder for the "music" and the note.
To add some sparkle, I drew a slim line around the sentiment with the amazing Sakura Gelly Roll - clear star pencil.

The headphones are a die cut (sorry, I have no brand name). I combined a normal black and a pearlescent black paper to get some optical dimension. The shells are adhered on the card with some 3D pads, for the rest I used a strong fluid glue.


To get the full list of all used supplies please hop to my blog.
:-:-:-:-:-:-:-:-:-:-:-:-:-:-:-:-:-:-:-:-:-:-:-:-:

Musical greetings from Wiebke.


Saturday 12 January 2019

January Non-Release Design Team Blog Hop & GIVEAWAY!

Hey & Happy Weekend!

Welcome to the first Non-Release Design Team Blog Hop & GIVEAWAY of 2019 - Whoohoo!! For those of you who are new around these parts I will explain what this post is all about...

Here at Uniko HQ it is just myself behind the screen, blogging, designing, packaging stamps & orders through the Uniko online shop, customer service and all the things in between. I *usually* release new product every other month for a number of reasons, but mainly so I can keep up with everything!

On non - release months like this month I like to set myself and the Design Team a challenge to look back at a previously released product and give it some more love. 

Usually I choose just one product that was released the previous year or a once favourite that hasn't seen much air time. However, like last January, I have given the Design Team a huge task of choosing to use their favourites from those released in 2018. Thats a total of 23 new clear stamp sets, 2 re-introduced clear stamp set, 14 stencil designs and 2 new designer die collections to choose from!

Let's see what the design team favourites are and how they have been inspired to use the products. Be sure to comment along the hop for your chance to win a Uniko £25 eGift Certificate. You have until Midnight (GMT) Saturday 19th January 2019 to comment, winner will be announced Sunday 20th 2019.


Bev
(Using Wonderful Day & sentiment from Pure Florals: Peony)


Izzy 
(using Winter botanicals: sweet broom)


(using Beautiful)


(Using Pure Florals = Peony and Wonderful Day sentiment)


Linda
(using Nature's Treasure's II stencil & Just Because)


(Using Pure Florals: Peony)


{Coming Soon}


Sarah P
(using Beautiful)


Wiebke 
(using: Natures Treasures II Stencil - (2018/05) & Pure Florals - Rose Stamps (2017-12))


WOW! Wasn't that a fun hop. It certainly looks like all the florals were a BIG hit with the Design Team. 

I'd LOVE to know what your favourite product released in 2018 was, be sure to add it to the comments, I might just pick a random winner to win their favourite ;)

Thanks for joining in on the fun.
Hugs