Showing posts with label Broken Lines stencil. Show all posts

Saturday, 17 April 2021

Brand Ambassador Inspiration - Birthday cards

 Bonjour !

Izzy here with inspiration cards combining products of the last release as well as older products. 

April is for me the busiest month in my agenda in terms of birthdays. I have at least one birthday to celebrate each week, so I really need to make cards !

As I still had all the products of the last release on my desk, I played with them again.


For my first card I used the Framed- Floral Vines set that I really love, it is so versatile. On a white card stock I stamped the frame and I heat embossed it with gold embossing powder. Then I coloured it with markers. 

When I wanted to mount this panel on the double white card, I found that something was missing so I played with the little circles from the Floral Vines set and I stamped and gold heat embossed them on the double white card and I coloured them with colour pencils. 

I foam mounted the framed panel on the double card. I stamped and gold heat embossed a little frame on a piece of Vellum. I fussy cut it and I glued it on the panel. To finish I stamped and I heat embossed the sentiment from Simply Said Blocks and I adhered it on top of the Vellum.


I went for a masculine look for my second card. If you know me, you know how much I love blue. So when I received the last release, I couldn't resist and I stamped the Background Blocks Solid Wonky Stripes in shades of blue. And of course I immediately saw some waves and I knew that I wanted to combine it with the Nautical Treasures sail boat. 

To make a visual game with lines, I also stamped some thin stripes on the sails with the Background Blocks Pinstripe

To finish my card, I stamped and white heat embossed the sentiment (from Simply Said). I foam mounted the wonky stripes background on a double card and I also foam mounted the sail boat previously fussy cut.


For my last card, I opted for old goodies : the Spring botanicals Tulip stamp set and the Broken Lines stencil.
Some time ago I received a gift card for a Art Supplies shop and I finally bought the Minc foil applicator machine. Only recently I bought some gel to use it with stencil. I decided to try it as a background for these beautiful tulips, and I really love the result.

I used the no-line colouring technique for the tulips and I played with my colour pencils to give them some dimension. The broken lines background is foam mounted on the double red card and I adhered the tulip with little adhesive foam squares.

Now here is a sneak peek of the birthday card I made for the Less is More challenge that starts today...


I hope that my cards will inspire you to make your birthday cards stash growing and/or to come and play along at Less is More.

Thanks so much for visiting today. Have a fabulous weekend, stay safe and get crafty !


Sunday, 16 June 2019

Stencil Sunday

Hi it's Julie and welcome to another Stencil Sunday at Uniko.

Today I'm going to share a couple of cards made using a wreath builder/ turnabout stamping jig that some of you may be familiar with. If you haven't got one here is a link to how to make your own.
Some of you may even have used one with your stamps to create some fun cards, like I did here, but this time I'm going to use a couple of stencils. I was inspired to have a go after seeing this Jennifer McGuire video.
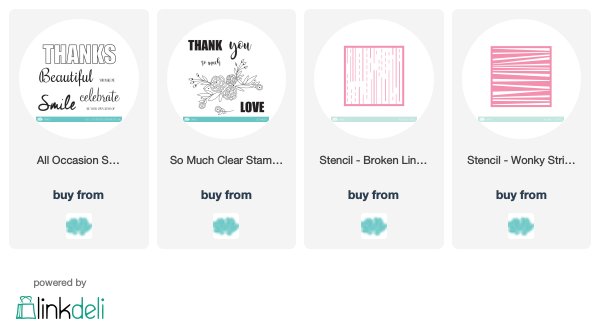
My first card uses the wonky stripes stencil and the So Much clear stamp set.


I used Distress Inks in a rainbow palette and rotated the card panel under my stencil every time I changed colour.

  1.  Tape your wreath template down so that you can place the stencil over the top, securing across one edge to create a hinge. This will allow you to lift it and move the card panel around.
  2. Place your card panel to be inked, into the template, ensuring that at least one corner will fit snugly into the bottom left corner.
  3. Lay a piece of tape or masking paper over the area you don't wish to add ink to.
  4. Ink the area required then rotate the square to the next corner and ink again.
  5. Continue until you have completed all 7 rotations.

If your square is the same size as the jig then you will end up with a space for stamping in the centre, but don't worry if it is not completely symmetrical as you can always add a die cut over the middle!

Once my panel was complete, I mounted it on a slightly larger piece of black card stock and then onto a 5" square white card base. From matching card, I cut a circle and stamped my sentiment in black before mounting it up on foam over the coloured panel.

This second card uses the Broken Lines stencil and a more restricted palette.


I followed the same technique, rotating my card panel in the jig and keeping the stencil in the same place with some tape. This is a slightly larger panel so you have to be careful and remember which corner you rotate! A larger white die cut circle completes with the addition of an ombre coloured thanks from All Occasions Sentiments #6, fussy cut after stamping and colouring with Copics.

The panel was mounted on a panel of  matching paper and then onto a 5" square base card.

You can use a rectangular panel but you need to be aware that the pattern will be slightly different depending on where you place your corner!
 The link to the You Tube video shows you much better than I can describe so it may be a good idea to check it out if you need a more visual tutorial.


That's all from me for today, I hope I've inspired you to look at your stencils differently and have a play!


Saturday, 20 April 2019

DT Inspiration - Don't like colouring? ........ no problem!

Happy Easter weekend .....

It's Linda here, with a little DT inspiration for you.
I'm using a couple of my Uniko favourites (I have a few!) ..... the beautiful Pure Florals - Peony clear stamp set and the Broken Lines stencil.


I think we all love floral images and me personally, the bigger the blooms the better!

Now I'm not the best at colouring in my stamped images, I do like to use Distress Inks, I love using my ZIG Markers, and I have dabbled occasionally with watercolours and Copics. Sometimes I get it right, sometimes I don't!
So .... if you tend to stay clear of pretty florals just because colouring in is not really your thing, why not leave those beautiful blooms simply black and white.  Colour in the easy bits, and add a touch of colour to the background like I've done here.

I stamped the large peony onto a piece of white card just with a black ink, and then fussy cut around it


I added a wash of colour to the leaves using ZIG Markers and a waterbrush, and the palest wash of pink to some of the petals, you cn hardly see it's there.

I then used the Broken Lines stencil and one of the Oxide inks to add some detail and colour to the background .....


I added a sentiment, stamping part of it directly over the stenciling and the rest onto a banner which I attached underneath using foam pads


I then attached the bloom onto the card, again with foam pads to add some dimension.

To finish off, I used a glue pen over some of the stenciled lines and then sprinkled over some fine crystal glitter for a touch of sparkle


I love the finished look ..... what do you think?

Thanks for popping by ..... enjoy the rest of your day and have a lovely Easter.

See you again soon ......


Products used:
Stamps: Pure Forals - Peony clear stamp set (Uniko)
Inks: Versafine Clair - Nocturne; Distress Oxide - Spun Sugar; Delicata - Golden Glitz
Other: Broken Lines stencil (Uniko); fine crystal glitter