Showing posts with label Flower. Show all posts

Thursday, 5 October 2023

Introducing... Remembrance

Welcome to Day 3 of the product introductions for our October Release. 

Today I am introducing a new floral and one I have had a few requests for. I'm please how this turned out and I am hoping you will love it as much as I do. So I am now super pleased to introduce you to Remembrance.


This clear stamp set features two individual poppy flowers and two sentiment options, perfect for Armistice Day in November as well as sympathy cards. But really I think poppies can be used all year round and for all occasions.


I kept my first card clean & simple stamping one of the poppies on a white panel and colouring simply with Stampin' Blends. I then adhered the panel with foam adhesive. I used one of the sentiments along the edge of the raised panels. 

My second card today is another that the lucky people who attended my make & take made at Crafterama Lincoln on Sunday. 


I was inspired by a technique Alumni Brand Ambassador Hannelie used HERE. It's a fab idea when you want to add colour, but don't have the patience to colour! 

I used the Stencil - Scattered Polka Hearts and a trio of Altenew inks to create this Bokeh effect. I could have been a little softer with the inking, so that the poppy stood out a little more. But still I am pleased with how it turned out.


That's all I have today using this set, but I know you'll be seeing more of it soon! If you missed Day 1 and Day 2 product introductions, you can catch up HERE and HERE. I will be back tomorrow with one more  introduction. This clear stamp set, along with all the products being introduced this week will be available 9pm GMT Saturday 7th October 2023. 


Crafty Hugs


Wednesday, 16 February 2022

Brand Ambassador Inspiration - Special Birthday-surprise for Bev!

Hello there,

today, I have something special to share with you!
Something what makes me proud and thankful and happy in the same time!

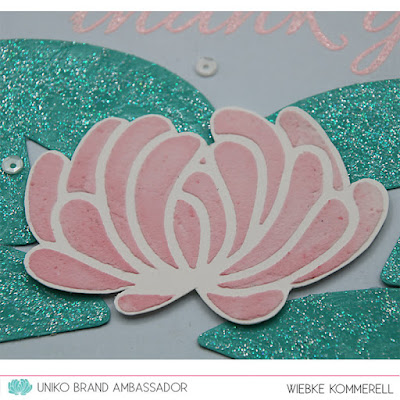
KomMa-designed_K1-1459_WaterLily#3
Sneak Peek of the Mini UNIKO Logo flower

It's a planned surprise for Bev, so I just put the directe link to the post on my KomMa-designed Blog to avoid her peeking into the post, before I put it online at 11:00!
😉


Hope you like it!

Greetings from Wiebke

Sunday, 19 April 2020

Brand Ambassador Inspiration - Daffodil experiments

Hello!

Wiebke here to show you some versatile spring flower cards!

Although Easter time passed by, there is still time for spring botanicals, right?
In my garden they just started to bloom...


Sometimes I love creating cards without a sentiment!
So I can use them for many different occasions: (easter), birthday, get well or just for you....
I only have to grab a sentiment I like to finish the card just in the moment when I need it!

You have the choice to put a small sentiment on the front on a little banner or in a block-optic or also a bigger sentiment on the inside of the card.
That's so much more flexible and you always have cards for many different occasions in "your stash".


Can you imagine how I created these beautiful Daffodil-impressions? 
Cause: Uniko has stamps,stencils and dies... but no embossing-folders in their product list yet... 

I created my own Embossing-panel with a stamp and 10 layers of Embossing Powder!

Jennifer McGuire showed this technique in the newest Online Card Class "Spring Card Camp".
I'm not sure who developed this technique - she herself or someone else and when it was used first time (new or old technique?)
But I think, everybody has tried to score a stamped image by tracing stamped lines with an embossing ball-stick before... that's almost the same technique, but to create thick layered images and emboss with them and a cutting machine is a much more elegant and also more accurate way to get almost the same result!

And you can repeat the embossing process again and again...
That's woth the work you have to invest with layering 10 times embossing ink and powder and heat it up every time. I recommend a stamping tool for this process - it's so much easier to get a good layering with one of them!


The first card I made with an impressed embossed flower.
I coloured the impressed lines of the flower with Zig Real brushes and added some water for a good colour gradient to the areas beside.

A still missing (small) sentiment will be placed right between the green ribbons on the right side of the flower or (when I'll use a bigger one) on the inside of the card.
I hope I can use it as a birthday card and don't need many get well cards soon. (Nobody should be in the situation to need one during the next weeks! So please stay save!)


Look how detailed the embossing is!

The second card is made with an invers impression of the embossing panel.
I softly added some Distress Oxide inks (mowed lawn and  fossilized amber) with a blending tool. The colours outside of the expressed lines make such a soft colour effect!

This card is very simple and a bit plain right now. When I know who will get it, I think I will add a banner or rectangle piece of paper with the sentiment in the left bottom third of the flower layer.
Probably with the Simply Said Blocks in one of the two Oxide Ink colours I used for the flower.


Look how detailed the embossing is - also as expression!

Hope these cards inspire you to try this technique too!

When you use an embossing powder that doesn't "want" to layer thick enough - don't give up! Use this first try, colour it as usual and make a card out of it.
And then make a second try of the layering with another embossing powder (and maybe another brand of paper).

My first one was clear powder from Ranger - and it stayed flat. Why? I still don't know!
The second try was with a white powder from efco (one of my oldest powders in the box) on a different paper. And this turned out great!
I will use it some more times to get impressions and then I will use it as "normal" embossed image on a card - so nothing is wasted! :-)

Have a good time, stay at home and healthy and be creative!

Hugs from Wiebke

Sunday, 10 February 2019

Introducing... Background Blocks Pinstripe & You Are, Yes You

Hey!

Welcome to the LAST day of our 7th Birthday & February 2019 Release product introductions. The last four days have been so fun and colourful. If you have missed any of them you can catch up HEREHEREHERE and HERE.

I'm back again today with my guest designer and the design team to show you LOTS of inspiration! This time we are introducing a new Background Blocks Pinstripe & Yes, You  clear stamps...


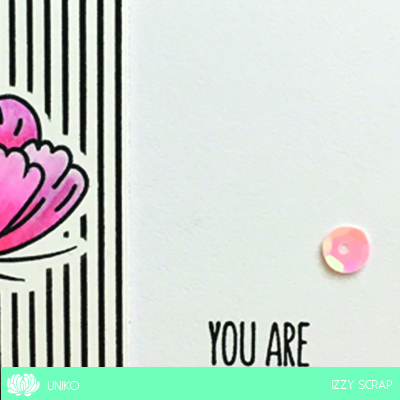
Background Blocks Pinstripe needs no explaining really as it is what is says, a block of yummy pinstripes! 


Do you recognise this little doodle sketch I shared on Instagram back in August last year...? This has turned into a mini clear stamp set called 'You Are, Yes You'. 

Now, 'You Are, Yes You' is a clear stamp set that I didn't sneak peek at all as I wanted to keep it as a little surprise until today ;) This little gem of a mini clear stamp set is a Release Day FREEBIE.

This clear stamp set will be automatically added to release day orders of £25 or more up until Sunday 17th Feb 9pm GMT or while stock lasts. After 9pm GMT Sunday 17th February, if there is stock remaining it will be made available for purchase at £5.

Now, it wouldn't be a release without a daily blog hop full of inspiration! As usual my AWESOME Design Team have worked their magic with todays products, so be sure to hop along & see them...


Sarah P


Wiebke 


WOW! That was a phenomenal inspirational hop, so many new ideas of how to use this new stencil & clear stamp set. I hope you enjoyed the hop & will come back tomorrow for the next product introductions.

Also, don't forget the enter the HUGE giveaway HERE to WIN Stamps For A Year! If you need help entering the giveaway as you don't have a blog or social media to link, send me an email and I will assist you :)


WINstampsforayear

Hugs


Wednesday, 18 October 2017

Coloring on Kraft - A short video

Hey all it's Rahmat here.
I am up with a simple card using the Flower Power set, and sentiment from the Pure florals - Lily.

Please watch the video, it is self explanatory.
You can also stop by my instagram at rahmat.ccc, if you want to hear me out about how I made this card, it is a shorter video over there.


I hope you like what I have come up with.

Thank you for stopping by, I really appreciate your kind  feedback :) Have a great day!
                                                                     

Tuesday, 21 March 2017

CAS Colours & Sketches #215

Hey!

It's time for a new challenge over at CAS Colours & Sketches and this month Patricia is our hostess and this week has another wonderful colour combination to inspire us all.


A fun combo don't you think? I'm not a huge fan of Rich Razzleberry so it daunted me a little, but this is what I came up with...


I was inspired by the new challenge over at AAA Cards HERE, which is to use die cuts and I was especially inspired by CC&S teamie and AAA Cards member Jane with THIS card created for the challenge.


Hopefully you can tell I was inspired by the die cut frame idea?! So, I used my Stampin' Up! Stitched Framelit dies to create the square frame and then dusted off Uniko Flower Power #7 to stamp the stem and flower. 


After assembling my card I decided the flower needed a little more interest and stamped it again and fussy cut it out. I adhered it using foam adhesive like the frame and added an enamel dot to finish it off. The sentiment is from Simply Said.

Anyway, thats all from me, but be sure to check out all the Design Team inspiration HERE on the CAS Colours & Sketches blog and I hope to see you in the gallery :) Challenge End Time: 6:00 p.m. Eastern U.S. time/11:00 p.m. London U.K. time Monday, March 28th, 2017

Hugs
Supplies:
Uniko Clear Stamps Flower Power #7 and Simply Said
Ink: Stampin' Up! Old Olive and Pacific Point. VersaFine Onyx Black
Card: Stampin' Up! Thick Whisper White and Rich Razzleberry
Accessories: Stampin' Up! Stitched Framelit Dies, Enamel Dots and Foam Adhesive.

Thursday, 11 August 2016

Uniko Sponsors TIME OUT Challenges!

Hey!

I'm only a week late to let you know that Uniko is sponsoring the current challenge over HERE at TIME OUT Challenges! It's a two week challenge, so you still have time to enter it ;)


This fortnight the challenge is a theme challenge and the theme is...

HOLIDAYS
with an optional twist of no stamping
(stamped sentiments allowed)


If you choose to 'twist' with the team over at TIME OUT you have the chance of winning a £15 eGift Certificate to spend over at the Uniko store HERE.


I've been seeing A LOT of Christmas cards around blog land and thought it was high time I got a wriggle on and made an effort to get into the Christmas spirit ;) Here's my attempt...


I decided to dust off Pure Florals: Poinsettia and do some partial stamping and cutting to create a focal panel across the bottom edge of the card. I decided to keep the stamping black, keeping the colour for the base card and gold berries.


I did add a little holiday sparkle with some clear Wink Of Stella over the whole poinsettia. I just couldn't resist! The panel is mounted to the card base using foam adhesive.

Be sure to check out all the TIME OUT Challenges Design Team inspiration HERE and HERE. I hope to see you in the gallery too ;)

I'll be back later with more to share, I have a flurry of posts today! Until then, thank you for stopping by :)


Supplies:
Uniko Clear Stamps: Pure Florals: Poinsettia
Ink: VersaFine Onyx Black
Card Stock: SU! Real Red & Whisper White
Accessories: Wink Of Stella and Foam Adhesive

Thursday, 23 June 2016

CAS Colours & Sketches #179

Hey!

I'm here today with my CAS Colours & Sketches DT card for this weeks challenge. Excited again, as I am hosting the challenges over there this month, which means I have picked the colour combinations and designed the sketches for you to use and hopefully inspire you to create and play along :)

This week HERE, is sketch week and this is the sketch I came up with...


A fun and super simple sketch (well I think so), allowing for your creativity to flow :) Anyway, this is how I used it...


Again I have gone for a tropical theme. I am just loving the new hibiscus flower from the new Uniko Paradise clear stamp set ;) 

This time I have paired it with the I LOVE Coffee clear stamp set and a mix sentiment from I LOVE Tea. My reason for this is because of the Summer Coffee Lovers Blog Hop is taking place right now! There is so much fun happening over HERE right now, with so many wonderful prizes up for grabs, including one from Uniko! PLUS I have a giveaway on THIS post, be sure to stop by and comment for a chance to win. 


With a tropical card, I needed tropical colours and it just so happens that this weeks colour combination at the Color Throwdown HERE and seen below are tropical.


I kept my card really simple, stamping the coffee cup and sentiment first in black ink. I then stamped the hibiscus flowers in SU! Pixie Pink and Melon Mambo with the centre in Summer Sun. The panel is mounted onto a Lucky Limeade card base using foam adhesive, after rounding the bottom right corner. I added two white enamel dots to represent the sketch details.


That's all from me just now, I hope to be back later with more to share. For now though I am off to enjoy a few bean free hours and the sunshine! 

Be sure to check out the CC&S Design Team inspiration HERE and I hope to see you in the gallery too this week! 

Thanks for stopping by :)


Wednesday, 15 June 2016

Aloha!

Hey!

So, I am back again with even MORE paradise inspired cards! I have two to share tonight as yesterday, I simply ran out of time in the day to prepare a post. 

Anyway, lets get to the projects...


This was the card I made last night, I used both the Paradise and Paradise Leaves clear stamp sets, along with a sentiment from Simply Said. Again, the bill of Bob is coloured with Copic markers and the ribbon is from Papertrey Ink.


Next I decided to make a more feminine card...


I combined both the sets again, using the two smaller leaves from Paradise Leaves to create a larger smaller leaf! I was inspired by the new Freshly Made Sketch sketch seen HERE and below for the layout of my card, so I masked the lower section to stamp the leaves.


After stamping the outline hibiscus flower, leaves and fussy cutting them I added a good dose of Wink Of Stella before adhering them to the card using foam adhesive. I added a few Pretty Pink Posh sequins to finish the card off.


Ok, that's all I have for you today using the NEW Uniko release stamps, by the way there is still time to comment on THIS post here to be in the chance of winning a £10 eGift Certificate. I do however have a Stamp Of The Week card over HERE, if you are looking for some more inspiration ;)

Thanks for stopping by!


SaveSave

Thursday, 14 April 2016

CAS Colours & Sketches #169

Hey!

It's Thursday AGAIN (these weeks are flying by), which means it is time for another challenge over at CAS Colours & Sketches. This week HERE out hostess Louise has a fun sketch for you to try...


I was looking at the different sized circles on the sketch first of all to determine which stamp sets to use. I nearly opted for the recently released Fun Flowers, but ended up using the flowers from Flower Power #3 and I LOVE Coffee...


I had recently purchased some SU! It's My Party Washi Tape, so my colours were determined by the ones I chose to use on my card for the rectangles.


This week everything has been back on schedule for the beans after the Easter break, which means we have been back to playgroup. One day back and I come down with ANOTHER cold after 2 weeks clear :( I'm hoping that my bean free afternoon of rest and a little creative therapy will make me feel better! 

Anyway, enough of my woes, be sure to stop by the CAS Colours & Sketches blog HERE to see how the rest of the design team have used the sketch. I look forward to seeing you in the gallery :)

Thanks for stopping by :)