Showing posts with label All Occasion Sentiments. Show all posts

Saturday, 15 February 2025

Birthday Inspiration with Uniko Alumni Brand Ambassador Lindsey Bowe


Hello & Happy Saturday!

It's a super Saturday as I am absolutely to have another Brand Ambassador Alumni joining us today, the lovely Lindsey Bowe.

Lindsey joined the Uniko family in January 2016 having been a valued customer and regular participant in Uniko challenges and events. I was drawn to Lindsey's clean style of card making, but that she could also add a spin of mix media without over powering the design.

I'm delighted Lindsey was able to join us this month to help celebrate our birthday. Let's have a look at the two birthday cards Lindsey has created to inspire us today.


On this first card Lindsey has used the Fabulous sentiment from the now retired, but once much loved All Occasion Sentiments #3. Heat embossed in gold to make it even more fabulous. 

Lindsey has decorated round the sentiment with the balloons from Balloon Bash and accented the sentiment with Birthday Wishes from Birthday Sentiments.

Next up Lindsey inked up Background Builders Seeing Stars and paired them with another older sentiment from Simply Said Birthday.


I think that you will agree with me that these cards are simply awesome and wonderfully inspiring. It's a delight for me to see how the Uniko Alumni are inspired and what products they reach for.

A big thank you to Lindsey for joining us today and taking part in the Uniko 13th Birthday Celebrations. Be sure to leave some comment love here on the Uniko blog and across social media platforms if you use them. I will be randomly selecting comments through the month to win some prizes.


Crafty Hugs


Tuesday, 20 September 2022

Brand Ambassador Inspiration - Techniques with Embossing Glaze

 Hi there,

 do you love Embossing Powders as I do?
Have you ever heard of the special one called Embossing Glaze?
If not - it's a translucent but colourful Embossing Powder with some more special effects.

In the first card I made for you I created amore or less translucent rainbow with the "Rainbows & Clouds" Stencil over a very soft pastell blue background.
But first I had stamped and heat embossed the "Large Background - French Script" in white.
After the melting process of the powder I used the Stencil again and added some fluffy clouds with white Embossing paste.
The sentiment "Time to celebrate the good times" is one of the "Birthday Sentiments", heat embossed in a fitting light blue.
For some more interest I added some clear little rhinestone drops as raindrops.


The second card has a very similar layout, but I stamped the script background in gray (without embossing), just added the rainbow with the same Embossing Glaze colours as before.
I planned to add embellishments in the same colours, so I took twelve white sequins, added sticky ink to them, dipped always two of them into one of the powders and heathed them up. Then I put a drop of clear glitter glue to them.
The sentiment of the "All Occasions Set #3" is stamped with the same Ink I used for the background on Vellum and then I added the same colour of Embossing Glaze to it (hickory smoke).
I glued the edges of the Vellum on the backside of my layer and embellished it with my "special gems".

For the next card I created a blended Sunset scene and added plants and shadows with different stampsets - "Just because", "Happy Days" and "Natures Treasures I".
The lighter shadows of the black embossed plants are made with the Glazes.

For this glazed "Pure Florals - Peony" I added several times Embossing Ink with a Dabber and then thin layers of Glaze.
I was able to mix and match the colours with every layer and then melted every one on top of the black stamped flower.
With every layer it went darker and more intense! So beautiful! Love this kind of "watercolour look".

 
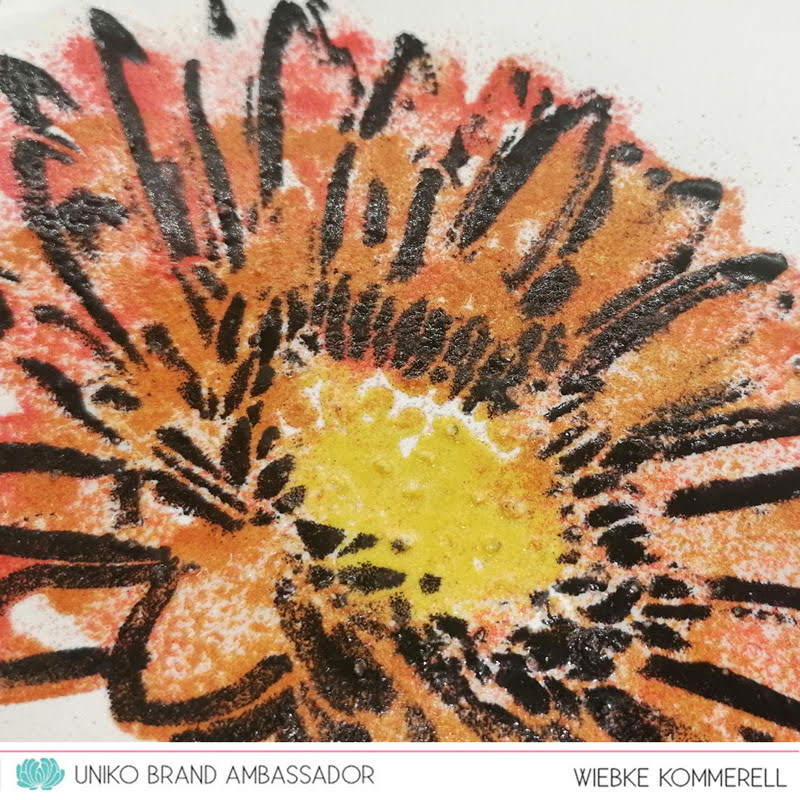
The last card is a bit different to the peony. I used the "Pure Florals - Gerbera Stencil" and one of the Peony sentiment stamps.
This time I didn't add the embossing Ink with a dabber (I tried, but it was too much ink for a stencil and turned out in a mess!), instead I used a pen and "coloured" the areas very quick and in a distressed way. I added and mixed the red and orange Glaze powder for the petals and the yellow for the center.
Melted every layer and as a last step I added black Embossing Powder to get some wild and dramatic lines to the flower.
Love this big and bold flower!

Hope I brought you some ideas to use the Glazes in different ways... there are many more to try!
For those of us who love Embossing Powders they are a very "nice-to-have" and "test and try" medium to play with.

Greetings from Wiebke

Wednesday, 16 February 2022

Brand Ambassador Inspiration - Special Birthday-surprise for Bev!

Hello there,

today, I have something special to share with you!
Something what makes me proud and thankful and happy in the same time!

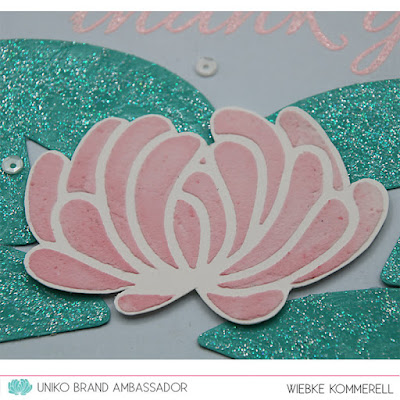
KomMa-designed_K1-1459_WaterLily#3
Sneak Peek of the Mini UNIKO Logo flower

It's a planned surprise for Bev, so I just put the directe link to the post on my KomMa-designed Blog to avoid her peeking into the post, before I put it online at 11:00!
😉


Hope you like it!

Greetings from Wiebke

Thursday, 14 October 2021

A CAS Sympathy Card - BA Inspiration

Good evening, Julie here with a late evening bit of BA inspiration. 
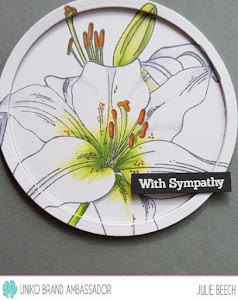
It's the start of a new challenge at Perfectly CAS and my DT inspiration card uses Uniko's Pure Floral - Lily set to make a sympathy card.
Sympathy cards are not the easiest of cards to make so I try to have a couple ready in my stash for those unwanted but necessary occasions. You don't always have the inspiration for a brand new make at times like that.

So here is quite a quick CAS card to add to your stash.


The lilies were stamped with Memento Grey Flannel on white card and masked to create a bouquet. After colouring with Copic markers, using a Googled image as a guide, I cut out the bouquet with a circle die. I also cut a piece of copy paper with the same die for use later.

Using the original circle die and a slightly smaller one, I die cut a frame from white fun foam and then cut a frame from my die cut, stamped panel to match. The fun foam frame was added to the copy paper and the centre panel also. The outer frame was then added to the fun foam frame matching the pattern and a sentiment from All Occasion Sentiments, stamped with Versamark and heat embossed with white EP, added. I think the frame adds interests but keeps the card CAS.


The completed panel was then added to a 5 x 7 dark grey card. White space isn't always white!

Hopefully I've given you a idea for a card for a hard to make situation. One I hope will be in my stash for quite awhile!!

So 'til next time, keep safe and keep crafting!

Friday, 16 October 2020

Brand Ambassador Inspiration - Focus on Happy!

Hello there! 

Sarah here with a Brand Ambassador Inspiration post for you. 
I've been MIA for the last few months due to a complete lack of crafting mojo ... I'd love to know how you fellow crafters cope with these situations. For me it's been a long spell of short bursts in my craft room and a bin full of rejects!
In the end I treated myself to a couple of new goodies and that seems to have spurred me on a little, especially in the Christmas card department but more of that in a few weeks!
Anyway on to my cards for today and I suppose I inspired myself using the card I created for our current Anything Goes challenge, which can find it HERE It was a really quick card to create (which we all love) and the cheery colours always make me smile.


Instead of using the Background Block: Equaliser, which I used for the challenge card I inked up the Background Builders Classics set. I've hardly used this one but it's full of interesting patterned and plain stripes so I need to ink this up again soon.

I used Altenew Inks throughout and simply kept the stamp in place in the Misti whilst moving my cardstock slightly upwards / downwards before stamping. The same technique with the BIG 'Happy' sentiment, from the 'All Occasion Sentiments' range and is sadly now retired. The white-embossed 'birthday' is from the Art Decoratifs Anniversaire set and to finish I popped the die-cut sentiment panel up on fun foam then added some coordinating enamel dots.

Below are a few more examples ... exactly the same stamps and process but different colour-ways. They were quick and easy to make and always good to have in stock. 


Thanks for calling by and I hope you've enjoyed this little inspiration post and fingers crossed I'll be back soon.

Have a fun day!


Wednesday, 14 October 2020

Swipe and Stamp - Brand Ambassador Inspiration.

Hello friends, Rahmat here with my inspiration today.

I have a simple one layer card with a fun technique.

Do watch the video for this quick card.


I have used 3 different sets from Uniko for this card, it's a very simple technique where you just swipe the ink pad on the stamp and stamp it. I haven't used Misti her, I have used a ruler to stamp, but yes you can use any stamping tool for this technique.


Supplies used:

Background Builders - Classic

Natures Treasures stamp

All Occasions(retired)


Thank you for stopping by, I really appreciate your kind feedback. Have a great day!     
                                                       

Tuesday, 15 September 2020

Stencils and Sewing - Brand Ambassador Inspiration

Hello Friends, Rahmat here. I am up with some more stenciling and sewing. Today I have used Uniko stencils for this.

For the first card I chose the Mehndi Mandala stencil and inked it up in black soot distress ink, and then pierced the holes along the negatives around the design to add stitches. I stitched a green flower sequin for the center.

I then trimmed the panel and added green glitter strip to the top and bottom.

The sentiment is from Birthday wishes set.


The second card is made using the Natures treasure II stencil and mask
I used a circle mask and then added the leaves around it.

I inked these leaves in fall colors, and then added the stitches with a brown floss. I used outlined start sequins to stitch around the circle to create a frame.

The sentiment is partly from stash and the the "friend" is from All Occasion sentiments #3.


I hope you like the inspiration today and do try out this, it opens up a whole new possibilities with the stencils.

           Thank you for stopping by, I really appreciate your kind feedback. Have a great day!     


Tuesday, 24 September 2019

Uniko Studio Design Team Inspiration...Creativity Re-Boot

Hello,

Carol here! Welcome to my Uniko Studio DT showcase, where I bring out a few Uniko favourites for a play date.  

I'm sure we've all had the 'lost mojo' experience and seek various ways to end the start-something/give up cycle. When this happens to me, I 'challenge myself a challenge' - a creativity re-boot -  which is precisely what I've done with the trio of cards I'm sharing here.

My challenge: 

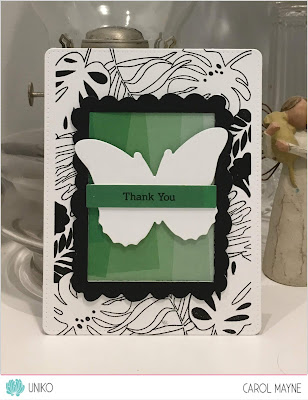
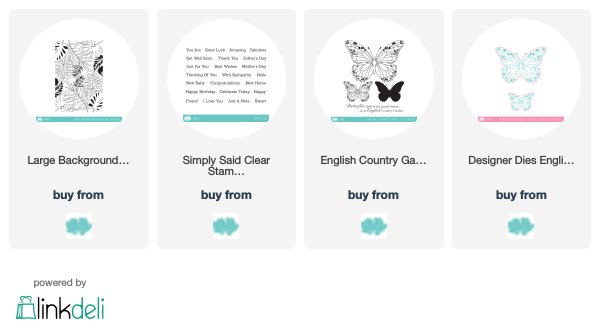
  • focus on one key die/stamp combination: English Country Garden Butterfly Collection
  • use a limited palette: black/white + green (inspired by the image at TIME OUT Challenge #144, which you can see here)
  • use one 6 x 6 sheet of designer paper (sometimes we need to use that stash *grin*). I selected a various shades of green sheet from Pinkfresh Studio
  • one occasion: Thanks (sparked by our upcoming Canadian Thanksgiving, but shifting from fall colours/images)
  • three cards, inspired by at least two/three challenges (TIME OUT Challenge #144, Freshly Made Sketches #403CAS(E) this Sketch #340). I've missed entering in a couple, but that's okay...it's the 'doing' that counts! 
  • go CAS! 

So...here are my results:

Card 1: 
Sentiment from All Occasion Sentiments
Inspired by CAS(E) this Sketch #340);


 Card 2: 
Sentiment from Simply Said


Card 3:
Large butterfly die only from English Country Garden Butterfly Collection
Sentiment from Simply Said
Background from Tropical Paradise
Inspired by: me *grin*


I'd love to know how you re-boot your creativity!

Thank you for dropping by!
~c

Sunday, 16 June 2019

Stencil Sunday

Hi it's Julie and welcome to another Stencil Sunday at Uniko.

Today I'm going to share a couple of cards made using a wreath builder/ turnabout stamping jig that some of you may be familiar with. If you haven't got one here is a link to how to make your own.
Some of you may even have used one with your stamps to create some fun cards, like I did here, but this time I'm going to use a couple of stencils. I was inspired to have a go after seeing this Jennifer McGuire video.
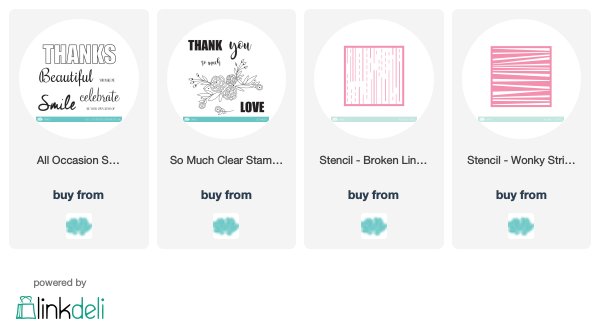
My first card uses the wonky stripes stencil and the So Much clear stamp set.


I used Distress Inks in a rainbow palette and rotated the card panel under my stencil every time I changed colour.

  1.  Tape your wreath template down so that you can place the stencil over the top, securing across one edge to create a hinge. This will allow you to lift it and move the card panel around.
  2. Place your card panel to be inked, into the template, ensuring that at least one corner will fit snugly into the bottom left corner.
  3. Lay a piece of tape or masking paper over the area you don't wish to add ink to.
  4. Ink the area required then rotate the square to the next corner and ink again.
  5. Continue until you have completed all 7 rotations.

If your square is the same size as the jig then you will end up with a space for stamping in the centre, but don't worry if it is not completely symmetrical as you can always add a die cut over the middle!

Once my panel was complete, I mounted it on a slightly larger piece of black card stock and then onto a 5" square white card base. From matching card, I cut a circle and stamped my sentiment in black before mounting it up on foam over the coloured panel.

This second card uses the Broken Lines stencil and a more restricted palette.


I followed the same technique, rotating my card panel in the jig and keeping the stencil in the same place with some tape. This is a slightly larger panel so you have to be careful and remember which corner you rotate! A larger white die cut circle completes with the addition of an ombre coloured thanks from All Occasions Sentiments #6, fussy cut after stamping and colouring with Copics.

The panel was mounted on a panel of  matching paper and then onto a 5" square base card.

You can use a rectangular panel but you need to be aware that the pattern will be slightly different depending on where you place your corner!
 The link to the You Tube video shows you much better than I can describe so it may be a good idea to check it out if you need a more visual tutorial.


That's all from me for today, I hope I've inspired you to look at your stencils differently and have a play!


Tuesday, 4 June 2019

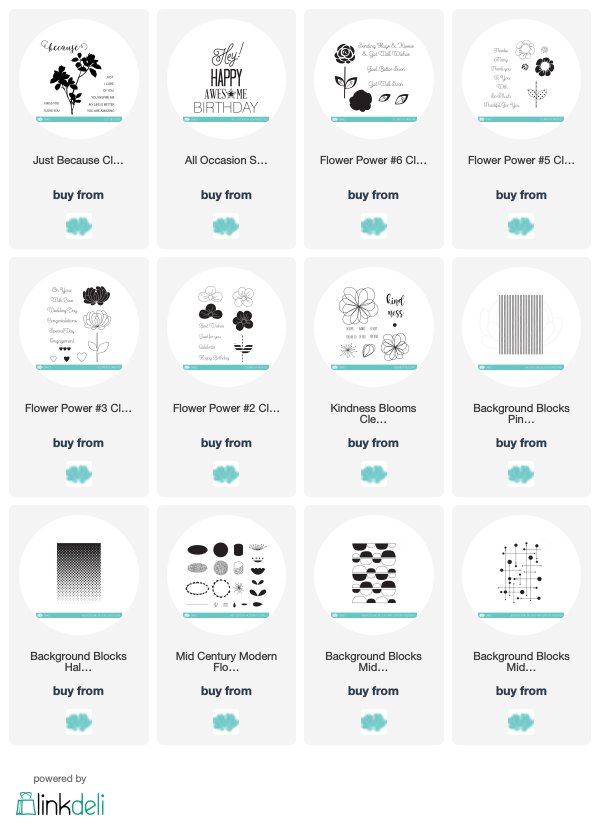
Back In Stock!

Hey!

I thought I would pop by & let you know that a bunch of clear stamp restocks arrived in the studio  today - yay!

I know a lot of you have been anxiously awaiting the Mid Century Modern collection of stamps to arrive & thank you to everyone who has placed a lovely backorder. I am busy packing all the orders ready to ship! 

So, here is the line up of what is back in stock over on the website...


*LIMITED stock left of this clear stamp - be quick!*


That's a whole lot of stamps! I can't wait to get inky with these sets again, restocks always inspire me to dust them off and ink them up again ;)

Happy Shopping! 
Hugs