Showing posts with label Bee Happy. Show all posts

Tuesday, 25 June 2024

Introducing... Ink & Flip Layering Geometric Hexagon

Hello & Happy Tuesday! 

I am so glad you have stopped by the blog today as myself and the Brand Ambassadors are here to tempt your creative taste buds with an array of inspiration. 

The first product I am excited to introduce is another addition to Uniko's innovative Ink & Flip Stencil line up, Ink & Flip Geometric Hexagon. 

This design is a 2 stencil set, again offering a wealth of creative options. It's perfect for those masculine makes, but also breathes new life into previously released Uniko products like Background Builders Happy Hexagons and Bee Happy clear stamps. 

Let's have a look at this new stencil in action...


   Anita


Bev


That hop has my creative juices buzzing! I hope you enjoyed it as much as I did and I'd love to know what you think of this new addition to the Ink & Flip Stencils.

That's all for today, but don't worry we will be back tomorrow with LOTS more inspiration. This stencil, along with all the products being introduced this week will be available on the website Saturday 29th June 9am BST.

Crafty Hugs


Monday, 20 May 2024

Happy World BEE Day & What's Happening This Week.

Hello & Happy Monday. 

Today is World BEE Day and so I thought I would honour the day with a card, because it would be rude not to. And it gives me a good excuse to dust off Bee Happy and give a sneaky sneak peek at something new coming next month. 


For the background I have used a new stencil coming next month, I've used Dragonfruit, Honeysuckle, Buttercup, Marmalade & Oceanside from Concord & 9th and Lime Ricky from Catherine Pooler.


I then embellished the background with the bees and sentiment from Bee Happy, a bit of dimension for the bees and kept the card with minimal fuss as to not take too much focus from the fun background.

What's Happening This Week... 


First off I have a Stamp of The Week for you to enjoy.


Looking around social media, I've notice a come back on the Zesty/Fruity trend. So I thought I would give our Organically Zesty the 'lime light' this week! 

Enjoy 10% of this clear stamp set in store HERE. And here is a couple of cards reminding you of how this stamp set looks in use. 


I will be back later this week with some fresh and juicy inspiration using this stamp set and fingers crossed a new video.


Clear Stamp Restocks 


Background Blocks Arts Decoratifs Christmas 


Background Block MOD Builder


Bauhaus Blocks


Christmas Sentiments


These clear stamp restocks are due in the studio 29th May and are now available to back order on the website. 

Stencil Restocks

I'm slowly getting our most popular and requested stencils back in stock. I announced a few arrivals HERE last week.

I'm also delight that I have a batch of the MOD Background Builder Stencil arriving on 29th May. This is also available for backorder HERE


The new website is progressing well and I am hoping to have it ready to launch on Saturday 25th May. So if you've not saved / screenshot any of your account details in your account already, I would encourage you to do so this week.

Crafty Hugs


Tuesday, 23 January 2024

Brand Ambassador Inspiration - Masculine Birthday Cards

Good morning everyone, 

Steph here and this month I'm using Uniko Big & Bold - Happy stamp and co-ordinating die set to make masculine birthday cards.


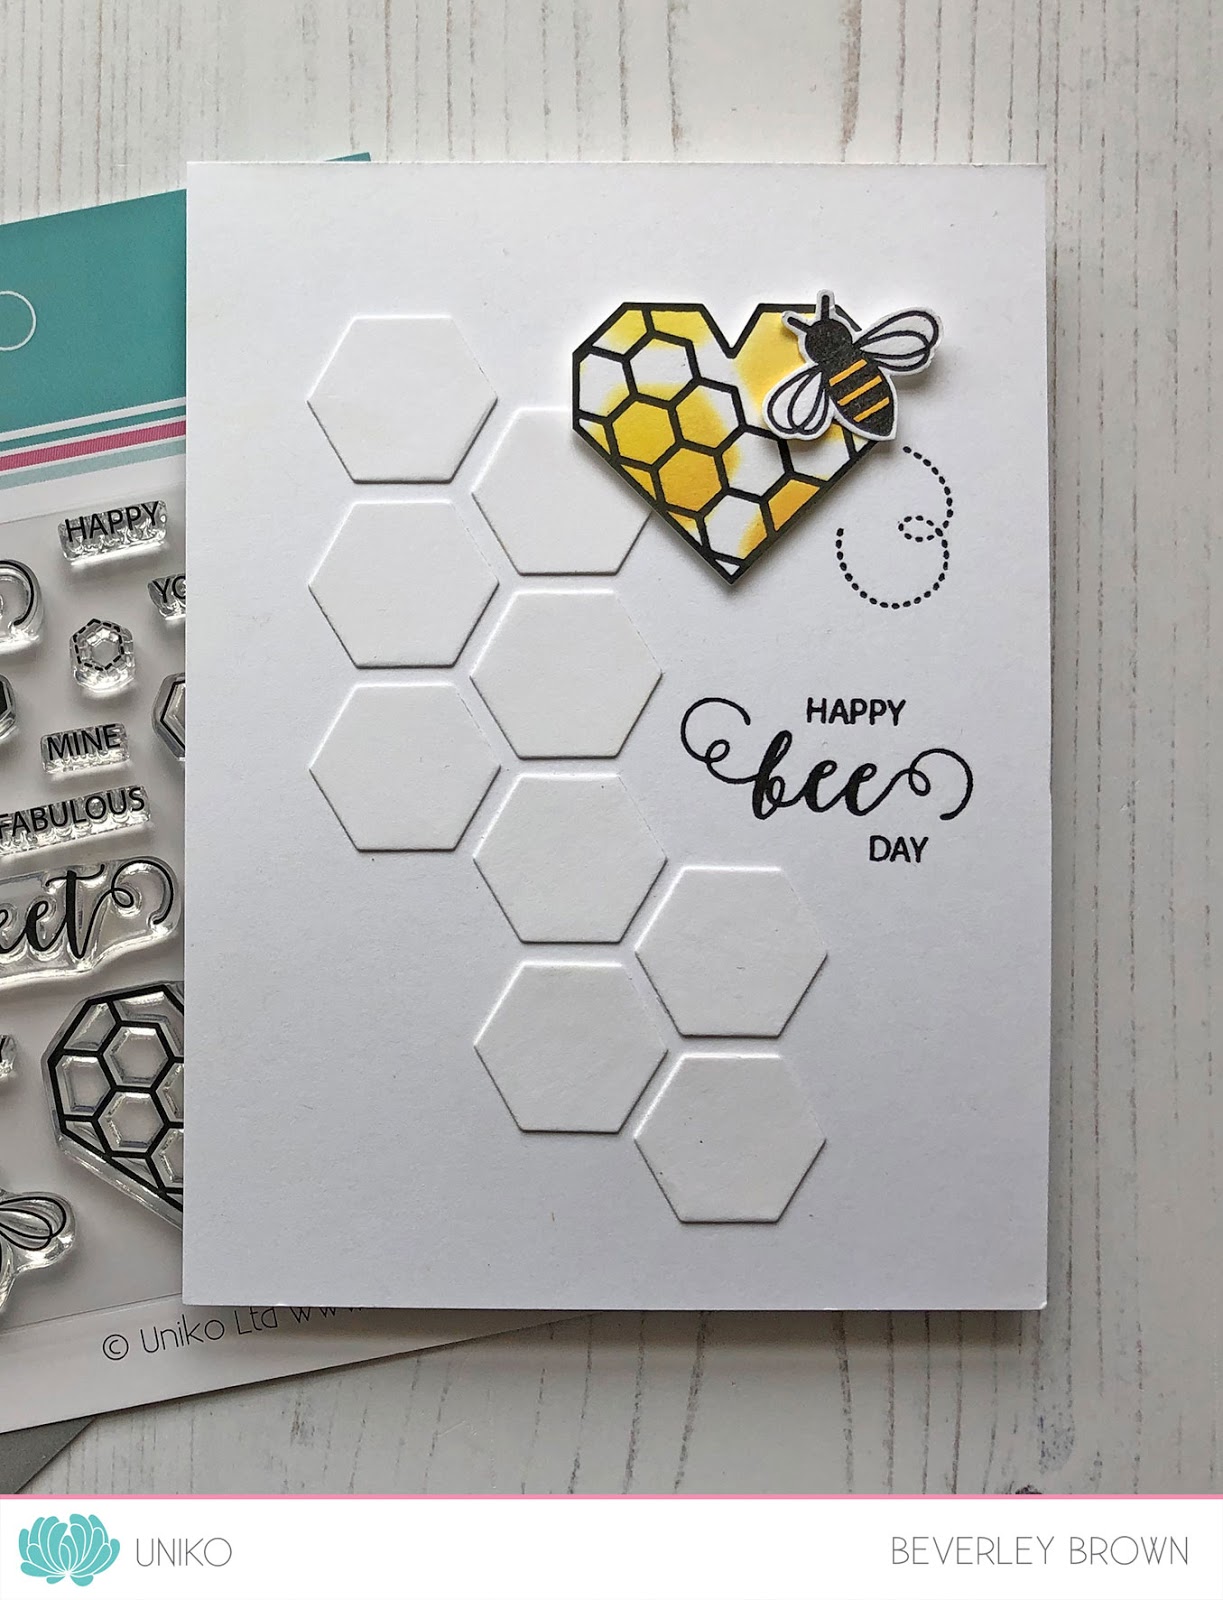
My first card teams the Uniko Big & Bold - Happy bundle with Uniko Bee Happy stamp set. I stamped the gorgeous little bees, the honeycomb hearts and the ‘bee day’ sentiment using the Bee Happy stamp set and fussy cut each one before adhering to the base panel which I had die cut using a generic honeycomb die. I then used blue ink to stamp the ‘happy’ sentiment and die cut using the coordinating die. 


My next card uses the ‘happy’ die cut as an aperture with coloured strips of card adhered behind. This is a great way to use up card scraps. The stamped elements are all from the Big & Bold - Happy stamp set. 


Taking inspiration from my previous card, I created a striped background and added a die cut ‘happy’ using both the inner more detailed die and the outer edging die. Again the sentiments are from Uniko Big & Bold - Happy stamp set and I finished the card with a die cut frame. 

Hopefully I’ve given you some new inspiration and you are digging out the Big & Bold - Happy stamp and / or die set for a play soon. 


Much love
Steph x

Monday, 27 March 2023

Magnificent Monday BA Inspiration - A little Bit of Sunshine to Brighten your Day

 Bonjour !

Izzy here with my last card to celebrate Spring. This time I used the Spring Botanicals Daffodil set together with the Bee Happy set and the Stylised Floral stencil.

As I told you in my previous BA inspiration post, here the daffodils are in full bloom and they finally put a bit of colour in our garden.


I started with the background of this card by die cutting a scalloped rectangle in a white card stock. Then I used the Stylised Floral stencil together with yellow inks to make a gradient from the top to the bottom.

On another white card stock I stamped the daffodil and the bee, then I coloured them with alcohol markers and I fussy cut them.


I flat adhered the stencilled background on the double white card and I stamped the beautiful sentiment in black as well as the little dots for the bee mouvement.

To finish my card I simply glued the daffodil and the bee on the card.

Et voilà ! That's all for me with the Spring cards. I hope that you enjoyed the inspiration and thank you so much for stopping by.


Wednesday, 12 May 2021

BA Inspiration - Wonky Stripes Rule!

 Morning all, Julie here with a little bit of Wonky Stripe inspiration! Here are four cards made using the two wonky stripe stamps and the wonky stripe stencil.


My first card was inspired by the challenge at CAS Mix up, where their theme is stencils and rainbow colours and a GD spot over at ATSM where the theme is stencils and die cuts.


I used a selection of DIs to ink my rainbow on an A6 panel of white card through the Wonky Stripe stencil, stamped the die cut Originally Organic Additions elements and coloured them with Copic markers. A couple of strips of linen effect card frame half the stenciled panel. I used scrap pieces of linen effect card and they were just a little too small so added a couple of slivers of gold mirri card to fill the gap. A sentiment from Pure Floral peony was stamped on black and embossed with gold EP, picking up the gold strips.

My second card uses the other half of the inked panel and a fussy cut large peony bloom.


A panel of linen effect card was glued over the stenciled panel and the fussy cut bloom added. I decided to leave the peony uncoloured as I thought it would detract from the rainbow edge. The sentiment is from the same Pure Florals- Peony set.

As with the last card I used a rainbow panel but this time I used the BB Wonky Stripe stamp.


It's difficult to use embossing and Copics without making a mess of your pens, so the trick is to stamp in a pale coloured ink, I used Altenew's Limestone, colour the image and then add the embossing over the top. If you use your Misti, just leave the stamp in place and make sure that you put your stamped panel back exactly where it was before. Don't cut it down until the embossing is complete!
Again as the background was quite lively, I used the simple outline of the small peony bloom from Pure Florals -Peony over my trimmed down panel. The coloured panel and bloom were added to an A6 note card on pads and a sentiment strip stamped with a greeting from the same Peony set completes.

Finally, I just had to use the large gerbera stencil again with the solid BB Solid Wonky Stripes as an accent along the bottom.


After inking the stencil with Mustard Seed and Twisted Citron in the center and Spiced Marmalade DI for the petals, I added detail with a matching Zig watercolour pen and blended the center of the flower with a little more Twisted Citron. The stencil doesn't have a stem, so I added one free hand and coloured it with green Zig pens.  
On a strip of white card, I stamped a couple of times with the BB Solid Wonky Stripes stamp in Altenew's Obsidian ink. My pad is still quite new and juicy so there is a little splatter where it shouldn't be but I think I got away with it! On another A6 note card, I added the stamped panel, then the trimmed down gerbera. 
My sentiment strip is made up from the words from two different sets Beautiful and Bee Happy. Once I got them laid out on my Misti, I stamped a few more to use in other projects, as its quite tricky to get the words lined up. You never know when you'll need a sentiment strip!

And take a deep breath... 
Hope you liked the ideas here, I sort of got carried away with my theme!

Anyway, look after yourselves and keep crafting until next time.

Thursday, 14 May 2020

Brand Ambassador Inspiration - happy & colourful

Hello

Wiebke here with a happy and colourful post to brighten your day!

It's also a happy bithday surprise for Beverley!
 
I'm so 
HAPPY HAPPY HAPPY HAPPY
to have you in my life! 😘


I made this bunch of clean and simple cards in a really short time! How I did it? By using all the "left overs" to create second cards!

The materials for all four cards are similar:
  • a self made rainbow-colour paper
    made of multimedia paper (it doesn't warp as much as normal cardstock when it get's wet) & Ranger Distress Oxide Inks (and a blending brush or tool) & a clear iridescent embossing paste (just added a thin layer with a palette knife)
    To create this paper you'll need a bit of time, but below I have some alternative ideas!
  • the Big & Bold Happy Dies
  • fitting stamps - I used Big & Bold Happy, Happy Days and bee Happy (guess why! 😉)
 
:-:-:-:-:-:-:-:-:-:-:-:-:-:-:-:-:-:-:-:


To avoid lots of glue-time for the thin areas I used adhesive sheets, but needed a bit of glue here and there anyway!

For the first two cards I cut out the bigger "shadow" word of my sparkling paper first, then placed the smaller die on this hello and cut again to create the thin edge of the word. - This was the difficult part - to line it up exactly for an even edge!
But with the help of some low-tack painters tape (I used the pink one from Tesa) it wasn't a real problem! 

The rest was easy!
To adhere the thin layer in the original shape and without wonky lines I used the other one as guide before I adhered it on a second cardbase.
All sentiments were stamped in black ink. I love to use my stamping tool for these jobs - You can position all the stamps perfectly with the gridlines on the lid and you can stamp twice for a perfect black impression without any problems of missplacing!


The black lines of the box are drawn with a thin black marker and and a T-ruler.
The small butterflies I punched out of the scraps of the sparkling paper and placed them as a fluttering crowd above the word die cut.

 :-:-:-:-:-:-:-:-:-:-:-:-:-:-:-:-:-:-:-:

Here on the next picture you can see in the reflection, how much this selfmade paper is sparkling! (It's always hard for me to catch this with a camera.)


For the second two cards I directly cut out the smaller die of the sparkling paper. 
On the cardbase I brushed the same colours I used before to create the sparkling paper, but with a lighter hand for a softer, less intense shadeing.
The more intense happy on a white shadow paper I placed there, added the two sentiment-parts and the card was finished!


The last card is made of the leftover again. I cut out the "frame" with a knife and a metallic ruler, rounded the corners by hand and adhered it on the cardbase.
This time I used the cute bee insted of a sentiment - just as a "be(e) happy".

:-:-:-:-:-:-:-:-:-:-:-:-:-:-:-:-:-:-:-:

Hope you like this idea of making quick'n'easy cards!


Some more ideas to stretch this technique:  

You needn't use a selfmade sparkling rainbow-paper.  
You can also use 
  • a patterned paper or 
  • a monochromatic shading
  • a paper with or without sparkling
  • ...
When you havn't a iridescent embossing paste, use
  • a sparkling embossing powder
  • a sparkling spray (maybe selfmade with some mica powder)
  • a thin layer of glitter glue or glossy accents (maybe with some glitter?)
  • ...
When you hon't want to make "happy" cards, use one of the other Uniko Big & Bold die sets!
"wish" or "snow".
 
:-:-:-:-:-:-:-:-:-:-:-:-:-:-:-:-:-:-:-:


Thanks for looking by today!   💓💛💚💙💜
Have a great and creative time and be happy!
 

Hugs Wiebke


Friday, 6 December 2019

Back In Stock!

Happy Friday!

I thought I would pop by today & let you know about a HUGE batch of restocks which arrived in the studio this week - yay! 

With no new release scheduled until January 2020, it gave me the opportunity to restock a lot of popular clear stamp sets and some of which have been out of stock for some time now, apologies for that.

Anyway, let's have a look and see what's back...


So many favourites of mine here :) Today I was inspired to used Background Builders: Vines, you can check out my card and post HERE.

Have a wonderful Friday & I hope you find some time to be creative.
Crafty Hugs

Monday, 20 May 2019

To Bee or Not to Bee Blog Hop

* Edited to Add the WINNER of the Extra Uniko Prize offered by commenting along the Uniko DT participating in the hop.

Random.org was used to select the lucky comment...

AWESOME creation! Love your bee! This is the BEE'S KNEES HOP! My husband & I host 60 to 80 bee hives on our 5 acre place for the summer (to get them out of the heat) for a bee keeper from California after they are through pollinating the orange and nut orchards.

Congratulations Lagene! I will contact you regarding your prize :)  

Thank you to all who joined in on the 2019 BEE or not to BEE Blog Hop, your comments and participation is truly appreciated. 

Milka has selected the winners for the Sponsor Prizes and is contacting the individual winners. 


Hey & Happy Monday!

Welcome to the 2019 BEE or not to BEE Blog Hop!


Hopefully you have hopped on over from Pretty Pink Posh the hop starts on Milka's blog and all the participants can be found at the end of this post.

The purpose of this blog hop is to celebrate World Bee Day, to support bees and to raise public awareness of the importance of bees and apicultural products.

Source: 

This year the Uniko Design Team have joined me with creating inspiration to share with you all and we have a mini hop contained inside the BEE or not to BEE Blog Hop! 


BEE sure to hop along all the Uniko Design Team and leave a comment, as I will randomly select a lucky comment from those left on the Uniko DT blogs to win a BEE themed Uniko prize :) You have until 31st May to comment.
ALSO...
For your 1 in 19 chance to win one of the sponsor prizes seen in the graphic above, hop along blogs of the participating designers and sponsors listed in blog hop list below and leave comment on each blog hop stop.
Donna Mikasa    
Larissa Walgemoed          
Tina Pavlovic                        

After commenting, return back to Milka’s blog and add your name to InLinkz, but prior you do, please read Blog Hop details, terms, giveaway rules and privacy policy which are shared in Milka's blog post below InLinkz.

InLinkz closes on May 31st2019, 11:59 PM CEST. Winners’ names will be announced on Milka’s blog on June 3rd2019 during the day.

There will be couple additional giveaways along the hop. Details about additional prizes and giveaway rules can be found on blogs that offers additional prizes.
Giveaway is opened Worldwide (+18) only. 

Happy Hopping!