Showing posts with label Beautiful. Show all posts

Friday, 23 June 2023

Floral Friday


Hello & Happy Friday.

I'm back today with two floral cards. I've been wanting to recreate a card I made HERE back in 2018 using the Kindness Blooms clear stamps, but with some different florals. 

First I need to restock my stash with vellum and then I just needed to get round to making the new versions. Which I set to doing today when I finally cleared off my desk! 

I couldn't decided between the geranium flowers in Beautiful and the modern floral of Beautiful Blooms II. So I ended up making two cards.

First up is the card using Beautiful Blooms II. 


For both cards I used the same technique of stamping the flowers in VersaFine clear ink and heat embossing with WOW Opaque White embossing powder. I then fussy cut the flowers out along the top and bottom of my panel, so the middle is still joined by vellum.


Once cut I then coloured the flowers on the reverse using alcohol markers. I chose to colour on the reverse for a couple of reasons. One so the alcohol marker doesn't stain the embossed white lines and secondly, it gives a softer muted feel to the colours. 

I finished the card off with the Happy Birthday from Floral Vines, adhered using foam tape and some Pebble enamel dots.

Here is the same card using Beautiful.


The only difference with this card is I switched out the blue for purple and added a sentiment from Simply Said Blocks III. Also I used Sunflower enamel dots.


I'd love to know which is your favourite card. Beautiful Blooms II or Beautiful?

Such a fun technique and I am already thinking of stamps I could use to give this a masculine twist! Hope you are having a lovely day.

Crafty Hugs


Wednesday, 12 May 2021

BA Inspiration - Wonky Stripes Rule!

 Morning all, Julie here with a little bit of Wonky Stripe inspiration! Here are four cards made using the two wonky stripe stamps and the wonky stripe stencil.


My first card was inspired by the challenge at CAS Mix up, where their theme is stencils and rainbow colours and a GD spot over at ATSM where the theme is stencils and die cuts.


I used a selection of DIs to ink my rainbow on an A6 panel of white card through the Wonky Stripe stencil, stamped the die cut Originally Organic Additions elements and coloured them with Copic markers. A couple of strips of linen effect card frame half the stenciled panel. I used scrap pieces of linen effect card and they were just a little too small so added a couple of slivers of gold mirri card to fill the gap. A sentiment from Pure Floral peony was stamped on black and embossed with gold EP, picking up the gold strips.

My second card uses the other half of the inked panel and a fussy cut large peony bloom.


A panel of linen effect card was glued over the stenciled panel and the fussy cut bloom added. I decided to leave the peony uncoloured as I thought it would detract from the rainbow edge. The sentiment is from the same Pure Florals- Peony set.

As with the last card I used a rainbow panel but this time I used the BB Wonky Stripe stamp.


It's difficult to use embossing and Copics without making a mess of your pens, so the trick is to stamp in a pale coloured ink, I used Altenew's Limestone, colour the image and then add the embossing over the top. If you use your Misti, just leave the stamp in place and make sure that you put your stamped panel back exactly where it was before. Don't cut it down until the embossing is complete!
Again as the background was quite lively, I used the simple outline of the small peony bloom from Pure Florals -Peony over my trimmed down panel. The coloured panel and bloom were added to an A6 note card on pads and a sentiment strip stamped with a greeting from the same Peony set completes.

Finally, I just had to use the large gerbera stencil again with the solid BB Solid Wonky Stripes as an accent along the bottom.


After inking the stencil with Mustard Seed and Twisted Citron in the center and Spiced Marmalade DI for the petals, I added detail with a matching Zig watercolour pen and blended the center of the flower with a little more Twisted Citron. The stencil doesn't have a stem, so I added one free hand and coloured it with green Zig pens.  
On a strip of white card, I stamped a couple of times with the BB Solid Wonky Stripes stamp in Altenew's Obsidian ink. My pad is still quite new and juicy so there is a little splatter where it shouldn't be but I think I got away with it! On another A6 note card, I added the stamped panel, then the trimmed down gerbera. 
My sentiment strip is made up from the words from two different sets Beautiful and Bee Happy. Once I got them laid out on my Misti, I stamped a few more to use in other projects, as its quite tricky to get the words lined up. You never know when you'll need a sentiment strip!

And take a deep breath... 
Hope you liked the ideas here, I sort of got carried away with my theme!

Anyway, look after yourselves and keep crafting until next time.

Friday, 6 December 2019

Back In Stock!

Happy Friday!

I thought I would pop by today & let you know about a HUGE batch of restocks which arrived in the studio this week - yay! 

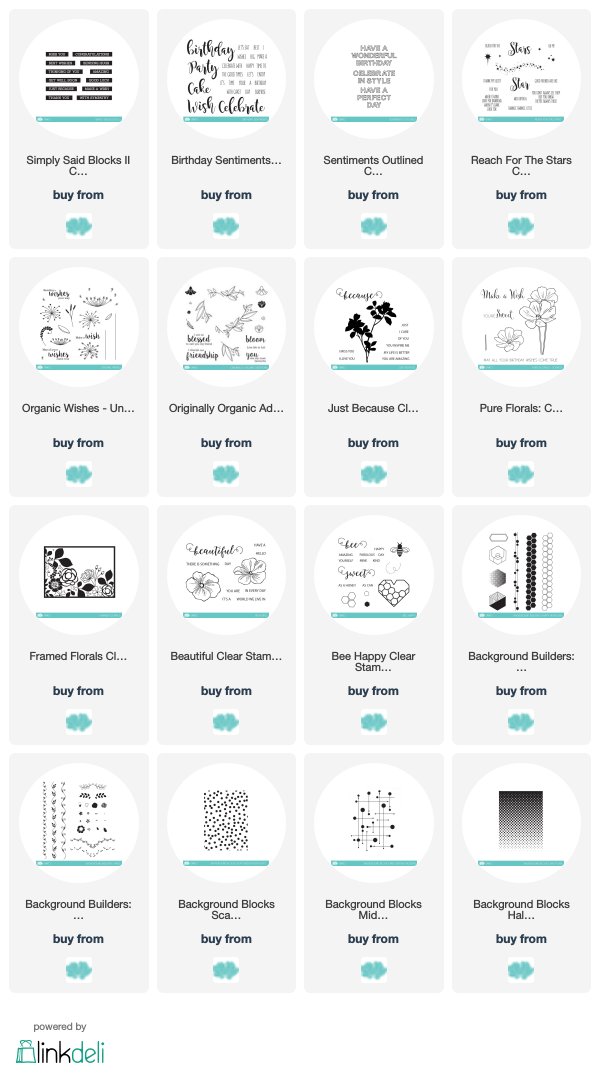
With no new release scheduled until January 2020, it gave me the opportunity to restock a lot of popular clear stamp sets and some of which have been out of stock for some time now, apologies for that.

Anyway, let's have a look and see what's back...


So many favourites of mine here :) Today I was inspired to used Background Builders: Vines, you can check out my card and post HERE.

Have a wonderful Friday & I hope you find some time to be creative.
Crafty Hugs

Sunday, 8 September 2019

DT inspiration - Getting inspired with challenges

Bonjour !

Izzy here. I hope you are all well after this summer break. Here, a new school year has just started last Monday and so the weekly routine too !

Anyway, I had some time to play in my craft room and today I wanted to share with you the cards I made with the English Country Garden : Butterflies set and its matching dies.

Last month I showed you how I get inspired by the things that surrounded me. This time, for my choices of designs and/or colours, I've been inspired by several currently underway challenges. It's a game I love to play with : to combine several challenges together.

The idea of my first card comes from the Time Out challenge and the word "Rainbow" in their quote...


I stamped all the butterflies in different colours and I cut them with the matching die. Then I place them on my card. Once happy with their placement, I fixed them together with masking tape doing a grid that I placed in my Big Shot with an oval die on top. 

With the masking tape, all the little bits stay attached so I turned them upside down to put adhesive foam behind. Once all covered, I placed them back on the double white card, pressing a little bit to be sure they all adhered well. Then I took off the masking tape and I cut along the edges the parts that go beyond.

The sentiment comes from the Beautiful set.

This results in the second card with the remaining parts of the cutout of the first card...


For this card the sentiment comes from the Simply Said II set.

For my third card I get inspired by the AAA Cards sketch and the colours of the Addicted to CAS challenge...


Once again the butterflies were stamped and cut with the matching die, then I adhered them with glue dots. The sentiment comes from the Flower Power #8 set

My last card is a combo of the Freshly made Sketch and the Colour Throwdown challenges...


For this card, I used the Pure Florals : Peony set to make part of the sketch. I stamped the peony in dark blue over an an iridescent cream card. And this time I used the bigger butterfly of the set.

I stamped it with Versafine blue ink over the same iridescent cream cardstock. The only colours I had in my stash to match the ones of Colour Throwdown were Distress inks. So I tried to use them on this paper as watercolour. And I'm so happy they reacted perfectly with this kind of paper and it even gives a beautiful shimmer to the colours.

You may have a better look on this picture...


For this card, I used a sentiment from the Simply Said Blocks set. 


Et voilà ! That's another way to get inspired for making cards. You will find more details on the inks used on my blog. 

Thanks so much for popping by and have a fabulous day !


Tuesday, 16 October 2018

CAS Colours & Sketches #294 - Colours & DT Call

Hey!

This month at CAS Colours & Sketches we have another multiple hostess month. This week Patricia is our hostess and has this weeks colours for you HERE ...


AND...
CC&S are looking for some new members
to add to our Design Team!

Our blog is dedicated to creating greeting cards in the Clean and Simple style of crafting, alternating between colour challenges and sketch challenges. Design Team responsibilities include designing cards for our challenges and sharing them on your own blog, commenting on challenge entries and voting for our Weekly Winners each week, and acting as our host and creating challenge ideas for at least one month during the year.

If you would like to be considered for a position on our team, you must participate in this week's colour challenge and next week's sketch challenge so that we can see your work in both types of challenges. Please add the letters "DT" after your name when you link your cards for the two challenges, and make sure that your cards follow our Challenge Rules. Applicants will be contacted during the month of November.  Our new members will join us as our Guest Designers in December and start on the team full-time in January 2019.

Anyway, I hope you join in on this weeks challenge & the DT call, but here is my inspiration using this weeks colours...


With the pinks in this weeks colours I had already decided that I needed to make a floral card. I then just needed to think how to incorporate the Soft Suede, which I have by stamping the flower outlines and sentiment.


A pretty quick CAS card with some Prismacolor Pencil colouring and simple layering of the flowers.  I used the recently released Beautiful clear stamp set and the sentiment is from Simply Said.

That's all from me today, I hope thatI have inspired you to join in on the challenge?! If you need a little more inspiration, pop on over HERE to see what the CC&S Design Team have created.

Thanks for stopping by!
Hugs

Monday, 24 September 2018

Uniko August stamps Release in review

Hello everyone Rahmat here.
I am up with a few cards using the August release stamps, I was away and I didn't had the chance to be part of the release hop.
I am using the Big and Bold Hello, Framed Florals and Beautiful stamp sets.
I have stick to the same color schemes for my projects.

For the first card, I first stamped the Framed florals in Versafine watermark ink and then I used the versafine onyx black ink for the bold hello.
Then I used the markers to color the florals.
I then trimmed the framed part, and mounted it on a patterned pre-cut base. To finish off, I added a few black jewels.


For the second one, I have used another pre-cut base.
I stamped the flowers on a white card stock and watercolored using zig clean color markers and Staedtler Marsgraphic markers, fussy cut only the top, and added using foam adhesive.
I added a black strip at the bottom of the card. The sentiment is stamped on the base, a few black jewels to finish off.


     Thank you for stopping by, I really appreciate your kind  feedback :) Have a great day!
                                                                     

Wednesday, 19 September 2018

DT Inspiration - One year

Bonjour !

Izzy here. Today it's been just a year and a month since I joined the wonderful Uniko team. In fact I wanted to do this post a month ago but it was the day of the new release.

To celebrate this I revisited some products that I particularly love and that were released in this period of time.

I'm starting with my favourite one I think the Kindness Bloom combined with the Birthday Sentiments set.


I played with the smaller stamps of this set, inking them randomly in different colours all over the double card front. I stamped the bold birthday wished on a die cut scalloped white square. This was then foam mounted onto the double card.

On a separate white card stock I stamped the blooms and I fussy cut them. Then I foam mounted them on the scalloped square corner. To finish, I glued some jewels.

My next card uses the marvellous Bee Happy stamp paired with the Beautiful stamp set and the Stylised Floral stencil.


On a square white card stock I used the stencil with Twisted Citron Distress ink that I blended softly to make a gradient. Once done I cut a part of it and I matted the two parts onto a black double card in order to reveal a black stripe. 

I stamped the adorable bees on a separate card stock, I coloured them with colour pencils and I fussy cut them. I assembled the Bee Happy and the Beautiful sentiments together in order to make one single sentiment. Finally I stamped the dotted spiral to give mouvement to the foam mounted bees. 

For my third card I used the Doodle Flower stencil together with the BIG & BOLD Hugs stamp set.


As you know, Distress Oxide spread like butter and blend so beautifully together that it is a pleasure to play with them ! That's what I did with this lovely stencil on top of a square white card. Then I stamped and heat embossed in black the sentiment on a white card stock and I fussy cut it.

I love how the black bold sentiment pops up on top of it with the stitched scalloped frame.

The fourth card is in fact a twofer of the third card...


I've seen in different blogs how to use the Distress oxide inks left on a stencil after blending them through. I wanted to try and I LOVE the result.

They give a much softer look and the negative of the stencil. When I saw the result I immediately knew that I would combined it with the Sweet Baby stamp set.

I also used the Distress Oxide inks to stamp the bold sentiment and the adorable bear. I fussy cut them and foam mounted them on the card.

My final card today uses one of the gorgeous stamp from the Pure Florals collection, the Rose. I love to combine it with the Lattice stencil.


On the card base I used the Lattice stencil in Spun Sugar distress ink. Then on a separate white card stock I stamped the outlines of the rose and of the leaves. I then coloured them with Promarkers and I fussy cut them.

I die cut a stitched border that I matted onto the card base and I adhered the leaves and the rose on top  with glue dots. A lovely sentiment from the Flower Power #1 set is black stamped to finish the card. 

And voilà ! That's all for me today. As you can see, Uniko products all go pretty together, you can combine them in such different ways. There have been many other products during this period of 1 year that deserve your attention as well, so stay tuned, I'll be back soon ...

Thank you for stopping by and have a great crafting day !

Izzy xx


Sunday, 19 August 2018

August 2018 Reveal, Release, Blog Hop & GIVEAWAY!

Woohoo! 

Finally the day has arrived and the August 2018 Release is NOW available to purchase HERE on the website. We have our traditional Reveal, Release, Blog Hop & GIVEAWAY! 

How about a look at the FIVE new clear stamp sets...


Background Builders: Happy Hexagons £9 
Copyright Uniko Ltd 2018


Beautiful £4 
Copyright Uniko Ltd 2018


BIG & BOLD Hello £4 
Copyright Uniko Ltd 2018


Framed Florals £4
Copyright Uniko Ltd 2018


So Much £4 
Copyright Uniko Ltd 2018


Now I have formally introduced all the NEW products, how about a FUN blog hop and a ton of inspiration from the Design Team.

Be sure to comment along the hop for your chance to win the ENTIRE Release!! You have until Midnight (BST) 2nd  September 2018 to comment and the winner will be announced soon after.

Happy Hopping!

Hugs

Friday, 17 August 2018

Introducing... Background Builders: Happy Hexagons & Beautiful

Hey!

Welcome back to day 2 of the August 2018 Release product introductions.

This is the fun part, you now get to see all the sneak peeks in action. The Design Team have worked their socks off and created an abundance of inspiration to share with you over the coming days :)

Yesterday myself and the Design Team re-introduced the 'So Much' mini clear stamp set HERE, be sure to check out all the inspiration and comment along the hop ;)

Today we are introducing 2 new clear stamp sets, Background Builders: Happy Hexagons & Beautiful.

Here is a little look at Background Builders: Happy Hexagons...


Geometrics, particularly hexagons are bang on trend right now and can be seen all around the paper crafting industry. I didn't have this in mind when I was designing the stamp set, I was mainly thinking to add to the Uniko Background Builders Geometric collection! 

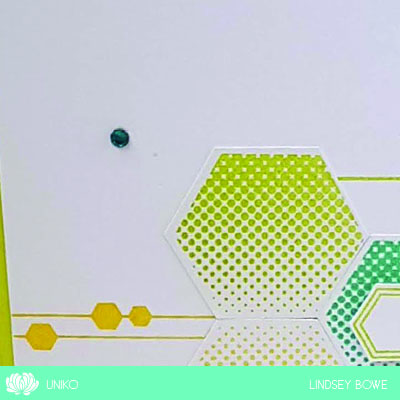
This was one of the cards from the Uniko Summer Stamping Retreat and it features all 4 of the single large hexagon stamps. The smaller squished hexagon is such a fun shape to add sentiments inside and some from the Simply Said range are the perfect size ;)


I've used my current favourite Altenew inks on this card and my 'go to' shades are the second lightest in the colour quads. The tiny solid hexagons are from Bee Happy clear stamp set, which was another influence on designing this new background builder. 

Next is Beautiful...


This clear stamp set came about through some logo designing I did for a friend and I was drawing imagery related to holistic therapies and geraniums were one of the flowers I started with. To cut a long story short, I ended up designing a logo completely different and these were calling to be put into a stamp set! 


This is another of the cards made at the Uniko Summer Stamping Retreat. The focus being on the sentiment and flowers stamped and heat embossed in white.

Ok, that's all I have to share here, but why not grab a cup of your favourite beverage and hop along with myself and the team...?


Well, I thoroughly enjoyed that hop and I am all inspired to get inky! I'd love to know your thoughts on these clear stamp sets and which is your favourite of the two, that is if you can decide?! 

That's all from myself and the Design Team today, but be sure to come by tomorrow for even more product introductions :)

Hugs