Showing posts with label MOD Background Builder Circles stencil. Show all posts

Saturday, 27 July 2024

Brand Ambassador Inspiration: Stencil Christmas Cards

  Hello everyone!

Happy Saturday!

Vinita here with some Christmas in July inspiration cards. I have fun making samples with MOD Background Builder Circles. I really like how they turned out!


Card 1

 I created a stencilled panel in the festive Christmas colors using Distress inks lumberjack plaid and cracked pistachio by masking the stencil. 


I added the panel to a red color card stock and adhered that panel to my white card base. The sentiment is from the Most Wonderful stamp set. The addition of red pearls enhances the beauty of this card, isn't it!

Card 2

I came up with an idea for a type of pinwheel flower using it somewhere. How would it work initially? The end result is here.


What do you think? Pretty funky Christmas card in rainbow colors! The colors of the pinwheel flowers and the background is created using the Distress inks pine needles, mowed lawn, crackling campfire, carved pumpkin, uncharted mariner, chipped sapphire, picked raspberry, and wilted violet.


 The sentiment is from the Season of the Beauty stamp set. The colored rhinestones are added to the center of the flowers.

Go and make some funky pinwheel flowers for yourself. The MOD background Builder Circles is such a fun and versatile stencil, you definitely go for it!

Thanks for visiting today!

Happy crafting!

Tuesday, 11 July 2023

Brand Ambassador Inspiration - Mid Century Modern Christmas

Good morning and welcome to another Christmas in July post! 

Over at Cardz4Guyz challenge, their theme is Christmas in July and here at Uniko we are also getting our festive hats on in the run up to the new release. I decided to put into practice one of the ideas I had for the MOD Background Builders Circles stencil I didn't use for the release back in January. Here is my first take.


I created a Christmas tree using the stencil and a tip I saw on Jennifer McGuire's You Tube channel. Taking an A6 panel of white card, I placed the stencil on it so that the 4 units of the middle section created my bottom branch, leaving enough room for a sentiment. Then using a mask created by cutting a small square from some scrap acetate, I went ahead and inked the elements in, moving the mask as I went. The inks I used were the 3 darkest of the Altenew Tropical Forest set and also their evergreen ink pad. Once complete, I moved on to the next row and so on until I got to the top where I used the extra elements found on the edge of the stencil.
The sentiment, Christmas Sentiments, was stamped and embossed with gold EP and a few red punched foil circles complete.

Pleased with my first attempt, I decided to make another, this time using the MOD Background Builder stencil and the same Altenew inks and the acetate mask.


This time I used some larger gold punched circles to decorate and the same sentiment completes.

OK, that's all from me for today, hope I've given you a few ideas to kick start your Christmas makes. I know I am falling behind in my Christmas card makes!

Happy crafting. 

Tuesday, 16 May 2023

Brand Ambassador Inspiration - Happy Birthday Cards

 Bonjour !

Izzy here with a little bit of Brand Ambassador Inspiration. As there was some birthday celebration in the air, I go on with two inspiration cards.

For the first one I wanted to use the last released Designer Dies Nature Treasures II Collection but this time I paired them with one of my favourite Uniko bundle, English Country Garden Butterflies Clear Stamp and Die and the beautiful background stamp Large Background French Scrip.


To make this card, I first die cut a white panel with a wonky stitched die on which I stamped the Large Background French Scrip. 

On a piece of white card stock, I stamped the butterfly with no-line colouring ink and I coloured it with coloured pencils. Once finished, I stamped back the butterfly but this time with black ink and I heat embossed it with clear powder and I cut it with the matching die.

I also die cut some of the leaves from the Designer Dies Nature Treasures II Collection. I cut some in Vellum paper and others in white card stock. I also stamped and gold heat embossed some of the curly leaves.

To finish my card, I tied a gold thread around the French Scrip panel and I foam mounted it on the double white card. Then I glued the leaves and the butterfly with glue dots. A sentiment from the Simply Said Blocks set has been gold embossed and glued on the card.


For my second card, I used part of the MOD Background Builder Circles stencil and I played with the colours of the last Color Hues challenge. 

To finish, I stamped the sentiment from Anniversaire Arts Décoratifs and I cut two out of four angles of the card so that it matches with the stencilled pattern.

Et voilà ! That's all for me today. I hope that you enjoyed the inspiration and thank you so much for stopping by.


Sunday, 22 January 2023

Stencil Sunday, Brand Ambassador Inspiration, Don't forget the small elements!

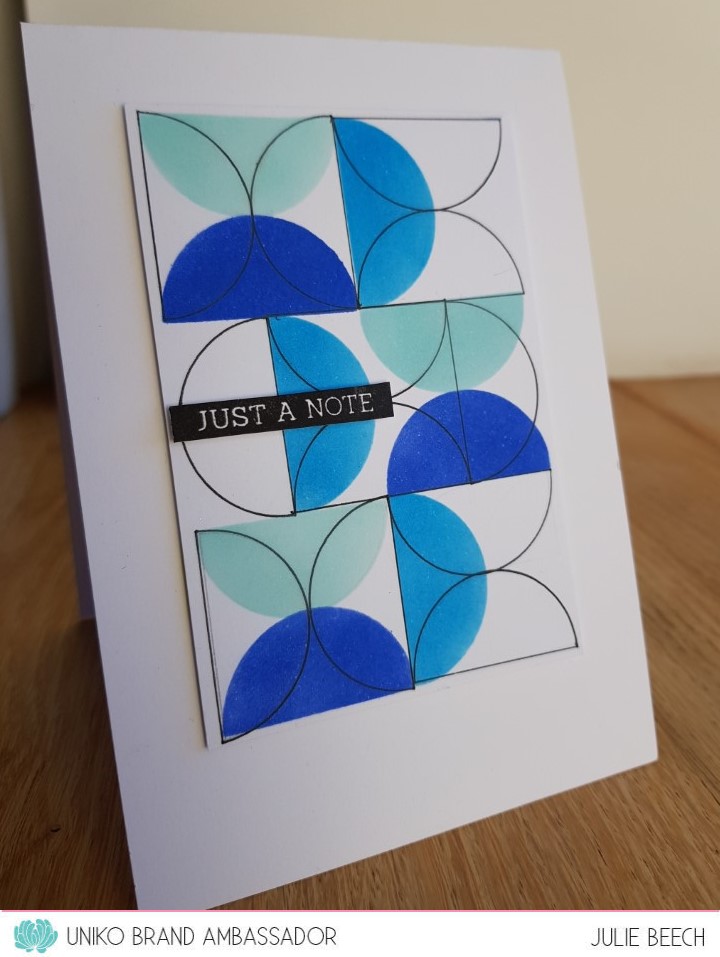
Morning all, Julie here with a little bit of inspiration using just one of the small elements from the new MOD Background Builders Circle stencil. I had so many different ideas that I didn't get around to making for the release.

First off is this card that was inspired by an abstract poster I found online, using just the largest  semi circle from the stencil.


To start, I took a panel of white card and drew around the inside of the semicircle with a black fine liner. Once I was happy with the pattern, I went back to add the stencilled elements in shades of blue. The panel was trimmed down to neaten it up and a simple sentiment, stamped in black on a scrap and trimmed down, was added. When I look at it now, I realise that the central mid blue semi circle should have been the other way around, but it's too late to alter it now!!
You could change up the design quite simply by including the quarter circle into the pattern or use the smallest semicircle for a more compact pattern. Play around on some scrap before you commit to your final design. Just have fun!!

This second card uses the same element but in a regular repeat pattern.


I chose to use a rainbow of colours this time and the last one of my square sentiments I made awhile ago using Doodle Flowers.
On a panel of white card, I inked the semicircle using rainbow colours, to create this repeating pattern. Trimmed down it was added to a base card and the sentiment added, then a white frame created using stacking square dies.

So two cards using just one small element, but two totally different looks. The small elements in sets are often forgotten but they are quite useful to create patterns. Play around, look at geometric posters on Google or Pinterest for ideas, but again have fun playing, it's only paper and ink after all!

That's all for today from me. Keep safe and keep crafting!