Showing posts with label Stylised Floral stencil. Show all posts

Monday, 27 March 2023

Magnificent Monday BA Inspiration - A little Bit of Sunshine to Brighten your Day

 Bonjour !

Izzy here with my last card to celebrate Spring. This time I used the Spring Botanicals Daffodil set together with the Bee Happy set and the Stylised Floral stencil.

As I told you in my previous BA inspiration post, here the daffodils are in full bloom and they finally put a bit of colour in our garden.


I started with the background of this card by die cutting a scalloped rectangle in a white card stock. Then I used the Stylised Floral stencil together with yellow inks to make a gradient from the top to the bottom.

On another white card stock I stamped the daffodil and the bee, then I coloured them with alcohol markers and I fussy cut them.


I flat adhered the stencilled background on the double white card and I stamped the beautiful sentiment in black as well as the little dots for the bee mouvement.

To finish my card I simply glued the daffodil and the bee on the card.

Et voilà ! That's all for me with the Spring cards. I hope that you enjoyed the inspiration and thank you so much for stopping by.


Sunday, 26 June 2022

Brand Ambassador Inspiration - Stencil Techniques Trio

Hi there

Happy Sunday!  Anita here with some stencil inspiration for you.  I love getting creative with stencils and, not only are they an inexpensive addition to your craft stash, they can be used in so many ways, in addition to the traditional ink blending method.

So I've got three different techniques for you using three different stencils from the Uniko range.


Using Pigment Powders and Water


For this technique I always use watercolour paper.  Lay the stencil flat to the paper, I used Flower Power #5 here.  There's no need to use tape, in fact it's best if you don't as the stencil will need to be lifted away easily.  Gently sprinkle pigment powders over the design.  I used Brusho here and just gently tapped the pot and used it very sparingly as there is so much pigment.  Then use a fine mist water sprayer to cover the design and to activate all the pigment.  Do not over-saturate or the water will start to migrate under the stencil.  Just lift it away and leave it to dry.

I finished off by stamping a sentiment from the So Much Clear Stamp Set.


Using the Ghosting/Watercolour Lifting Technique


I ink blended a background using Distress Oxide inks.  For this technique I used the Stylised Floral Stencil.  The stencil was placed over the ink blended panel and then spritzed with water.  Carefully lift the stencil away and leave for a few moments before blotting with a paper towel.  The water will activate the ink and allow the colour to be lifted away.  This generally works best with Distress and Distress Oxide inks as they react with water.

I die cut the panel with a stitched rectangle and heat embossed a sentiment from the Simply Said Clear Stamp Set onto a strip of vellum which was wrapped around and secured on the reverse.


Reverse Stencilling


For this card I've used the Flower Power #1 Stencil.  This technique involves inking up the stencil directly with ink pads and then spritzing well with water before placing it onto the cardstock.  I chose Strathmore Bristol Smooth cardstock for this as it takes water well.  I inked it up with Distress Inks in three shades.  Once placed onto the surface I left it for a short while to let the ink settle into the cardstock.

I trimmed it down and matted it onto a panel of co-ordinating cardstock, leaving a slim border, before adding the sentiment which is from the Simply Said Blocks Clear Stamp Set.  I then added some clear gems to finish.


Thanks for taking a look, hopefully these have given you some creative inspiration.  I hope you enjoy the rest of your weekend.

Crafty hugs

Thursday, 17 March 2022

Brand Ambassador Inspiration - Spring Botanicals Tulip

Good morning

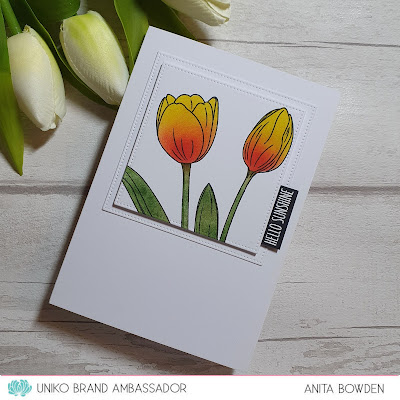
Anita here with my very first Brand Ambassador Inspiration post!  There are so many wonderful products in the Uniko range I was spoilt for choice but, with the official start of Spring this coming Sunday and this being my favourite flower, for my first post I had to share some inspiration using Spring Botanicals Tulip.  So I have a trio of makes for you today, all quite different.


Wonderful colouring with markers isn't one of my talents so for this first card I've used ink blending...


On some white cardstock I stamped the tulips image and then stamped it again onto some masking paper.  Instead of masking the image, I cut out the negative space and masked the background.  I then ink blended with Distress Inks.  I cut out the image using a pierced square die and another slightly larger from plain white cardstock.  I heat embossed the sentiment, also from the Spring Botanicals Tulip set, using white embossing powder on black cardstock and adhered it like a tab.  The die cut panels were then layered up with dimension.


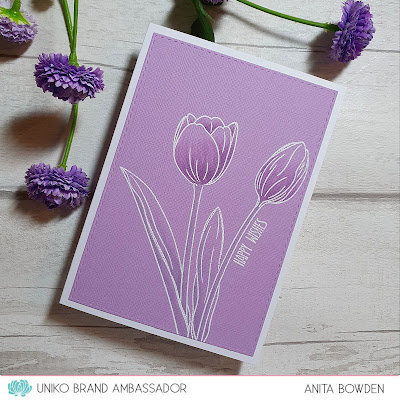
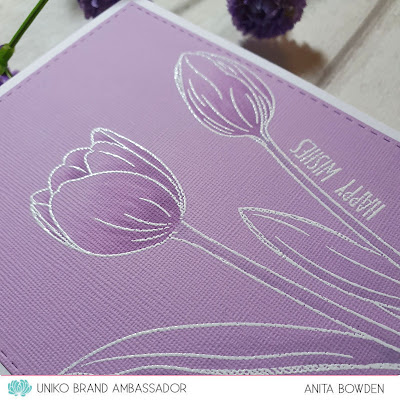
For this next card I used very simple tone on tone colouring...


My first step here was to stamp the image in a pale lilac ink onto some lilac textured cardstock.  I left the stamp in my stamping platform as I would need to re-stamp later.  I added some tone on tone colouring with alcohol markers, lilac shades for the petals and I chose grey for the leaves just to add a little shading.  Once complete I placed the panel back into my stamping platform, stamped in VersaMark ink and heat embossed in white, along with the sentiment, also from the same stamp set.  It's so much easier to emboss afterwards so you don't have to avoid the embossing and I've heard that embossing isn't too good for marker nibs either.  To finish this one the panel was die cut with a stitched rectangle and adhered flat to the card base.


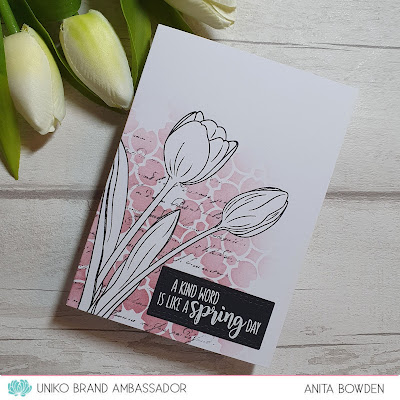
And for my third of this trio I left the image uncoloured and just added colour to the background...


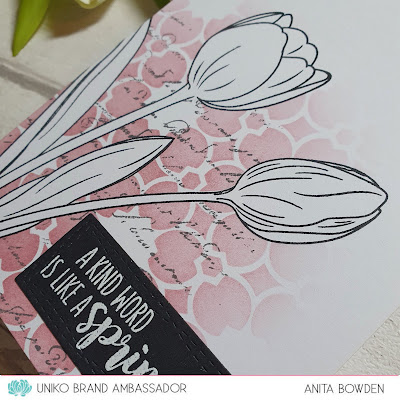
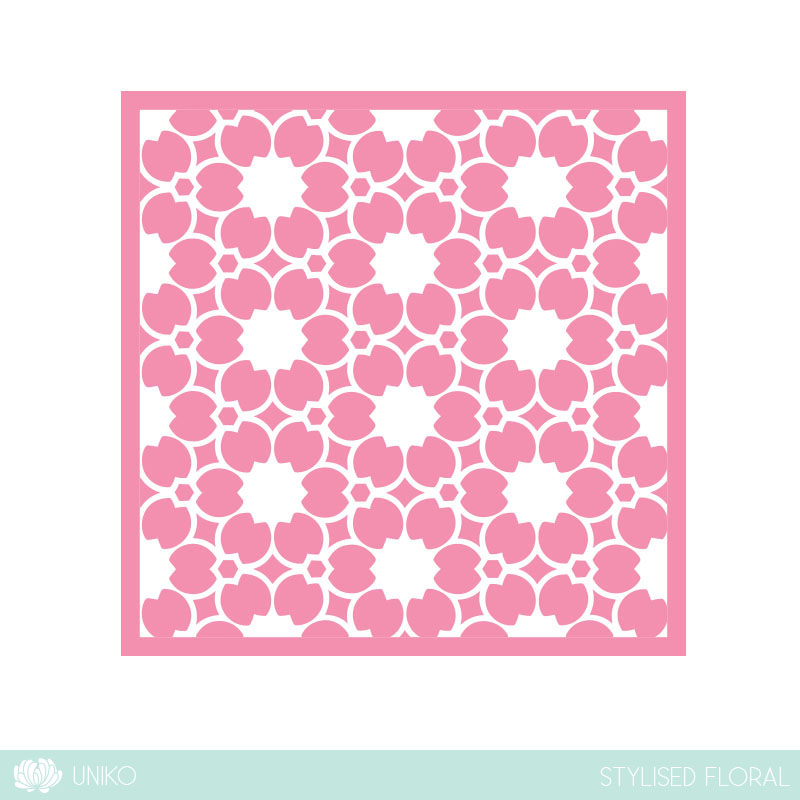
I stamped the image and masked it using the mask I'd previously cut from the first card.  I then laid the Stylised Floral Stencil over the top and blended through with Distress Ink, fading it out.  For a little more background interest, with the mask still in place I lightly stamped in grey with the Large Background French Script Stamp, just keeping the stamping within the area of the ink blending.  To finish, I used a sentiment from the Spring Botanicals Tulip set, heat embossed in white on a black die cut panel.


I hope you find some inspiration from these.  I'd love to be more creative with my alcohol markers but much more practice is required so, while I'm still learning, I'm always looking for different ways to add colour.  I had great fun making these.

I'm so glad Spring is (almost) here, it's my favourite season.  The daffodils are in full bloom in the UK and the tulips won't be far behind.

Crafty hugs to you all

Monday, 10 August 2020

One stencil, 3 techniques - Brand Ambassador Inspiration

 Hello friends Rahmat here, I am up with some inspirations using Uniko Stamps and stencils.

I have used Stylized Florals stencil here for all the cards but with different techniques.

I have used Foil transfer, adding shimmer to transfer gel and used a glimmer paste here.


                              This card is made using Thermoweb transfer gel DUO with Gina K silver sequin foil.

I spread the gel evenly through the stencil and let it dry. It dries clear and tacky, then add the foil and run through the die cutting machine, or you can also apply pressure manually, the gel is tacky enough to get a good transfer. I have used a heart diecut here during the transfer.

I used distress ink Weathered wood with a light hand to ink the base card and added the foiled heart with a foam adhesive, the sentiment is from Always and forever set. I added a foiled strip att he bottom for interest


The second card is made using a translucent glimmer paste, I simply spread the paste evenly through the stencil, and once it was dry, I had die cut the heart and added with a foam adhesive to the base. The base card is inked using distress in worn lipstick with a very gentle hand. The sentiment is from the same set as above. A pink glitter strip is added for some interest.

                                .                                                                      
The last card is made using the Thermoweb transfer gel with translucent glitter. I spread the gel evenly through the stencil, and then added the glitter and let it dry. Once it was dry, I die cut the heart and added to the base card, the base is inked with distress ink  Hickory smoke, and silver glitter strip to finish it off.


       Thank you for stopping by, I really appreciate your kind feedback. Have a great day!     


Saturday, 8 August 2020

Brand Ambassador Inspiration - Mono-printing with Stencils

Morning all, Julie here with some ideas to inspire you to get more from your stencils.

With so much time on my hands at the moment, I decided to have a play with my stencils to create some panels using a couple of mono-print techniques.

Here are two panels I made using a technique I saw Jennifer McGuire use on You Tube

I started by inking an A6 panel of white card with lots of Picked Raspberry and Salty Ocean DI. Then I made a hinge with some masking tape and added a plain white A6 panel. Without getting water on the plain panel, I spritzed the inked side then sandwiched the Stylised Floral stencil between and ran it through my die cut machine a few times using the normal die cut set up. Carefully separating the two panels revealed these colourful, fun, textured effects.

Here are a couple of cards I made using each of the panels, I still have a bit left over too for further makes! 


This first card uses a strip of the darker panel slipped behind textured lined panels, a simple stamped, uncoloured small peony bloom from Pure Florals - Peony. I kept it simple and uncoloured so as not to detract from the panel, the sentiment is from Simply Said Blocks.

For the second card I used a panel die cut from the paler print and the same bloom, again not coloured so as not to distract from the background. This time the sentiment from the peony set is stamped on matching linen cardstock.
My final card uses a slightly different technique to create the background. Instead of a piece of white card I added a cut down baby wipe over the stencil in the sandwich and ran it through a few times in the die cut machine as before. This time I rang the changes and used the Fun Flower stencil. The damp baby wipe lifts away the ink where it peeks through the stencil to leave this soft effect. The panel was inked with Tumbled Glass DI this time.

To make the card, I used more sentiments from Pure Floral Peony mounted on deep blue and the small butterfly from English Country Garden, embossed in white on vellum and then die cut. A few clear sparkly sequins complete. The embossed panel was mounted on the same blue card and added to an A6 card base.

That's it from me for this time. I hope I have encouraged you to look at your stencils again, you don't have to use these two, have a play and see what effects you can achieve with what you have.

So until next time, keep safe!


Sunday, 9 June 2019

DT Inspiration - Alcohol inks, stencils and Bold sentiments

Bonjour !

Izzy here ! This year I wanted to try alcohol inks and I'm just starting to discover all the possibilities they offer. So today I wanted to show you what I've done with my alcohol inks, texture paste, stencils and bold sentiments die cuts.

What I love with the AI is that their colours are very bright and used on Yupo paper (or similar), they give a beautiful bright and shiny look. I had to try a technique I saw on Jennifer McGuire blog to make great backgrounds.

Here are my cards...


For this card I used the Fun Flowers stencil together with the Fun Flowers stamp set. On a Yupo paper I popped texture paste through the stencil and let it dry. Meanwhile I stamped the Background blocks : pinstripe in black over the white card base, I die cut the Big & Bold : Happy sentiment in a black paper and I stamped in black the flowers of the Fun Flowers stamp set then fussy cut them.

Once the texture paste dry, on a felt applicator I put 3 alcohol inks, a bit of blending solution and I blended them onto the textured Yupo paper.


Then I adhered this Yupo paper strip over the white card base as well as the bold sentiment. I glued the flowers with Glue dots. To finish I stamped the other part of the sentiment.


For this card I used the Confetti stencil and the Big & Bold : Wish sentiment. I also used texture paste through the stencil and once dry I used my AI and blending solution together with a paint brush to make this sort of rainbow colours pattern. 

The sentiment is also done with AI on a paper similar to Yupo. Once dry I die cut the AI panel with a scalloped die and glued it on the white card stock. I also die cut an oval shape in a white card stock and I stamped the rest of the sentiment on it. To finish I die cut the bold sentiment and glued it onto the white oval cut.

I really love these bold sentiment dies, and I really hope that Bev will release some more for the other bold sentiments of the collection. 


So for my last card I had to create the die cut of the Big & Bold : Hugs stamp. It is long, tedious and much less beautiful than a real die cut. Here is how I did it...


For this card I again used texture paste through the Stylised Floral stencil, let it dry and then I randomly sponged the AI with a felt applicator. I cut this panel with a heart shape die and I glued it on the white card stock. Then I glued the bold sentiment on top of it.

To finish my card, I die cut an ampersand, I foam mounted it on the card and I stamped the rest of the sentiment from the Big & Bold : Hugs stamp set.

And that's it ! I still have a lot to learn with alcohol inks but in the end I will find a way to use all these trials on cards ! They are a fabulous background for the Big & Bold sentiments !

Thanks so much for popping by and have a great Sunday !


Sunday, 28 April 2019

Welcome to another Stencil Sunday ........

Hello there .....

I hope you're enjoying your weekend ..... can you believe we're almost in May!!!  Doesn't time fly when you're having fun! 

It's Linda here again with another quick and easy idea for using your Uniko Stencils ....... why not create your own pretty backing papers.
Here's a really simple idea using just a small part of the background piece I created.


I took a large piece of smooth watercolour card and blended Distress Oxide inks over the top. 
I started at the bottom with the lightest colour (Scattered Straw), and then worked my way up the card getting slightly darker each time to create a sort of ombre look.


I used Wild Honey, Spiced Marmalade and Picked Raspberry  ....... just think of all the fab combinations you could try!
Because the Oxide inks blend so well, you get all these fab shades in between too.

I then took my stencil ..... the pretty Stylised Floral, and used Abandoned Coral Distress Oxide to add the design over the top.  The result was a pretty piece of cardstock that I can cut up and use for lots of different projects ..... backgrounds, even die cutting.  You'll no doubt see some of it again!

For this card I cut a piece to fit on the bottom third of a 7x5 cardblank, and then I used a fancy, stitched edge die to trim down a piece of white card to fit over the top


I stamped my sentiment, from the Birthday Wishes Clear stamp set using one of the Oxide colours I'd used on the stenciled card ...... so that everything matched. 
If you haven't tried stamping with your Distress Oxides, give it a go.  They are so different from the original Distress ..... you get a much crisper image.

The pretty matching floral embellishment was made using the Stylised Floral stencil again.


I simply inked through the design onto a scrap of white card, fussy cut around the flower shape and attached it to the front of my card using foam pads.  I added another layer on top for the centre.

Thanks for popping by .......enjoy what's left of the weekend, and Happy crafting!

Cheerio until next time ......