Saturday 30 April 2022

Brand Ambassador Inspiration - Playing with stencils to CASE

 Bonjour !

Izzy here. I must admit that lately my inspiration is not at the top. But I noticed one thing, when I see all the beautiful cards on Instagram, Facebook..., I cannot help to think "oh, I could make this card with such Uniko stamp and/or stencil..". So I pined the picture for a future CASEd card. And this is what I propose you today, some CASEd cards made essentially with stencils.

The first card I CASEd is one from Sidnie of Sldcreations

and here is mine

For her background, Sidnie used a background stamp to make the emboss resist technique with her Distress Oxide inks. I used the Mid Century Modern Squares stencil. I inked it with Versamark and I heat embossed with clear powder. Then I played with the Distress Oxide inks in another combo of colours (Black soot, Chipped sapphire and Peacock feathers).

For the sentiment, I used the BIG & BOLD Happy clear stamp & die bundle. 

For my second card, I CASEd Kristie Goulet from Kreative Kristies


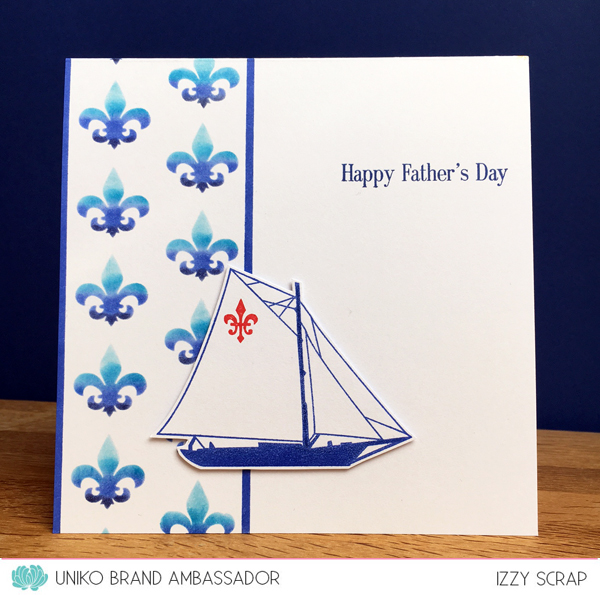
The stamped filigree on Kristie's card made me think to the Fleur de Lis stencil so I used her design to make this card. I paired this stencil with the Nautical Treasures Clear stamp set since it also has a Fleur de lis stamp.

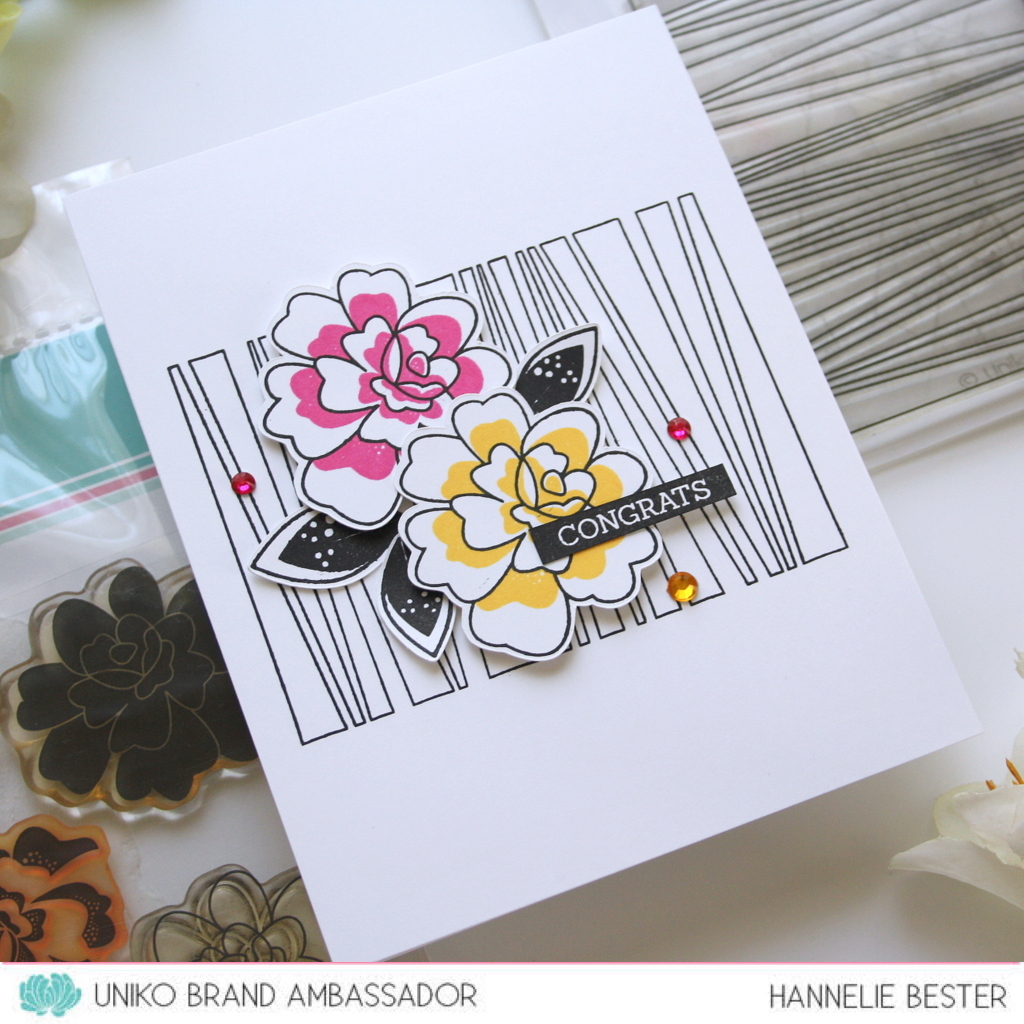
For my third card, I CASEd a Joan Bardee's card (from Dear Paperlicious) that I saw on Instagram.


I love the contrast of the dark background and the flower on top. Embossed background can also be made with stencil and that's what I've done here with the Stylised Floral stencil. For the flower I chose the delicate Floral Vines Clear Stamp Set and I coloured it with markers. It is perfect to frame a sentiment beautifully.

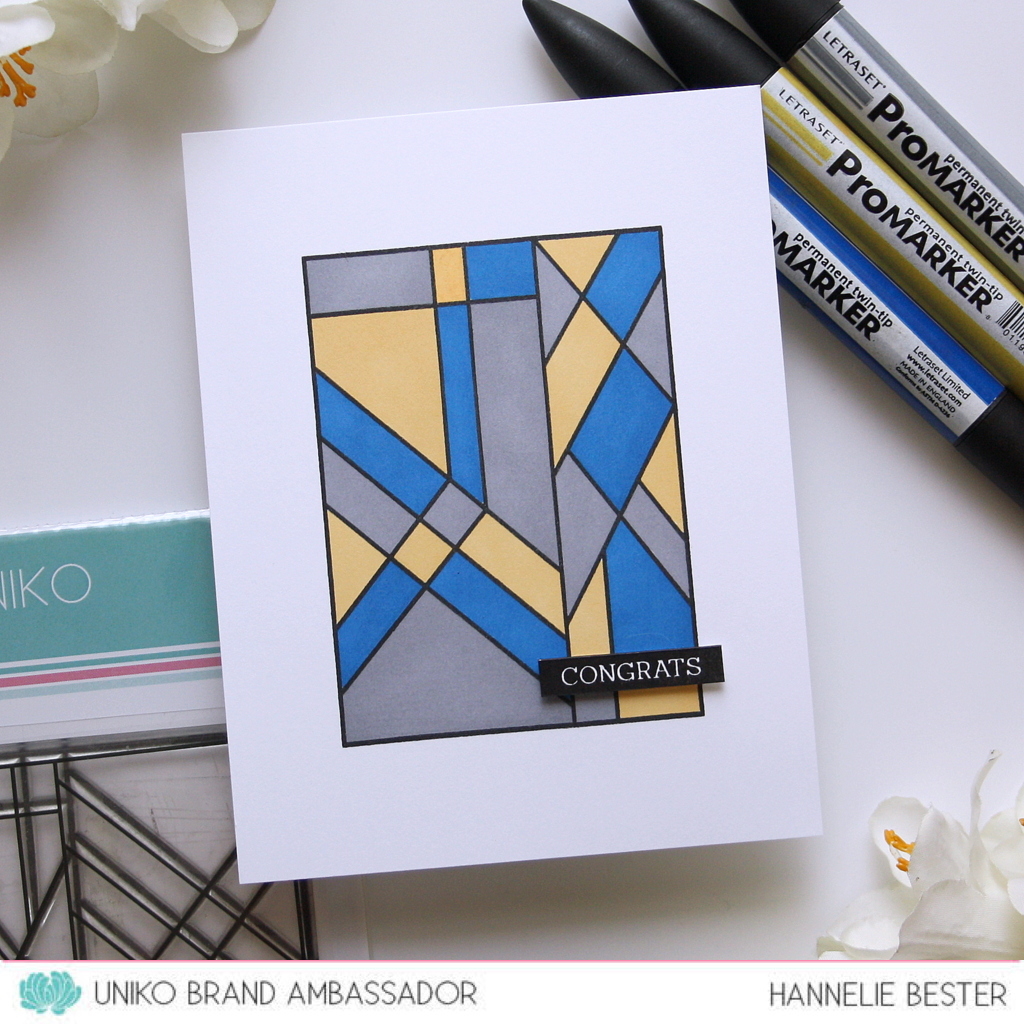
Last but not least, I CASEd Therese Calvird from Lostinpaper


I love so much her combo of colours that I kept it and I used the Mid Century Modern Shapes stencil for the geometric shapes. I also made it a birthday card with the Sentiments Outlined Clear stamp set. To frame this design, I just added some pinstripes on the edges from the Background Blocks Pinstripe Clear stamp.

And that's all for me today. I can't thank enough these wonderful Ladies for inspiring me with their beautiful cards and I hope that may be I inspired you with mine.

Have a lovely weekend and thanks so much for stopping by.


Friday 29 April 2022

Brand ambassador inspiration - Masculine card set

 Hi there !

Hannelie here today sharing a set of masculine cards using different backgrounds in the same colour scheme :)

First card :


For this card I used :


Second card :


For this card I used :


Third card :


For this card I used :


All the stamping were done with Gina K amalgam black ink , using my misti, and colored with Promarkers.

Thanks for looking !

Hannelie

Tuesday 19 April 2022

Brand Ambassador Inspiration - Framed Balloons

Hi everyone, 

Steph here for today’s Uniko Brand Ambassador Inspiration post. I mentioned last month that I wasn’t ready to let go of the birthday spirit and it appears I still have it this month too! I’ve focused my post on the wonderful Uniko Framed Balloons set that was part of the Uniko 10th birthday release.

My first two cards focus on using the full frame and both have been heat embossed. 

This card uses green pearlised card and white embossing powder. I have then added colours, shadows and highlights using colouring pencils. I have given the balloons an extra highlight with a white gel pen. This card has a lovely shimmery finish which does not quite translate on the photo.

Sticking with the green theme (it is my favourite colour after all!), this time I used gold embossing powder. I love how the gold pops on the dark green. On this card I used alcohol markers to add shadows and metallic gel pens to add colour and the balloon highlights. I teamed it with one of the wonderful sentiments from Uniko Anniversaire Arts Decoratifs set. 

Finally I decided to give more focus to the additions in the set as I had not used these in my introduction posts back in February. 


I repeat stamped the confetti and coloured it using alcohol markers. I then cut it into a square before cutting into three triangles. I created a green card blank and cut the front panel into a triangle, reserving the two cut of triangles for the cross over on the card front. I layered my confetti pieces onto the green pieces and adhered to the card front as shown. I added hearts cut from the remaining confetti card and presents stamped and fussy cut. Finally I added the sentiment which I coloured to match and die cut with a fancy die. 

I hope these give you some inspiration of how you can get more from your stamp sets and what different effects you can achieve simply by changing the colour of the card stock, ink or embossing powder.

Thanks for joining me today. 

Much love

Steph x


Sunday 17 April 2022

Brand Ambassador Inspiration - Flower Power

Good morning

Anita here wishing you a very Happy Easter Sunday.  We've certainly had a glorious couple of days here in the UK so far this bank holiday weekend, Spring has definitely sprung!  I hope you're all having a wonderful weekend, however you're spending it.

Before I get started on my makes, I'd just like to make you aware of a 10% discount code that Bev is kindly offering on all orders this Easter weekend so if you do want to make a purchase, please do use the code easterspecial10 for a discount...


Ok, onto my cards, and I chose to use some of the great Flower Power stamp sets for these.  


First up, a little emboss resist and ink blending...


I stamped the flowers and leaves from the Flower Power #3 stamp set in VersaMark ink onto some white cardstock and heat embossed them with white embossing powder.  I then ink blended with Distress Oxides before cutting with dies from the Designer Dies Flower Power #1 - #6 Collection. I adhered these to the card base, popping the flower heads up on 3D foam and then stamped the sentiment from the Flower Power #4 stamp set onto a die cut sentiment strip.


Next up I created a stamped floral background as my focal point...


These cute little roses and leaves are from the Flower Power #6 stamp set and the flower head is created with two-step stamping.  So I stamped the solid image first in lilac and then over-stamped with the petals image in a darker purple.  I then created a mask to stamp the leaves up against the flower heads.  The sentiment, also from the same stamp set, has been stamped and heat embossed in white on a strip of purple cardstock.  I then adhered the strip to the panel before die cutting the panel with a scalloped rectangle.


For my final card I watercoloured the flowers using watercolour pencils.  Unfortunately, my camera has washed out the colour a little on this one...


On some Strathmore Bristol cardstock I stamped and heat embossed a few flowers at a time, these being from the Flower Power #2 stamp set.  When stamping the subsequent flowers, I brushed away the embossing powder where it overlapped the already embossed flowers, this could also be done with a mask.  I then painted the flowers using a wet brush and picking up the colour from the tips of the pencils.  I made a die cut panel with an aperture and stamped the sentiment, also from the Flower Power #2 set, and adhered the floral panel behind the aperture, before adhering the panel to the card base using fun foam.


As you can see from these, the Flower Power sets are great for mixing and matching, and can used in so many ways.  There are lots of floral elements and numerous sentiments in each set.

Crafty hugs to you all and very best wishes for a Happy Easter Sunday.  Don't eat too much chocolate!  Actually, on second thoughts...you only live once, eat that chocolate and enjoy it!


Friday 8 April 2022

Uniko Brand Ambassador post : Beautiful Blooms 2 with five different backgrounds

 Hi there!

Hannelie here with a quick and simple set of five cards using Beautiful Blooms 2 with different backgrounds. Always handy to have a set of cards on hand for those unexpected occasions when you need a small gift!

Card #1 :


Card #2 :


Card #3 :


Card #4 :


Card #5 :


It makes a beautiful set! 


I used :

Beautiful-blooms-ii ,  Simply-said-blocks  & Simply-said-blocks-iii  on all the cards


I used my Silhouette cameo to cut out the flowers and leaves and stamped everything with Versafine Black ink, Altenew ink and my Misti stamping tool.

The flowers were popped up with foam squares and embellished with pearls or rhinestones.


Do you have a favorite? I would love to know!


Thanks for popping in today ... hope you leave inspired ♥


Hannelie


Tuesday 5 April 2022

BA Inspiration - Mid Century Modern Florals

  Hello!

It's Jane here sharing a couple of cards I created using the Mid Century Modern Florals stamps and Mid Century Modern Shapes stencil.

I absolutely love CAS cards that have a colourful background and a simple stamping of a black image on top. so that's the look I was aiming for today.


The design for both cards is fairly similar, both starting with an inked stencil background cluster.

I then stamped straight on top with Versafine Clair nocturne ink. There is a flower stem line in the stamp set, but I chose to draw it with a ruler and fine black pen. 


The sentiments on the cards are from Everyday Sentiments and I love their clean modern style, just perfect for my two CAS cards.

Thanks so much for looking today.

Stay safe and keep crafting!
Jane
x

Friday 1 April 2022

BA Inspiration, Spring Botanicals - Tulips Three ways

 Good afternoon folks, Julie here with a little bit of Spring BA inspiration.

It's the 1st of the month, so there's a new colour combination over at Color Hues and as soon as I saw that it was pink and green I knew I had to use the Spring Botanicals -Tulip set. These cards all use the same stamp but I've used a different method of colouring in each.

My first idea uses a slimline card base and watercolour. On a panel of white card, I stamped a row of tulips in black and embossed with a clear EP before washing in some pink DI over the petals and green over the stems and leaves. Detail was added with matching pink and green Zig watercolour markers. 

Taking the slimline card base, I added a strip of black and white DP to the open edge before adding my watercolour panel and a strip of silver mirror card. The sentiment from Pure Florals Cosmos was stamped on a strip of black card and heat embossed with white EP.


The second card started with an A6 panel of Copic friendly card, on which I stamped all over with the tulip flowers in Altenew's Limestone ink for a no line effect.


Using pinks, RV00, 10, 13,14 and 17, I coloured the blooms, the leaves were similarly coloured, this time using YG17, 21 and 25. For added dimension I added a bit of shadow with a dark grey Copic.
The sentiment, from Doodle Flowers, was stamped onto a square panel of grey card and heat embossed with white. I realised that if I double mounted the sentiment as I had intended, then the central bloom would be totally lost, so instead I added a separate white frame, allowing a peek of the bloom behind. The completed panel was added to a panel of the same grey card and then on pads to a 5 x 7inch white base card.


Finally, I did a loose watercolour version to go with the snowdrop one from my January BA post.


To get the look of no line, I first stamped my tulips onto a panel of scrap copy paper then scribbled the back with graphite pencil and traced through with a sharp pencil onto an A6 panel of MM paper, you could try a pale ink and simply stamp but you run the risk of it bleeding into the paint unless it's a waterproof ink!
I then painted over the tulips with masking fluid.


Once the masking fluid was dry, I washed clear water over the panel and dropped a variety of greens into the background, darkening areas around the blooms.
When dry, the masking fluid was removed and I started work on the blooms.


I worked on each petal in turn before starting on the leaves and stems. Lots of water is the key to the loose watercolour effect and patience!! Find something else to do while the different layers dry.
When I was happy with the painted panel, I mounted it behind a die cut mount and added a simple sentiment on pads.

When I chose the tulip image for these cards my own in a pot on the patio were just showing signs of life but hopefully they will soon burst forth into bloom.

That's all from me for today, hope I've inspired you to get out those stamps and paints out and have a play, it is only paper at the end of the day! If you don't like your attempts leave it a few days and come back to it, it's amazing how different it will look, you may surprise yourself.

Until next time, stay safe and keep crafting!