Saturday, 27 October 2018

Introducing... Stencils Scandinavian Christmas & Christmas Folk Snowflake AND Simply Said Blocks Christmas

Hey!

Welcome back to day 2 of the October 2018 Release product introductions.

This is the fun part, you now get to see all the sneak peeks in action. The Design Team have worked their socks off and created an abundance of inspiration to share with you over the coming days :)

Thank you for all the comment love yesterday here and on social media. If you missed yesterday, you can catch up HERE where myself and the Design Team re-introduced Background Builders: Christmas and Jolly Christmas clear stamp sets.

Today we are introducing 2 new stencil designs Scandinavian Christmas & Christmas Folk Snowflake AND 1 new clear Stamp Set, Simply Said Blocks Christmas!

Here is a look at Christmas Folk Snowflake Stencil and a sentiment from Simply Said Blocks Christmas...


I've had this motif designed for probably 5 years now. Originally an idea I had for a collection when I was a freelance designer for the gift industry, but I never followed through with it, until now! 

When designing new products, I often look through my archive of designs and that is what I did when designing this stencil. I am super chuffed with it and just look at the sparkle! 


I've inked through the stencil with Candid Apple Distress Ink and then before removing my stencil, I inked over with VersaMark. I then sprinkled Stardust Embossing powder over and heat set it. The sentiment is just one of the options from the new Simply Said Blocks Christmas.


As usual my AWESOME Design Team have created projects to share with you all too. Be sure to hop along, commenting along the way. You never know, I might just pick some random comments to WIN some prizes this release ;)


Sarah P

WOW! That was another inspirational hop, so many new ideas of how to use these new stencils and sentiment stamps. I hope you enjoyed the hop & will come back tomorrow for the next product introductions. 

Hugs


Friday, 26 October 2018

Re-Introducing... Background Builders: Christmas AND Jolly Christmas

Hey!

Welcome to the first day of the October 2018 Release product introductions.

This is the fun part, you now get to see all the sneak peeks in action. The Design Team have worked their socks off and created an abundance of inspiration to share with you over the coming days :)

Today we are re-introducing Background Builders: Christmas AND Jolly Christmas clear stamp sets. These two clear stamp sets were first introduced WAY back in October 2013 HERE and HERE. You can also find more 'old' inspiration using the clear stamps HERE and HERE on Pinterest.

How about a fresh look at what these stamp sets offer in their creativity potential...


First up a colourful card using 6 out of the 8 building strips from Background Builders: Christmas. I simply repeat stamped the strips on white card to create a pattern and then die cut stitched squares to create a quilt style design. The sentiment is from Simply Said Christmas.


There are a few fun features to this building set and one of my faves is the two step stamping holly strip :) I also LOVE adding glitter to the outline tree centres! 

Next up we have Jolly Christmas and I have used my favourite image from the clear stamp set for both these cards...


The card on the left I shared HERE for my CAS Colours & Sketches DT card, so you can find all the details about it there. 

For the card on the right I created a background using Uniko Stencil Scattered Polka Hexagons and sparkly paste. I coloured and fussy cut Jolly Santa out applying glitter to the brim of his hat and the cuffs on his coat. The sentiment is from Most Wonderful.


As usual my AWESOME Design Team have created projects to share with you all too. Be sure to hop along, commenting along the way. You never know, I might just pick some random comments to WIN some prizes this release ;)


WOW! That was an inspirational hop, so many new ideas of how to use these re-released clear stamp sets. I hope you enjoyed the hop & will come back tomorrow for the next product introductions. 

Hugs


Thursday, 25 October 2018

October 2018 Release Sneak Peeks!

Woohoo!

It's time for another NEW release and to share some official sneak peeks with you! If you follow @unikoltd on Instagram, you might have seen a few peeks I have been sharing here and there ;)

This month I have 4 NEW clear stamp sets, 2 re-release clear stamp sets AND 3 stencil designs! They will all be available to purchase at a NEW release trial time of 9pm GMT Tuesday 30th October.

Anyway, I will remind you of that as we progress through the release festivities. How about I share some peeks with you...


Firstly, here are the 2 peeks of the clear stamp sets coming back from retirement. Those who have been followers and customers of Uniko for a few years might recognise these. 

Next we have peeks at the 4 new clear stamp sets...


And lastly, but by no means least the 3 new stencil designs...


As you can see it is a pretty BIG release and I can't wait to share projects and ideas using them all :) 

My awesome Design Team are going to help me do this too and we will be back tomorrow with the start of our traditional product introductions.

I hope you will join us at 9am tomorrow and I would LOVE to know what you think of the sneak peeks. 

Thanks for stopping by!
Hugs

Tuesday, 23 October 2018

CAS Colours & Sketches #295 - Sketch & DT Call

Hey!

This month at CAS Colours & Sketches we have another multiple hostess month. This week is my turn to be hostess and I have this fun sketch seen HERE and below to inspire your clean & simple card making...


AND...
CC&S are looking for some new members
to add to our Design Team!

Our blog is dedicated to creating greeting cards in the Clean and Simple style of crafting, alternating between colour challenges and sketch challenges. Design Team responsibilities include designing cards for our challenges and sharing them on your own blog, commenting on challenge entries and voting for our Weekly Winners each week, and acting as our host and creating challenge ideas for at least one month during the year.

If you would like to be considered for a position on our team, you must participate in last week's colour challenge and this week's sketch challenge so that we can see your work in both types of challenges. Please add the letters "DT" after your name when you link your cards for the two challenges, and make sure that your cards follow our Challenge Rules. Applicants will be contacted during the month of November.  Our new members will join us as our Guest Designers in December and start on the team full-time in January 2019.

Anyway, I hope you join in on this weeks challenge & the DT call, but here is my inspiration using this weeks sketch...


This little guy, Jolly Christmas is making a come back into the Uniko clear stamp inventory. Myself and the Uniko DT will be formally introducing him later this week, along with more Christmas / Winter themed products :) 

Anyway, he was perfect for this weeks sketch, combined with a HO HO HO background strip from another of the NEW Uniko clear stamps being introduced later this week ;)


I've used the Poppy Parade Stampin' Up! marker to colour Jolly Christmas in and added glitter to the brim  & bobble of his hat and the cuffs of his coat. I also coloured the tiny circles inside the HO HO HO strips with the same colour. Super simple and pretty quick to create!

That's all from me today, I hope thatI have inspired you to join in on the challenge?! If you need a little more inspiration, pop on over HERE to see what the CC&S Design Team have created.

Thanks for stopping by!
Hugs

Tuesday, 16 October 2018

CAS Colours & Sketches #294 - Colours & DT Call

Hey!

This month at CAS Colours & Sketches we have another multiple hostess month. This week Patricia is our hostess and has this weeks colours for you HERE ...


AND...
CC&S are looking for some new members
to add to our Design Team!

Our blog is dedicated to creating greeting cards in the Clean and Simple style of crafting, alternating between colour challenges and sketch challenges. Design Team responsibilities include designing cards for our challenges and sharing them on your own blog, commenting on challenge entries and voting for our Weekly Winners each week, and acting as our host and creating challenge ideas for at least one month during the year.

If you would like to be considered for a position on our team, you must participate in this week's colour challenge and next week's sketch challenge so that we can see your work in both types of challenges. Please add the letters "DT" after your name when you link your cards for the two challenges, and make sure that your cards follow our Challenge Rules. Applicants will be contacted during the month of November.  Our new members will join us as our Guest Designers in December and start on the team full-time in January 2019.

Anyway, I hope you join in on this weeks challenge & the DT call, but here is my inspiration using this weeks colours...


With the pinks in this weeks colours I had already decided that I needed to make a floral card. I then just needed to think how to incorporate the Soft Suede, which I have by stamping the flower outlines and sentiment.


A pretty quick CAS card with some Prismacolor Pencil colouring and simple layering of the flowers.  I used the recently released Beautiful clear stamp set and the sentiment is from Simply Said.

That's all from me today, I hope thatI have inspired you to join in on the challenge?! If you need a little more inspiration, pop on over HERE to see what the CC&S Design Team have created.

Thanks for stopping by!
Hugs
Sunday, 14 October 2018

Uniko Studio Snowflake Projects...Inspired by "Turnaround" Stamping

Hello,

Carol here, sharing a discovery made while wandering through the blog-iverse: 'home made' Turnaround Stamping.  Most of us are well aware that Turnabout Stamps are a new, popular, trend in stamping, involving a variety of stamps that are attached to one another and designed to be inked up and rotated to create fabulous - and in many cases, intricate - backgrounds.

Did you know, however, that we can create our own version of this type of stamping, using a bunch of little images already in our collections and a grid system? I didn't...until I found Allison Cope's video/post at Inspire Me Monday:Turnaround Stamping.

I was completely enthralled and *had* to give it a try, using a variety of Uniko snowflake stamps from Stunning SnowflakesBig & Bold: Snow and Background Builders: Vines Winter Additions.

What follows are photos of my 'grid', my stamp arrangement and the cards/bookmarks that emerged from 1 thru 4 turns of my 'design.'  I 'should'  have included photos of the panels before I transformed them, but...completely forgot!  My initial layout is somewhat visible in my Misti photo and/or the first card.

Allison's video is absolutely instructive and easy-to-follow (which I pretty much did to a 't'), so I'll leave you to watch her and just get on with sharing my little offerings. I'm sure nothing here is 'new under the sun', but for me, the exercise of playing/creating was pure joy!

My grid and initial stamp placement (used 6 X 6" paper for everything):


One 'turn' stamped...and the CAS card created...


Two turns stamped...divided into two bookmarks...(need to add embellishments/twine...on my to-do list).


Three "turns"' stamped...and the  two cards created.


Four 'turns' stamped...and another two cards.


Once you fiddle about with your image placement (practice on scrap paper to be sure the 'turns' work...trust me...this is well worth your time), this is a TON of fun...and oh, the possibilities!  You don't even need an engineering degree to figure this out! If I can do it, so can you!

I inked up another panel (inspired by Allison's version), using several Uniko sentiments from various sets and a couple of snowflakes...and yes...it took a bit of "put this here, put that there, nope...back to the drawing board" to figure out (plenty of scrap paper used *grin*), but once done, the inking/stamping was quick (each image inked/stamped and rotated four times to get the colour variation).  Not sure what I'll do with this yet, but once I figure out my designs, I'll be sure to share...


Hope you enjoyed my projects and maybe give this technique a try with the Uniko 'littles' in your collection. I'll definitely be using this grid system again, although by no stretch will my efforts be as fantastic as the 'professional' Turnabout stamps on the market. Still, this is a fabulous way to stretch our stamps and our creativity, right? Right!

Friday, 12 October 2018

Foiled Chrysanthemum

Hi there, Sarah G here.  

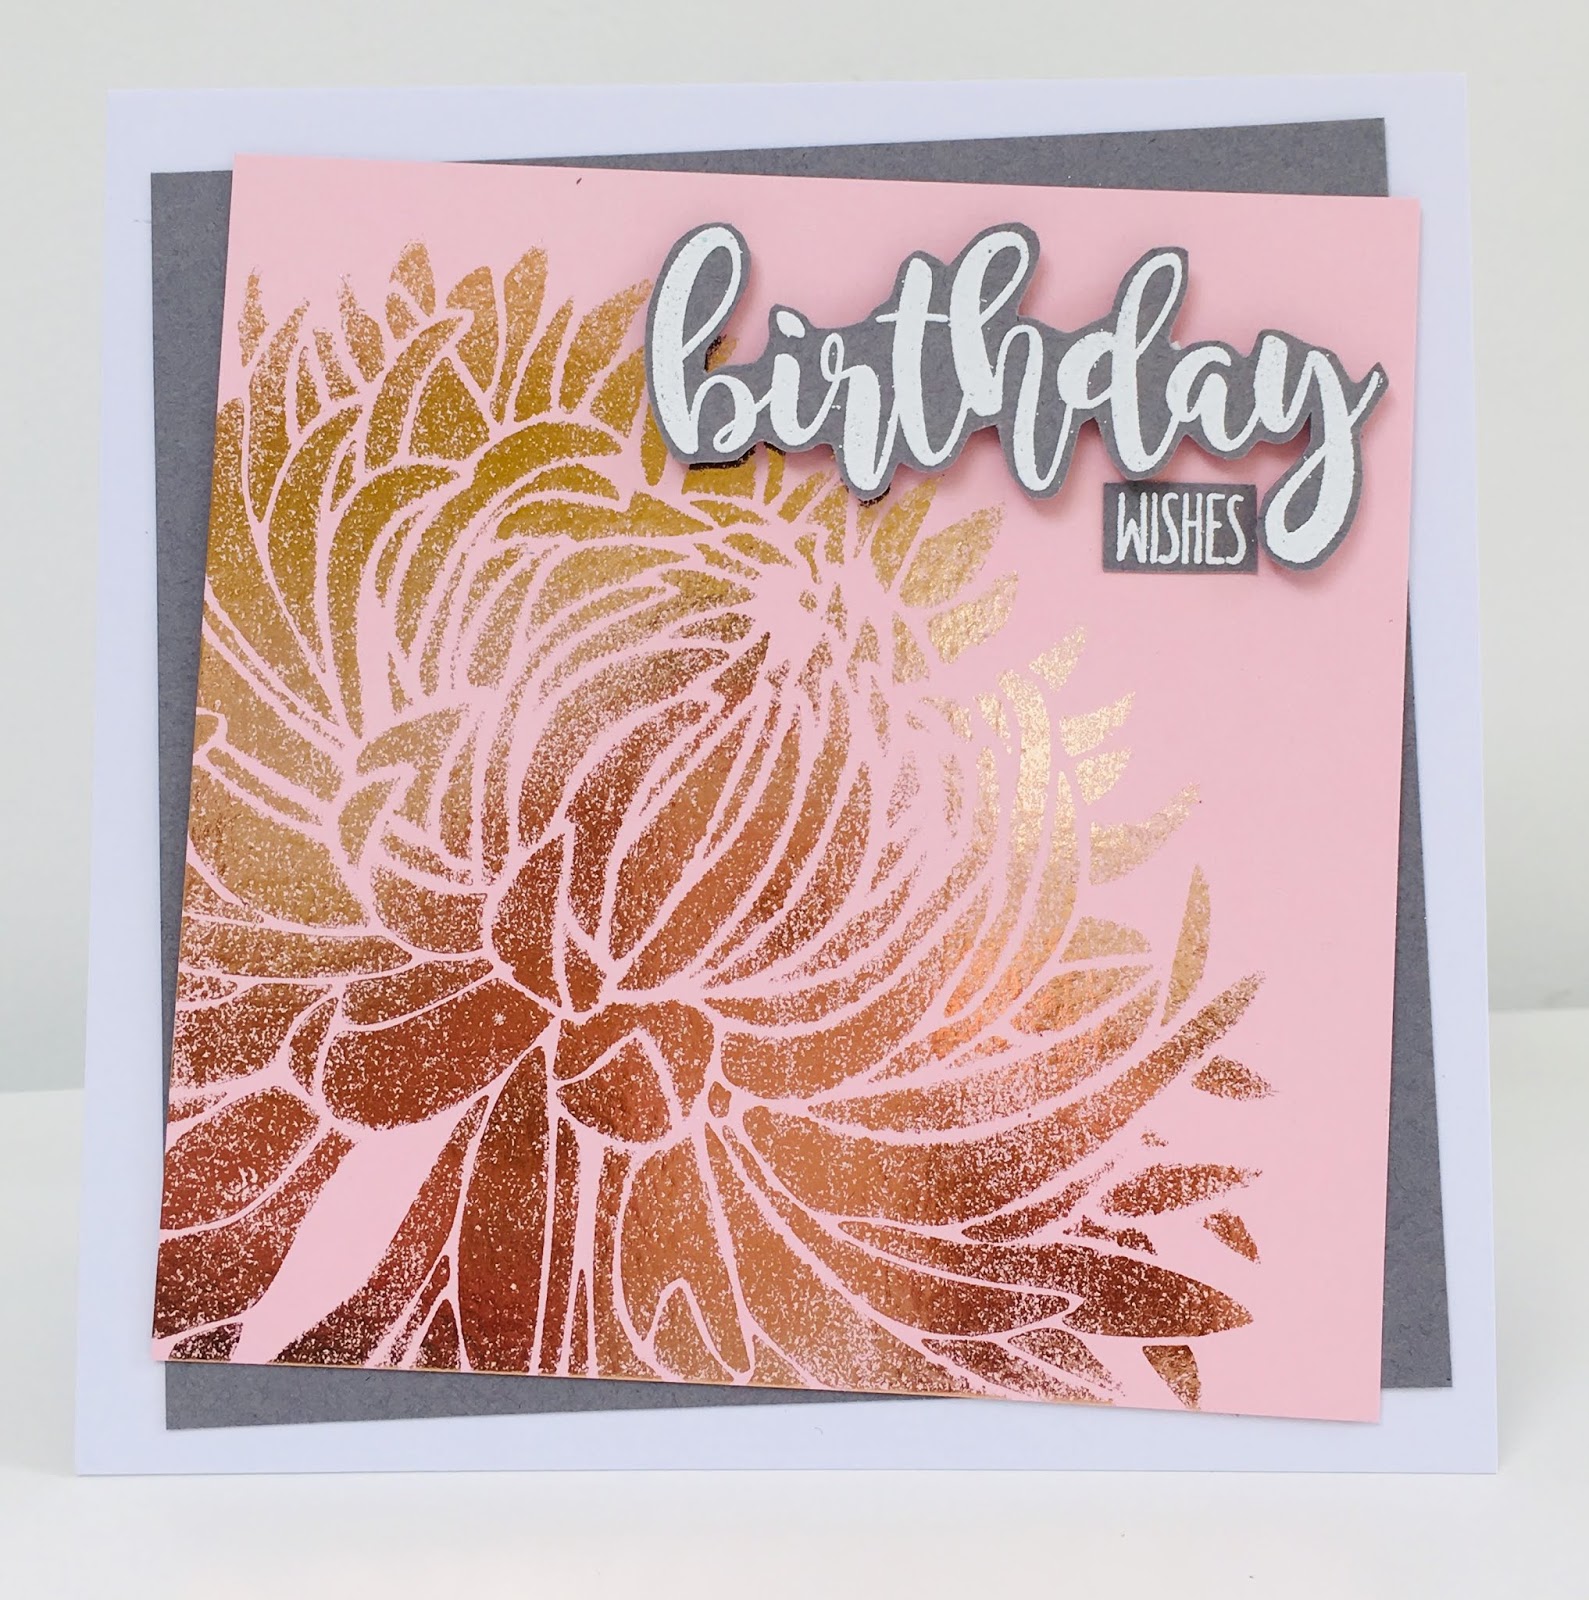
I wanted to drop in to share some experimenting that I have been doing recently with stencils and the Heidi Swapp Minc Reactive Paint.  I wanted to use it to create foiled designs and decided to use the beautiful chrysanthemum stencil.


I simply dabbed through the stencil with the paint on cut and dry foam, allowing it to dry before putting it through the minc machine with rose gold foil.  It gives a shiny but slightly distressed look which looks lovely in real life!  Of course this involved a bit of trial and error to get right and my top tips would be to lay the stencil down with repositionable adhesive spray to minimise any bleed underneath and to dab the paint on sparingly.

However, the waste from the foil sheet was as pretty as the foiled image so I stuck it down on to a piece of double sided adhesive and cut round the flower.  I removed the back of the adhesive and rubbed a clear iridescent glitter across the back of the flower.  I added some paint splatters in pale mint to enhance the artsy look.


I hope you like these designs.  Hopefully it gives you some more ideas for using your stencils in new ways!

See you again soon x