
I'm back today with a card to share that I've made using the current CAS(E) this Sketch! I had this card idea in my head as soon as I saw the sketch and had to find a little creative time to make it...
thisSketch%2324a.jpg)
The sketch seen HERE and below certainly got my creative juices flowing & I can see me coming back to this one!

My card is almost a one layer card, but I decided to mat the main layer with some SU! Summer Sun CS I had left in my stash. I think it helps frame the focus of the card...
thisSketch%2324b.jpg)
I thought I'd put together a photo tutorial of how I created this card too, I'd have done a video tutorial but I am not very good at those... YET!
I'm working in Photoshop CS5, most Photoshop & Photoshop Elements packages have similar menus.
Step 1 - Create a new document the size of your card panel. Mine is 10 cm x 13.5 cm
File - New - Custom - Enter dimensions - OK

Step 2 - Create a second new document the size that you want your patterned paper strips to be. Mine are 1cm x 5cm
File - New - Custom - Enter dimensions - OK

Step 3 - Open the digital patterned paper files you want to use. I chose a patterned paper design from Pure Florals: Chrysanthemum Digital Patterned Paper Collection.
File - Open - Locate Saved Digital Download - Open

Step 4 - As the canvas size of my card is a quarter of the size of the digital patterned paper I decided I needed to shrink the paper so that more of the design would be seen on each of the coloured/patterned strips.
Image - Image Size - Enter Dimensions - OK

Step 5 - Creating the strips.
Using the Rectangular Marquee Tool select the top left area of the paper big enough to fit inside the second document in step 2

You now want to copy this section of the paper to paste into the second document.
Edit - Copy
Step 6 - Go to document 2 (I named mine strip size) and paste the paper into the document.
Edit - Paste
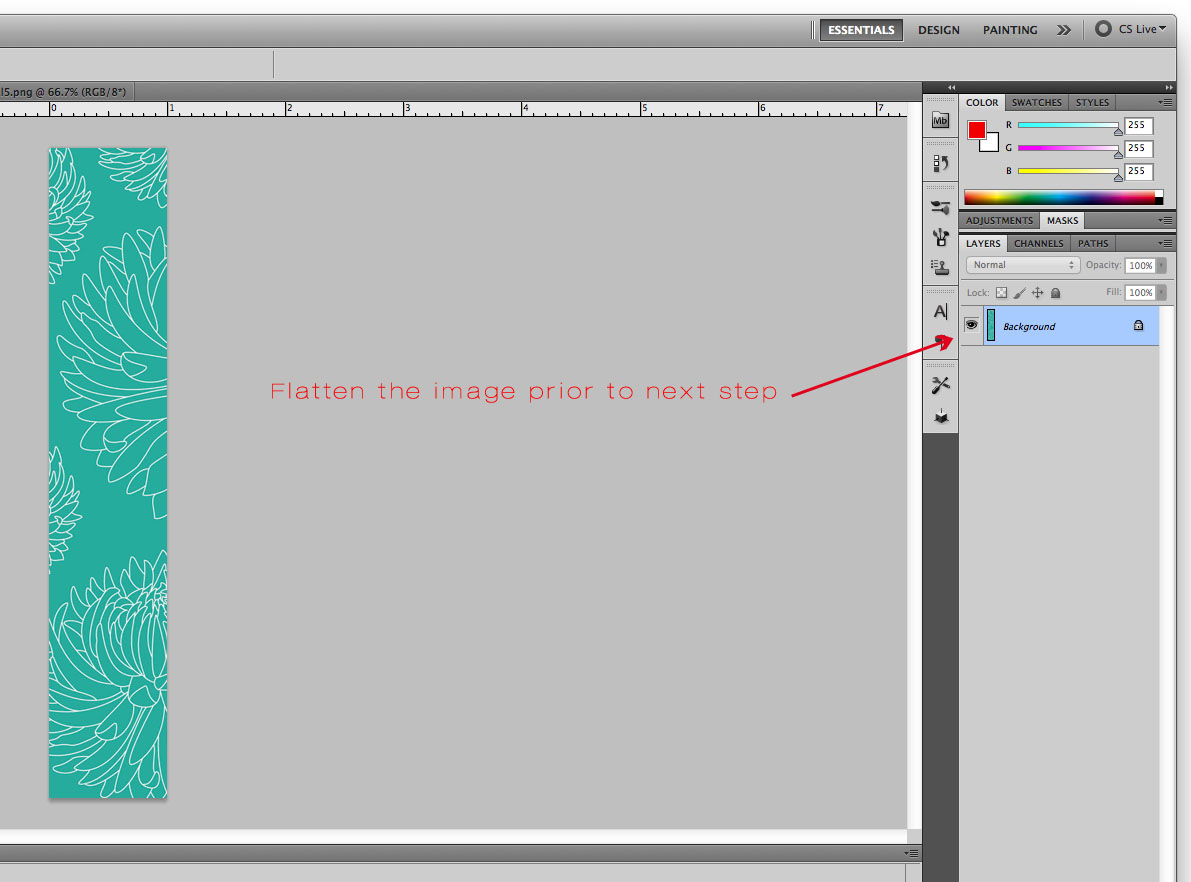
Step 7 - Before we can copy & paste this paper strip into our first document in Step 1 it needs to be flattened so it is just one layer.
Layer - Flatten Image - Edit - Copy
Step 8 - Paste patterned strip into document 1

Roughly move & place the strip where you want it to be. You can play with placement & spacing once you've all you strips on the document.
Step 9 - You could repeat Steps 3 - 8 with each of the 4 other colours of patterned paper.
However, I took it one step further and made the process a little more time consuming! I wanted the pattern across all the strips to match as they went across the card front which you can see in my close up photo above.
How I did this... Step 3 - 6 are the same as above. In Step 7 before I flattened my image to copy and paste into the main document I moved the paper to the left by 1cm

Step 10 - Repeat Step 7 & 8
Step 11 - Repeat Step 9 but for the 3rd colour/patterned strip you'll need to move it across to the left by 2cm and by an extra cm for each strip until you've five strips in your document. Which should look like this...

Step 12 - Adding the sentiment. Use the Type tool (T) to do this. Select & change Font & Font Size as required.

The font I used is Disco 18pt.
Step 13 - Print document, trim to desired size
Step 14 - Stamp 'Hello' sentiment & adhere mat layer to card base
Ta Dah!

I hope you found the photo tutorial useful?! If not I'm sorry, but I hope you liked my card :) That's all from me today - phew I hear you say after all those photos! Haha!
I'll be back tomorrow with more to share & thank you for stopping by.

Supplies
Card Stock: SU! Retired Summer Sun, White 160 gsm Printer Paper
Ink: VersaFine Onyx Black
Stamps: Uniko Studio All Occasion Sentiments #1
Accessories: Uniko Studio Pure Florals: Chrysanthemum Digital Patterned Paper Collection
This is so pretty and what a great effect. I was wondering how you made it so was glad u shared your tutorial
ReplyDeleteAbsolutely love your card and thanks so much for sharing how to make it. Hugs x
ReplyDeleteOh wow! I hope at some point to be able to actually look at your tutorials and figure out how to be more digital - your colours and images and technical ability always result in amazing cards! Thanks so much for playing along with us at CAS(E) This Sketch this week!
ReplyDeleteI love this!! The subtle patterns - the use of the scripty "hello" with the basic "friend" - bright colors - fantastic look! Thanks for joining us at CAS(E) this Sketch!
ReplyDeleteThank you. I will have to pop back when I'm next playing with my digital papers. Great card too.
ReplyDelete