Showing posts with label English Country Garden Butterflies Designer Dies. Show all posts

Tuesday, 16 May 2023

Brand Ambassador Inspiration - Happy Birthday Cards

 Bonjour !

Izzy here with a little bit of Brand Ambassador Inspiration. As there was some birthday celebration in the air, I go on with two inspiration cards.

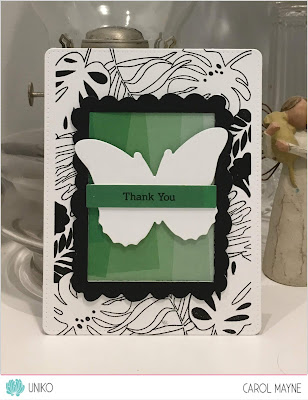
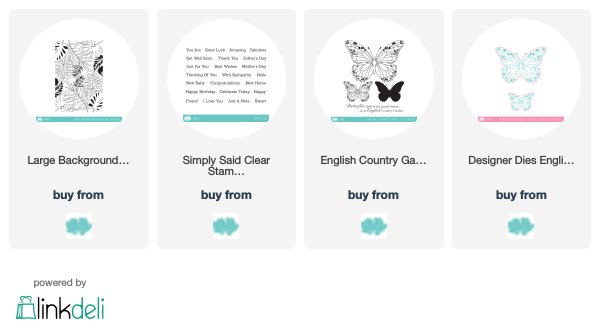
For the first one I wanted to use the last released Designer Dies Nature Treasures II Collection but this time I paired them with one of my favourite Uniko bundle, English Country Garden Butterflies Clear Stamp and Die and the beautiful background stamp Large Background French Scrip.


To make this card, I first die cut a white panel with a wonky stitched die on which I stamped the Large Background French Scrip. 

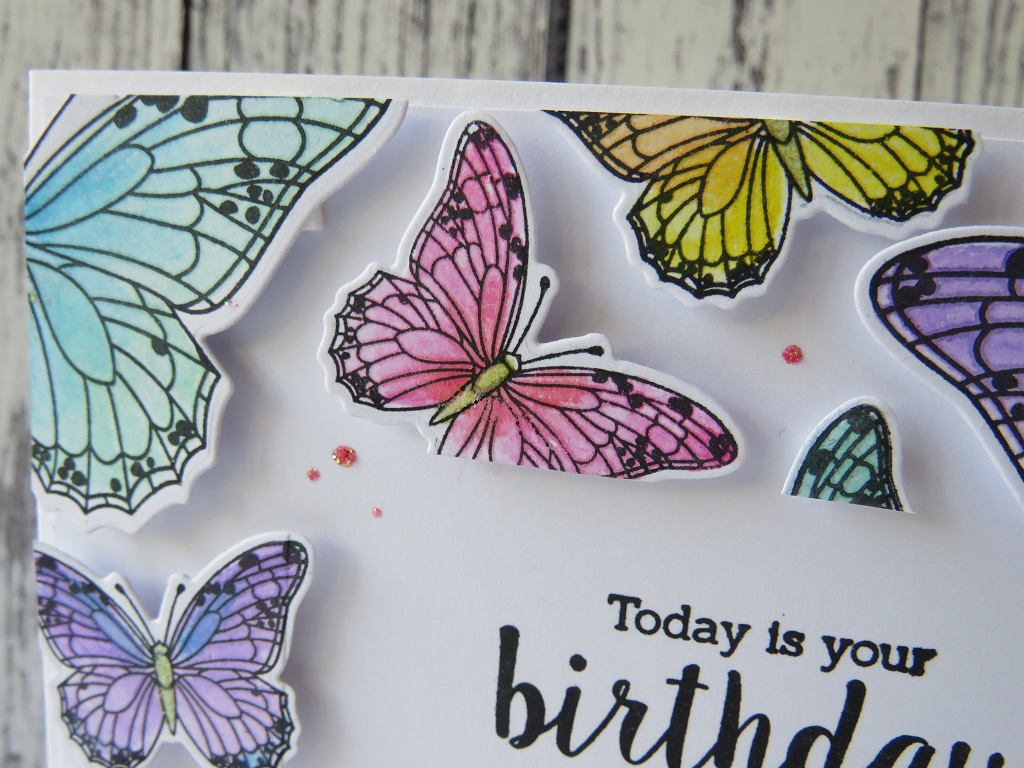
On a piece of white card stock, I stamped the butterfly with no-line colouring ink and I coloured it with coloured pencils. Once finished, I stamped back the butterfly but this time with black ink and I heat embossed it with clear powder and I cut it with the matching die.

I also die cut some of the leaves from the Designer Dies Nature Treasures II Collection. I cut some in Vellum paper and others in white card stock. I also stamped and gold heat embossed some of the curly leaves.

To finish my card, I tied a gold thread around the French Scrip panel and I foam mounted it on the double white card. Then I glued the leaves and the butterfly with glue dots. A sentiment from the Simply Said Blocks set has been gold embossed and glued on the card.


For my second card, I used part of the MOD Background Builder Circles stencil and I played with the colours of the last Color Hues challenge. 

To finish, I stamped the sentiment from Anniversaire Arts Décoratifs and I cut two out of four angles of the card so that it matches with the stencilled pattern.

Et voilà ! That's all for me today. I hope that you enjoyed the inspiration and thank you so much for stopping by.


Wednesday, 3 March 2021

Brand Ambassador Post : English Country Garden Butterflies

 Hi there!

Hannelie here today with a trio of butterfly cards !


It's been a while since I tried a new technique. I tend to stick to my usual ways. Time to do something about it...  I'm talking about print making with die cuts! So easy with a fun watercolor look! I will definitely do it more often in the future.


Card #1


Card #2


Card #3


All together!


I used : 


Thank you so much for popping in! I hope you'll leave here feeling inspired to try something new (to you) !

Hannelie

Wednesday, 22 July 2020

Brand Ambassador Inspiration, English Country Garden stamps and dies

Morning all, Julie here with another Brand Ambassador inspiration post.
Last month I used the English Country Garden stamps and matching dies to create a couple of cards, this month I'm back with a couple more.


I've used the large butterfly die from the set to first to cut out a vellum butterfly which I then stamped and embossed and secondly created a mask and inked and stamped through it.

Here's the first inspired by this card I saved ages ago.


I loved the movement that the die cut sweep created. Using an Avery Elle curved die to create the sweep out of linen effect card, an inset panel was added, made by inking a panel of white card with Picked Raspberry and Seedless Preserve DOx, splashes of water and over stamping with the large butterfly in the same colours of DI. The sentiment from Pure Florals - Peony, was stamped in the same two colours for the large 'sending' and black for the small one. I heat embossed the lighter pink with clear EP before moving slightly to create the shadow by stamping again with the darker pink ink, it creates a subtle 3D effect. A few PP sequins complete.

Wild flowers were the inspiration for my second card.


The technique used here has been around for ages, all I did was cut a piece of copy paper the same size as my base card, then cut out the butterfly using the same large die. The resultant mask was then taped over the card and the background inking added using Salty Ocean and Mowed Lawn.
I used the small elements from Organic Wishes to stamp the silhouettes in black before removing the mask and stamping the sentiment from English Country Garden.

That's about it from me today, hope I've inspired you to look at your stamps ad dies in different ways and have a go yourself, this month's challenge is all about the garden, so why not join in!?

See you back here again soon.


Tuesday, 23 June 2020

Brand Ambassador Inspiration - English Country Garden

Good morning friends, Julie here with a little bit of Uniko summer inspiration.
I needed to make a card for my daughter's birthday, so decided to use the English Country Garden stamps and matching dies to create a floating frame design. I also ended up with an extra card from the left overs, definitely a win win!


So grab yourself a cuppa and settle down to a photo heavy post!

To start I die cut a stack of blanks of both the large and small butterflies before stamping them and colouring with Copics.
I find the best way to batch stamp is to use my MISTI and the waste from the first die cut to create a jig, so that I can place the blanks back in and then stamp away, replacing the blank after each stamping. I saved my jig from a previous project.
Once I had enough butterflies, I arranged them over a panel of copy paper trimmed to 41/2" by 61/2", not worrying if they hung over the edges. 
Using some Press n Seal, I overlaid the butterflies and pressed down especially between gaps. The Press n Seal allows you to lift the project up and then trim away the over hanging elements. 
This is how it looks part way.


This is it fully trimmed.


Without removing the Press n Seal, I cut a rectangle from the center with a die, it will cut through all layers if you take it steady!


Put the center to one side and flip the frame over and carefully remove the white copy paper, adding foam tape to the different elements.


After removing the backing from the tape, place on a 5 x 7 base card and press firmly once in position. Then very carefully remove the Press n Seal. You can stamp a sentiment directly into the center of the card but I chose to add a layered one to add some extra interest and bling. The sentiment is made up of bits from three different sets, You Are, Yes You, Birthday Sentiments and Festive Sentiments and heat embossed with platinum EP. A few holographic gems were added to complete.


Now back to the middle we put to one side. To frame the central panel, I decided to cut a thin frame using a rectangle of matching card and a slightly smaller rectangle die. I found that its easier that way than cutting the center out and trying trim down to size. If you do need to trim then I found replacing the die cut center works well in keeping the frame from distorting too much.

Instead of popping these butterflies up on foam, I simply glued them down flat onto a 5 x 7 card base, adding the frame and a simple sentiment strip from Simply Said. 


Here are the two finished cards together.


I do apologise for the photo heavy post but I hope it has inspired you to have a go yourself, its such an effective technique and you don't need to use butterflies, any die cut images will work.

So that's all from me, keep safe and sane 'til next time.


Tuesday, 24 September 2019

Uniko Studio Design Team Inspiration...Creativity Re-Boot

Hello,

Carol here! Welcome to my Uniko Studio DT showcase, where I bring out a few Uniko favourites for a play date.  

I'm sure we've all had the 'lost mojo' experience and seek various ways to end the start-something/give up cycle. When this happens to me, I 'challenge myself a challenge' - a creativity re-boot -  which is precisely what I've done with the trio of cards I'm sharing here.

My challenge: 

  • focus on one key die/stamp combination: English Country Garden Butterfly Collection
  • use a limited palette: black/white + green (inspired by the image at TIME OUT Challenge #144, which you can see here)
  • use one 6 x 6 sheet of designer paper (sometimes we need to use that stash *grin*). I selected a various shades of green sheet from Pinkfresh Studio
  • one occasion: Thanks (sparked by our upcoming Canadian Thanksgiving, but shifting from fall colours/images)
  • three cards, inspired by at least two/three challenges (TIME OUT Challenge #144, Freshly Made Sketches #403CAS(E) this Sketch #340). I've missed entering in a couple, but that's okay...it's the 'doing' that counts! 
  • go CAS! 

So...here are my results:

Card 1: 
Sentiment from All Occasion Sentiments
Inspired by CAS(E) this Sketch #340);


 Card 2: 
Sentiment from Simply Said


Card 3:
Large butterfly die only from English Country Garden Butterfly Collection
Sentiment from Simply Said
Background from Tropical Paradise
Inspired by: me *grin*


I'd love to know how you re-boot your creativity!

Thank you for dropping by!
~c

Wednesday, 29 May 2019

Easy Twofer using the Floating Die Cuts technique

Good morning .......

It's Linda here, with a fun little project using the English Country Garden Butterflies clear stamp set, and the matching Designer Dies that were released earlier this month.

I'm sure you've seen, what some people are calling ........ Floating Die Cut Frames.  A really fun technique of using stamps with matching dies to create cards where the die cuts look like they are just floating.
It's also a great way to create two fabulous cards in one, which is always a winner for me.


I first saw Jennifer McGuire using this technique on YouTube, and thought it would be perfect to use with these stamps and dies

To start, stamp a whole bunch of the butterflies, using both sizes, onto plain white cardstock  (if you don't like colouring, you could always stamp these directly onto coloured cardstock instead)
Using the matching dies, cut out each one.

Cut a piece of white cardstock to fit the front of your cardblank (mine was  a 14cm square card)  On to this arrange the die cut butterflies, filling the whole piece of card, leaving a little bit of space in between each of the butterflies, and making sure that some of them go over the edges.

Now for the magic ingredient ...... GLAD Press n Seal


I discovered this through Jennifer McGuire and I managed to find it on Amazon.  It's kind of like cling film, but one side is sticky, a bit like low tack tape.

Place this over the top of the butterflies, trying not to move them around, and press down.
Trim off any excess around the edges of the card.

Next, use a die to cut out the centre, I used a square but you could use a circle, a rectangle, an oval, even a heart.  Place this on top of the Press n Seal and secure with low tack tape.
Before running it through your die cutting machine, remove the piece of cardstock from the back.  Don't worry, your die cuts will stay in place.

Once you've die cut the centre, take the middle bit out, and then place foam pads on the back of each of the pieces left, forming the frame (this is where I realise I should really have taken step by step photos, but hopefully you're following me)

Place the frame back onto your piece of white cardstock and carefully remove the Press n Seal.   The foam pads will hold the die cut pieces in place and they will look like they are just floating on your cardstock .......


I only coloured my butterflies after I'd placed them onto my card but, if you find it easier to colour them before all the die cutting that would work too.

I stamped a sentiment in the centre of the frame .....


and added some dots of glitter glue in between the butterflies.


I love how this turned out ......


I did mention a twofer ....... well check this out


Take the left over die cut piece (the center bit) which will still have all your die cuts in place on the Press n Seal.   Simply add foam pads to the backs of all the pieces as before, and then attach it to the front of a cardblank.  Gently peel off the Press n Seal ...... and voila!


Floating butterflies in a perfect square!

Add some colour (if you've not already done so) and a simple sentiment ......


And finish with a few splatters of matching ink


I hope that all makes sense.
If you're like me, you'll give this a go, and then start looking through your stamps to see which have matching dies that you can use for this fab technique.

Have fun!

Thanks for popping by ...... have a great day.

Cheerio until next time ....