Showing posts with label Countdown to Christmas. Show all posts

Saturday, 19 December 2020

Countdown to Christmas Day 17 - Throwback Thursday & Winner!

 Hey!


Okay, so I am playing catch up! Life just simply got in the way.

I spent Thursday mainly stressed with getting the oven fitted. We had one guy not turn up and spent the afternoon getting someone else to come out the same day. I am pleased to report that it did FINALLY get fitted and just in time for it to 'do its thing' before cooking tea! 

How about a throwback to another Christmas past before I announce a the comment winner from my Time Hop Tuesday post HERE.

Rustic Wreath has been sitting on the shelf next to my work area since starting on my Christmas makes with the intention of inking it up again, which I still plan on doing at some point! So how about a little throwback to November 2016 when it was introduced and a look at the trio of cards I made...


Another classic Christmas stamp set that will stand the test of time. Ok, so wreaths often get a little more elaborate these days, but I don't think you can ever get tired of a classic foliage wreath. Along with the wreath this set contains mini foliage accents along with sentiments. The small poinsettia flowers are from Background Builders: Winter Vines.

It was and always is a joy to read everyones lovely comments on the blog, it does make me smile and my heart happy, so a BIG thank you to everyone that takes the time to stop by and comment :)


The lucky comment chosen by random number generator is no.9...

Such beautiful cards Bev! If I were to hop back to a favourite Uniko product release it would be when Winter Foliage was released. It remains my all time most used and most useful stamp set for Christmas and can be combined with so many of my other stamps! It was the stamp set that first introduced me to Uniko too, and I've been a fan ever since!! Vicky x


Congratulations Vicky! 

Drop me an email with your postal address and I will pop a prize in the mail to you. 


Thanks for stopping by, I will be back a bit later today with Countdown to Christmas Day 18! 

Crafty Hugs Bev x


Wednesday, 2 December 2020

Countdown to Christmas Day 2 - WIN IT Wednesday!

 Happy WIN IT WEDNESDAY!


I love spreading Christmas Cheer and I think we are all in need of some good cheer this festive season, so today I have the NEW Cracking Christmas clear stamp set, Explosion! AND the Explosion! Additions Bundle up for grabs! 


This is a pretty CRACKING prize package! 


To be in the chance of winning, simply add your name to the linky at the end of the post!

The link up will close at Midnight GMT Tuesday 8th December 2020.

Just One Entry per person please. 

Duplicate names will be deleted prior to randomly selecting the winner. 

An alternative prize will be offered if the winner already owns any or all of the prize on offer.
The link up requires you to add a html, simply link to your personal blog or if you do not
have a blog you can link to something on the Uniko Website ;)


Before I go I made another card using a combination of all these products together...


How fun is this? It's a little less CAS than I usually go for and I could have gone a little less on the smaller explosions, but I got carried away! I have used the large halftone explosion from Explosion! Additions. The explosion from Explosion! using the coordinating die to cut it out. AND all of the other stamps are from Cracking Christmas


I'd love to know how you would use these products if you won! What kind of interactive card would you make for example? 

Okay, that's all from me today! Be sure to link up your name below & good luck :)

Crafty Hugs 
Bev


Sunday, 13 October 2019

Brand Ambassador Inspiration - Stenciled Christmas Cards

Hello everybody!

Have you started creating Christmas cards weeks ago?
Or did you miss it until now and just recognized it's almost middle of Ocotber, time is running and you NEED some more quick ideas to make nice cards in no time to send out soon?

If you are one of the second ones, you should take a closer look here!


*~*~*~*~*~*~*~*
As you know, I love stenciling!
Some people may say: "stencils are so time-consuming..." but here you'll see they aren't!

Maybe you need a bit of time for the first step - but one of the best parts of a finished stencil pattern is, you can cut it in smaller pieces and make several cards with not much extra time!
 

Time savers are: 
  • Heat-Embossing all things in one step.
  • Combine several DieCuts in one cutting-process.
    and/or: U
    se leftover DieCut pieces from previously made cards.
  • Use the same materials like inks, embossing powders or embellishments on different cards (so you needn't search what fits and clean-up after using it every time again!).
    When you combine them in a new way, it's different everytime!

Let's get crafty with the first step:
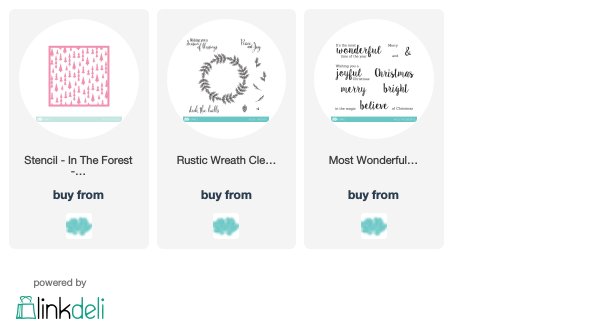
I mixed some white matte embossing paste (the one I used is called "snow paste", it's from a German company) with a bit of green and blue Nuvo-Drops and also a bit of dark green Stickles. This self-made paste I put through the "In the Forrest" Stencil onto a thick multi-technique paper (140 lbs = 300g/m²), this helps to avoid warping and uneven paper after everything is dried. 


After the paste was dry I made these three cards of this single piece of paper:


1. Raised Christmas Tree


I cut a strip with a width of 6,5 cm of the tree-paper. Then I used a fir tree punch to cut out one tree, which I covered with a thin layer of the green Nuvo-Drop I used before and smeared it around with my finger. You can still see the stenciled trees there, but the punched tree was optically seperated from the background now.
I punched out several trees from a simple green cardstock, stacked and glued them together with the green stenciled tree on top.
Then I glued both, the strip and the stacked trees with a strong adhesive onto my cardbase

I stamped and heat embossed the sentiment from "Simply Said Christmas" in gold and the cones from "Background Builders - Vines Winter Additional" in liquid platinum.
To finish the card, I embellished the raised tree with some little golden stars and put also one on the top (on the flat layer). 

"Raised Christmas Tree"
Dimensional Tree
Sentiment and embellishments - heat embossed in two colours

* ~*~*~*~*~*~*~*
2. Golden Rings 

For the second card I die cut a circle of the tree-paper.

This special die I used always cuts a circle and an additional thin ring at once.
I cut out several of the dies in one step, nested them together, adhered them with my (low sticky!) painters tape and cut.
For the card I used three of the thin rings in different sizes and a small circle I cut out in a second step. I stamped my sentiment from the Set "Rustic Wreath" and put the powder on, then I covered all three rings with a VersaMark Marker and put the golden powder on top too. I heat-embossed them one after another, so it was only one time-saving working step with only one heating time of the tool.

After I adhered the three rings and the two circles on the card, I embellished each ring with some of the small stars I also used on the second card and with one big golden star.

"Golden Rings"


* ~*~*~*~*~*~*~*
3. Tree in the Forrest

For the last card I die cut again a circle of the third part of my tree-paper.
This time I stamped and heat embossed my sentiment of the Set "Most wonderful" first.

Then I stacked the circle up with some same-sized circles of white cardstock. The thin ring with the pattern I placed flat around the pile and covered it with some clear sparkling stickles.


Then it happened! A big and clumsy blob came out of the bottle! In the first moment I thought, ok, this card is demaged! But then I thought: NO! I don't want to put it away! I tried to save it.


I die cut another ring of paper - why I thought, green woud be a good idea... I don't know anymore... So the second misstake was sticking around the pile... and this glue is strong! No removal possible!  

To save the card once more, I covered the green ring with the same dark green stickles I used to colour the paste to calm it down a bit. 

You now have the chance to learn from my idiocy and avoid the faults I made!

  • NEVER cover thin rings with wet or semi-wet stuff when they are already fixed on the cardbase!
  • ALWAYS think twice, how you can save the situation if something bad has happened!
A better idea would have been to cut out the larger ring of white cardstock (instead of green!) and leave it blank or cover it with the subtle colour of the sentiment (liquid platinum again).

But hey, it's a handmade card, it may not be perfect, but I like it anyway!


* ~*~*~*~*~*~*~*
I hope I could inspire you to use your stencils and the DIY backgrounds you've created in a new way. 
0It's also a perfect way when you have a stenciled paper with smaller misstakes (run outs) - cut these parts of and use the smaller pieces!


Have a great and creative day!
Greetings from Wiebke

Saturday, 28 November 2015

Countdown to Christmas Blog Hop!

Welcome to the Uniko Countdown to Christmas Blog Hop!


Hey!

I am so glad you have stopped by today as today we have a Uniko Design Team Countdown to Christmas Blog Hop. I decided to put on this extra Design Team blog hop as not all the team received their November Release goodies in time for the release day blog hop HERE.

So, we are all here today with more inspiration using the Uniko November 2015 Release products, which are still in stock but a couple of the sets I only have a small amount of stock left ;)

As usual I left making my samples to the last minute, but I am quite pleased with what I created in a few hours & I hope you like them too! As not to make this post HUGE I will be sharing the rest of my projects HERE on the website blog.

Ok, onto my card...


I was inspired firstly by THIS card here on Pinterest for my layout & secondly for my colour choices the current Fusion Card Challenge HERE and inspiration photo below.


One thing I love to do when designing Uniko clear stamps is to provide creative options when stamping. So when I designed Essentially Christmas I wanted to create 2 step stamps which could also be used individually on their own. 


This card and another of my cards today HERE on the website blog shows my CAS style of 2 step stamping. Basically an outline stamp & a solid stamp, yes, it is simple, but it also provides endless possibilities! 

Ok, that's all from me on this blog today, but please CLICK HERE to see more from me ;) Don't forget that by commenting here and on all the Design Team blogs along the way you will be in the chance of winning the ENTIRE RELEASE! (Or an eGift Certificate to the value of any of the products from the release you may have purchased).


Now I'm handing you over to the Uniko Design Team, who have 'Rocked' this release around the Christmas Tree! Lol!


CLICK HERE to see more from Deborah


CLICK HERE to see more from Jane


CLICK HERE to see more from Nicki


CLICK HERE to see more from Sarah G


CLICK HERE to see more from Sarah P


Remember, simply visit & comment along the hop by midnight Saturday 5th December, to be in the chance of winning  the ENTRIE release! The WINNER will be announced Sunday 6th December.


All the new products showcased today are available HERE on the website.


We also have a Black Friday weekend SALE on AND we have some products RETIRING which are at a discounted price until all stock of the retiring items are sold.

THANK YOU so much for stopping by today & joining in on all the fun. I hope that you all have a wonderful festive season.


Thursday, 26 November 2015

Winner WINNER Turkey Dinner!

Hey!

I'm back this evening to announce the WINNER of the £15 eGift Certificate from the November 2015 Release, Reveal & Giveaway post HERE. 

So without further ado, random.org selected the following number...


And in order of the hop, lucky comment 35 is...

Your sparkling holiday cards are so pretty and I love how, in addition, you made a spring card, too!

Congratulations Susanne! Please send me an email to bev@uniko.co.uk no later than December 10th 2015 and I will send you your eGift Certificate code!

Thank you to everyone who joined in on the release day fun & commented along the way. The Uniko Design Team and I appreciate you stopping by our blogs & your lovely comments.


Don't forget that we have a Countdown to Christmas Blog Hop on Saturday 28th November starting at 9am GMT and by commenting along the hop with the full Uniko DT you have the chance to win the ENTIRE November 2015 Release & or an eGift Certificate to the same value if you have already purchased any of the release.

Ok, that is definitely all from me today!

I will be back tomorrow with our November Challenge Guest Designers & with some of the Design Team with more Christmas inspiration for our challenge reminder post.

Until then, thank you for stopping by today.