Showing posts with label Glitter Paste. Show all posts

Thursday, 14 November 2024

BA Inspiration: Mixed Media Christmas Tree Trio

Hello everyone!

Happy Thursday!


Vinita here! Recently I was going through my stash and rekindled my interest in Silver glitter paste. Because of the paste opacity, a thin layer makes it more opaque and visible the underneath color. Talk about the drama! 

So I thought it would be the perfect use for a new stencil release Christmas tree trio recently at Uniko.


It looked complicated but was easy to make. 

Here are step-by-step instructions with pics:


On a white panel, I placed my Christmas Tree trio stencil and drew the outlined trees one by one as shown in the above pic.


Once again, I put my stencil to ink my solid outlined tree using mowed lawn DI in between all these trees one by one.


It appeared like this as shown in the above pic.


I ink-blended the rest of the space using forest moss, crushed olive and mowed lawn DI. I outlined my trees using a green acrylic marker for more interest.
Now it's time to decorate my trees and the background. I added some confetti using DI.


I used my beloved Posca white pen for snowfall in the sky. Stamped the sentiment from the Pure Florals Poinsettia stamp set. To finish it off I wrapped a thread around the trees. 

Hope you all enjoyed this!

Happy crafting! 

Sunday, 13 October 2024

Stencil Sunday - Ink & Flip Layering Geometric Christmas Tree

Hello & Happy Sunday 

Today I thought I would share this idea I had using the newest Ink & Flip Layering Geometric Christmas Tree Stencil.


So my idea was to section the Christmas tree focal layer down the middle, having one half on a trimmed piece of card adhered using foam tape and the other right half inked onto my card base. I also wanted to add some sparkle using glitter paste, for this I used Nuvo Glimmer Paste in Moonstone over the inking. The colours I used for the Christmas Tree are Parsley and Evergreen. 


The result worked out well, but with the application of glitter paste, the depth of the foam adhesive raised section isn't as prominent. In hindsight I should have used thicker foam tape. 


To finish I added the 'Tis The Season sentiment from Simply Said Blocks Christmas and also a sprinkling of Poppy enamel dots. This wasn't the quickest card to make with the addition of the glitter paste, but the result was worth it.

That's all from me today, time for me to head into the kitchen and get some Sunday baking done and the roast dinner! 

Have a lovely day.

Crafty Hugs

Friday, 11 October 2024

Retro Hex Glitter Baubles

Happy Festive Friday 

Today I have a fun retro Christmas card to share with you. I had this idea last weekend at the Crafterama show in Lincoln. More so when I got my hands on these fabulous and super sparkly Funky Fossil Stellar Pastes.


I knew that I wanted to turn the Ink & Flip Geometric Hexagon Layering Stencil focal point into a bauble. Originally I wanted to create a fully pasted bauble, but due to the depth of the paste, on the flip pasting the line definition inside the design was lost.


So I went with the second option of glittering just one side of each bauble. The colours of pastes I chose are Party Dress and Icicle Dreams, which I thought would pair lovely with Honeysuckle and Oceanside.


Once the baubles were inked, pasted and dried I fussy cut them out. I decided upon the bow from Mid Century Modern Wreath Builder, along with one of the sentiments from the stamp set. I drew the bauble strings with a dark grey fine liner. 


It's not often I go for a DL site card, but I thought the size of the baubles worked better on this. What do you think? 

That's all I have for today, but I will be sharing more over the weekend.

Crafty Hugs


Monday, 20 November 2023

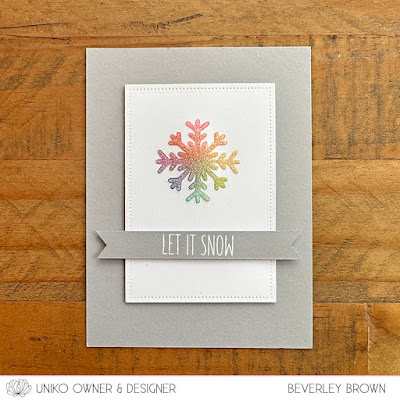
Merry Monday - Rainbow Snowflakes

Hello & Happy Monday.

I originally planned to make & share these yesterday, but I decided to enjoy more family time and simply ran out of day. So here I am, later than planned. But at least I have a trio of pretty rainbow snowflakes to share with you.


Restocks always inspire creativity and with the Stencil - Let it Snow arriving back in stock on Saturday, I was inspired to ink up one of the largest snowflakes from the stencil in a rainbow of colours. I then added Moonstone Glimmer Paste over the top. My sentiment choice is from Christmas Sentiments.


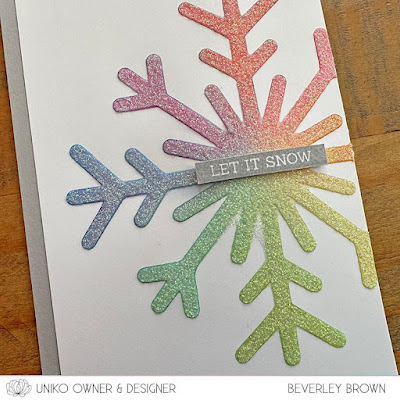
This then led me to use the Stencil - Large Snowflake Two which is a supersized version of the first snowflake. 


I repeated the same process using a rainbow of ink colours through the stencil and then used the same Moonstone Glimmer Paste. The sentiment is from Simply Said Blocks Christmas.


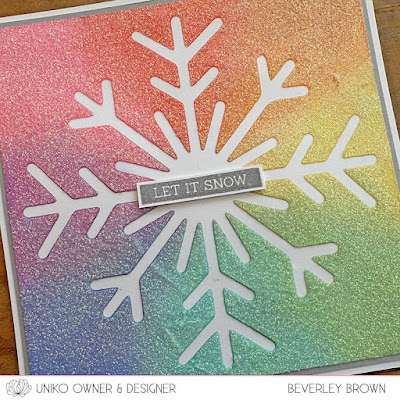
And this led to my third card. 


This time I used the stencil mask. This was a little more tricky, more so to add the paste over the top. I don't think I have pasted such a large flat area. And although it has a few little kinks to it, I think it turned out well.


That's all I have to share today, but there is LOTS more inspiration coming this week. Along with Uniko's version of Black Friday! Be sure to sign up to our newsletter via the website homepage HERE to be the first to know. 

Crafty Hugs 

Sunday, 14 April 2019

It's Stencil Sunday ....... with the Mehndi Mandala

Happy Sunday ......

I hope you're having a nice weekend.
Welcome to another Stencil Sunday ..... a relatively new feature on the Blog where we showcase the fabulous Uniko Stencil designs.

It's Linda here, and I've chosen the beautiful Mehndi Mandala to create some quick and easy cards that you can use for any occasion.  Change up the colour combinations for a different look.

The inks I've used are all Distress Oxides, I love how they work through stencils, they blend perfectly and give such a nice crisp finish.


The mandala is such a great size and perfect for using the full design but ....... why not give it a different look by chopping it in half ...... right across the centre


I inked through the stencil using Worn Lipstick and Picked Raspberry Oxides and then literally cut the mandala in half.  I attached the two halves to my card front leaving a small gap across the centre, which I covered using the sentiment banner.


I added some pretty scalloped edges to the banner and then attached it using foam pads to add dimension.

Use just half of the stencil design ...... I've gone for the top and bottom of my card, but it would also work on each side for a different look.


Distress Oxides again through the stencil ..... love this colour combination! (Cracked Pistachio and Mermaid Lagoon)


I stamped the 'happy' from the Big & Bold Happy stamp set using Mermaid Lagoon Distress Oxide and heat embossed with a sparkly powder.  The matching die cuts it out beautifully .....


I cut it again twice, from plain white card and layered them together to make it more dimensional, and then attached it across the centre of my card using foam pads and stamped the rest of the sentiment underneath.

Diagonals is another great layout ...... one of my favourites in fact.


I've used the stencil with inks on opposite corners and stamped the sentiment in the centre to create the topper


I then used the stencil again, this time on a larger piece of card and with some pretty Glitter paste to give me a little more detail in the background


Not sure the sparkle comes across that well on the pictures ...... trust me though it does give a nice delicate detail to the background.


Happy stenciling!

Thanks for popping by ..... enjoy the rest of your Sunday.

Cheerio until next time ......

Uniko Products used:
Stencils: Mehndi Mandala
Stamps: Big & Bold Happy clear stamp set and matching die; Birthday Wishes clear stamp set