Showing posts with label Festive Sentiments Outlined. Show all posts

Monday, 11 July 2022

Merry Monday, BA Inspiration with Winter Foliage Stamps and Matching Dies

Good morning, Julie here with some more ideas and inspiration to encourage you to make a start on your Christmas makes. Today I'm using the Winter Foliage stamps and matching dies and a new to me technique I stumbled across on You Tube recently. Here's a look at the three designs I came up with.


I was looking at a Marion Emberson video and she was raving about a video of a technique she'd just seen, so I went to look too. In the You Tube video, Ann Melvin uses Kitchen paper to die cut foliage to give a 3D effect. You Tube also suggested another video here that pre dates the first by the Memory Box guy. Thinking this looked something I could use for my post I had a play. 
I wont go into the process of making the die cuts as the video does it much better but I will explain how I made each card!

My first card uses a couple of the pine branches and pine cones, together with a text panel I made a couple of years ago.


Once I had cut out my elements, I added some water colour paint to the die cuts and left to dry. Using the left over from the die cutting, I placed it in my MISTI to use as jig to stamp my elements with the matching stamps. The boughs I stamped with Evergreen Bough DI and the cone with Ground Espresso DI. Now in the video there was no mention of the layers parting from one another which happened to mine, but a little dab of glue secured them back together! To make it more Christmassy, I added in some Inka Gold wax watered down with a little plain water, with a fine paint brush.
My panel was made for this BA post a couple of years ago, the process is quite involved so I made a load at the same time and kept them for use later! I trimmed the background panel, clear embossing on kraft, then added stamped and die cut elements. The finished panel was finished with a twine bow and added to my off white, A6, base card.

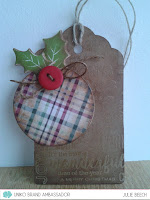
This second card uses two of the holly leaves and one of the berry clusters over another sentiment stamped background. This time I kept it very simple and just added a circle from the bits box, stamped with Season's Greetings from Christmas Sentiments and the holly and berries. 


My text panel was slightly too small for an A6 base card, so I trimmed it down to leave a thin, white border down both sides. The holly was painted as before with watercolour, then stamped in Pine Needles DI and the berries I left unstamped, just watercoloured and a few dots of white gel pen. This time I added some Wink of Stella to the die cut and stamped elements.

My final card uses the last of the holly leaves and berry cluster in a more contemporary slimline design.


After adding water colour and stamping the leaves as before, this time I added some Versamark and clear EP and heat embossed. It took a couple of goes as the paper towel is very absorbent. The definition on the leaves was lost in the embossing process, so I scored in the veins carefully, with a craft knife.
On a panel of white card I stamped the large sentiment from Festive Sentiments in black and added the embossed leaves and berries. A doodled border using a black fine liner completes this element. 
When I'd finished the panel and placed it on the plain white card, it looked a bit uninteresting, so I stamped a couple of the Background Blocks Wonky Stripes in black on another piece of card, then added that to my base card before the top panel.

Well I hope I've given you some ideas to kick start your Christmas makes, so for the moment, thanks for stopping by.

Stay safe and keep crafting!!   

Monday, 23 August 2021

Brand Ambassador Inspiration - Christmas in August

Hello

It's Wiebke here with a new Brand Ambassador Inspiration for you!
Time for "Christmas in August"!

I don't know, how other countries govern the selling of all the sweet Christmas goodies like cookies and chocolate-stuff.... Here in Germany the supermarkets and grocery stores start to sell all these things usua at the end of August (but my family is not one of the first who needs to buy them!). 


So, only a few days left until the christmas mood may start for some people!
I have a new Christmas inspiration for you, thereby you can join into the feeling too but without sweets and calories 😉!

I stamped the sentiment of the Festive Sentiments Outlined Set in a dark blue colour and covered the letters with a clear sparkling pencil.
The Designer Die Sparkling Snowflake I cut out of a colour fitting dark blue cardstock and covered it with sparkle too. 
 
Another close-up of the sparkling sentiment.
 
I adhered the snowflake to the cardbase and embellished it with light blue rhinestone stickers. The bigger stickers in the inner circle fit in there perfectly.

A close-up of the dimensional embellishments.

Snowflakes and sparkle are always a great combination!
There are so many possibilities to add glitter and shimmer to the icy beauties. - This time we used a Wink of Stella brush and the rhinestones.

Next time maybe glitter glue, metallic foil, embossing powder, sequins or glitter flakes....
Which sparkling element is your favorite one?
When you check out all the possibilities, your christmas card production will be done in a very short time!

Hope I was able to inspire you a bit and make you starting early enough this year to be prepared and have a stress-free pre-christmas time!

Crafty greetings from Wiebke

Friday, 12 March 2021

Festive Friday - Brand Ambassador Inspiration

Good morning all, Julie here with another Festive Friday post featuring three cards on the same colour theme.

I'm still determined to get ahead with my Christmas makes in the hope that I wont need to be in a rush later in the year and this month I've been inspired by the colours over at CAS Christmas, so why don't you grab yourself a cuppa, sit back and check out these makes.

This first card uses the Christmas Pop trees as well as BB Falling Snow and a freebie snow stencil from a magazine. 
The two Christmas Pop trees were stamped and heat embossed with white EP before trimming down and edging them with red ink. The third snowflake one was made by tracing the shape of one of the others, cutting out from kraft card, then stamping with BB Falling Snow and embossing in white EP. On a scrap panel of kraft, I stenciled the snow using some Ranger Texture paste over the top 2/3rds and when dry added the strip of red, white and kraft coloured DP to the bottom. Arranging the trees over the DP, the finished panel was popped up on pads over a kraft base card, a trio of red gems complete. 


You can't get much simpler than this one layer card. Festive Sentiments Outlined and a holly sprig from Framed - Holly, stamped and embossed in white EP, 3 tiny red crystals for the red berries all on an A6 kraft base card. You could use any large sentiment here, such as Festive Sentiments, or even stamp it in black. A great design for mass production?


I've used Background Builders Christmas 2018 before to make a plaid pattern before, here and here. This time I've used a panel of kraft card, red ink, a white gel pen and a black fine liner to make a panel to cut my letters from. The kraft is obviously darker and very absorbent so the red is not as bright as it would be on white, but using my Misti I was able to go back a couple of times to deepen the colour.


You can see that I made a couple of mistakes with the stamping and line drawing but there was still enough left for me to cut out all the letters I needed, waste not want not!
The Wishing You is from Festive Sentiments and Christmas from Most wonderful were stamped onto the off white base card in black before the die cut merry was added on matching red foam letters.

So that's all from me for the moment, hope I've given you some ideas to get your Christmas stash rolling!
Stay safe and keep crafting 'til next time.

Friday, 22 January 2021

Festive Friday - Get more from your sentiments, some BA Inspiration

 Good morning, hope you are well and keeping safe and sane! Julie here with a little bit of Festive BA Fun this Friday. 

I have made a resolution to make Christmas cards all through the year, so that I'm not rushing around at the end of November making them like I was last year! Hopefully I won't have as much time on my hands this year, meeting up with friends and relatives will be at the top of my agenda, so I need to use this 'free' time to get ahead. So far I've made four!

So for my first Festive Friday post, I am concentrating on SENTIMENTS. Yup those little stamps that come with the more interesting stamp sets or the fab sentiments sets such as Festive Sentiments and Most Wonderful. 

Another resolution I made towards the end of last year was to use up my scraps and backgrounds that I have accumulated and it was after rummaging through these, that I got the idea for my theme for this post.

My first card uses a LOT of sentiments that I got together from my Uniko sets, some old and some new, some current, others sadly retired. I made them way back in 2019 but didn't use them all and in the spirit of waste not want not, here is my card design.

To make the panels, I started by laying an A5 panel of card in my MISTI, then arranged the stamps to cover the whole area. When satisfied with the arrangement I closed the MISTI door and inked up the stamps with Versamark and then stamped on to the card panel, added clear EP and heat embossed. I didn't remove the stamps and used a selection of different coloured card in festive colours to create multiple backgrounds which I can use later. A selection of little stamps were used to fill in any gaps too small for a sentiment.

For this card I took a bright red stamped panel and added it to an A6 card base, trimming off any overhang. The snowy landscape was cut twice using a Marianne die and added to the bottom of the card and excess trimmed away. A little Wink of Stella adds a bit of sparkle. No need for a sentiment as they are there in the background!

Here are a couple more ideas using the same technique that I made with the first of my panels, you may recognise them. 


Just click the image if you want to find out more.

Of course sentiments aren't just for Christmas, you can use any of your sentiments to create a background!

Keeping up the theme of making sentiments center stage, here is my second card. 


This uses a few sentiments in different fonts and sizes that I stamped onto card, heat embossed with fine white EP and trimmed down. The colour of the strips were chosen to match my backing which I stamped using Background Blocks Falling Snowflakes and the separate snowflake stamps from Snowflake Serenade in non traditional colours. I used a die cut funky Christmas tree as a template to create the centerpiece, adding each trimmed down strip starting from the bottom. A star punched from holographic card and a holographic gem on the red pot complete. The completed panel was then added to a red A6 note card. 

Here is the same idea from 2019 using a more traditional colourway.


So that's about it from me for today. I hope I've given you a few ideas for using those very useful sentiment stamps.

Stay safe and keep crafting!


Monday, 16 November 2020

Brand Ambassador Inspiration - A Merry & Bright Christmas

Hello there! 

It's Sarah here with my latest Brand Ambassador Inspiration post for you. 

Getting into the Christmas spirit and inspired by so many A-list crafters out there, particularly Laura Bassen and her 'paper stripping' techniques! I can honestly say I'm hooked on this look!
Anyway I've teamed the Scandinavian Christmas Background Block on this collection using a tone-on-tone effect. The paper stripping pieces are embossed using the Festive Sentiments Outlined set. Sunglasses at the ready ... it's a BRIGHT look!
Do you find there's always some stray embossing 'dots/smudges' on projects? It drives me up the wall but I've managed to disguise these areas with some conveniently placed holly or enamel dots and fingers crossed no-one will notice what they're covering!!!


Thanks for calling by and I hope you've enjoyed this little inspiration post and enjoy your day. 

I hope your Christmas makes are coming along well.


Wednesday, 1 January 2020

Happy New Year!

Hello & Happy 2020!

Welcome to another exciting year at Uniko :)


I am over on the Uniko Website Blog HERE with all the details about this Happy New Year card. I'd love you to hop on over and take a closer look.

I hope you have all had a wonderful New Years Eve and New Years Day and 2020 has begun well for you.

Crafty Hugs


Friday, 20 December 2019

Uniko Brand Ambassador Inspiration...Dreaming of a White + Pop of Colour Christmas

Hello,

Okay...I am still NOT done sending Christmas cards and, I suspect, still have a few more to make! OHMYSTARS, but I'm behind!  That said: Carol here welcoming you to my Uniko Brand Ambassador Inspiration post!

Fortunately, I have several lovely Uniko stencils and sentiments on hand, as well as some translucent gel and plenty of glitter to create cards (5 here) that are super simple AND super sparkly! While this isn't 100% mass-production - as I've used various stencils - the embossed sentiment fits that bill. I simply arranged the words on my Misti, die-cut my cardstock, added Versamark ink and white embossing powder and, in a few waves of my heat gun, had my sentiments all done. The hardest part: waiting for the glitter to dry! Yes, yes...I could have used pre-mixed glitter gels/shimmer pastes but my stock is running low. It was way more fun to 'glitter me (and Lily and my craftroom) silly'!

I did my best to capture the sparkle in my photos but didn't do them justice. Please use your imagination a bit...these really do shimmer and twinkle!

Uniko Products:

Sentiment: 

Stencils: 


To those receiving these cards...sorry/not sorry *grin* that some glitter may sparkle parts of you, too!

May the gifts of peace, love and joy be yours this Christmas and throughout the New Year!

Merry Christmas!!

~carol

Monday, 28 October 2019

More Ideas using Sentiments as a Background - Brand Ambassador Inspiration

Good afternoon folks.
It's Julie here with a few more ideas using sentiments as a background.

On Saturday I shared a card using a panel created with lots of sentiment stamps. As it takes awhile to lay all the sentiments out, it made sense to stamp a load on different coloured card for use later. I even had another go at creating a slightly different one whilst I listened to the footy on a wet Saturday afternoon!

My first card uses one of my first layouts. As you can see there are lots of different fonts and sentiments which I laid out on my MISTI before stamping with Versafine and embossing with clear EP. This example was done on white card and inked over with Salty Ocean DOx in a resist technique.


I used the idea of a bauble, cutting out a circle from the inked panel and the slipped the large Sparkling Snowflake, die cut from holographic card, behind. A little bit of thin silver ribbon and a bow completes. The finished panel was popped up on foam over a white base card.

My second card uses a different layout, this time it has a more horizontal design to accommodate a landscape design.


I used the trapped colour technique to create this background, stamping and embossing as before but this time on a panel of watercolour paper previously inked with Salty Ocean DI that was left to dry well before stamping. After heat embossing, I spritzed the blue panel and then wiped off the ink leaving behind the colour trapped behind the embossing. The top panel was cut with a scalloped edge die and some snowflakes from Stunning Snowflakes were stamped in Salty Ocean and Blueprint Sketch DI. Finally, I popped up the white panel on pads over the inked one on a white base card.

Finally I went all silvery for a change!


This panel was stamped and embossed with clear EP before cutting out the central NOEL with an alphabet die set. After cutting, I added Weathered Wood to the base but left the letters clear. I glued my panel onto a base card then added some grey foam letters and then the white ones on top. To complete I added a small die cut snowflake from the new Big n Bold Snow dies and a few diamante gems.
Three different looks, all from the same starting point. Hope I've given you a few more ideas for your Christmas card making, I've still got a load more to make but I still have plenty of backgrounds to use!