Showing posts with label Texture Paste. Show all posts

Tuesday, 11 October 2022

Uniko Brand Ambassador Inspiration - Christmas Stencils

Hello everyone, 

I hope October finds you well. Steph here today with my Uniko Brand Ambassador post and I am still very much on the Christmas crafting wagon! I do think Christmas craft might be my favourite.

This month I have focussed on stencils because I think you can make cards pretty quickly with stencils (if you exclude the paste drying time!), you can usually get two cards out of one run of the stencil (A6 size cards) and they add interest without adding bulk for lower postage costs.

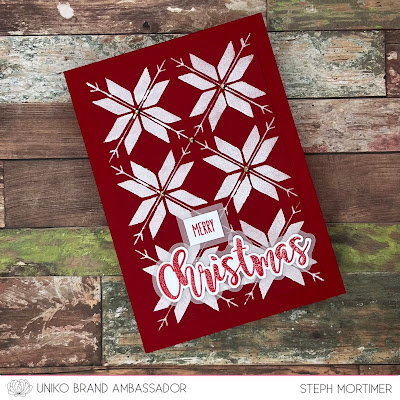
For my first two cards today I used the Uniko Christmas Folk Snowflake stencil and white stencil paste. 


Once the stencil paste had dried I cut down the panel to make two and adhered to the card bases. I started off with the Kraft card but I definitely prefer the one mounted onto a red card base. To this, I added a heat embossed sentiment from the Uniko Festive Sentiments stamp set which I fussy cut, mounted onto velum and fussy cut again.

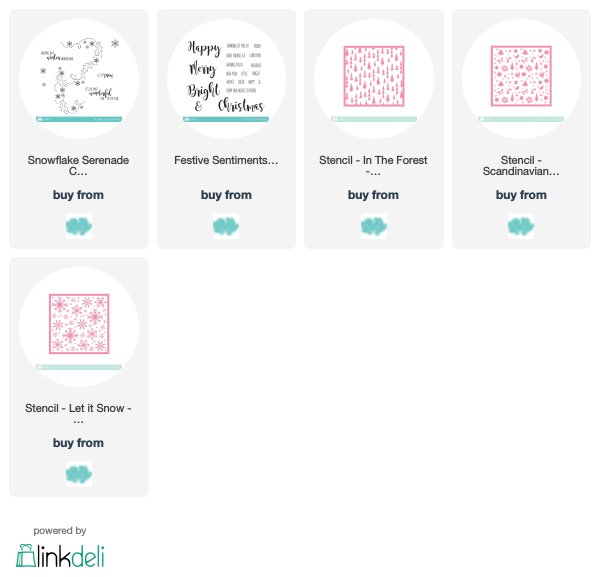
My next cards use the Uniko In The Forest stencil, one with white stencil paste and one with glitter stencil paste.


As the stencils are detailed and the focal point on the card I didn’t want to add anything more than a simple sentiment, again from the Uniko Festive Sentiments stamp set and also heat embossed, fussy cut and layered onto velum.

I hope these designs have given you some ideas for quick Christmas cards and ignite your passion for stencils! 

Much love

Steph x


Sunday, 1 August 2021

Stencil Sunday - Rainbows & Clouds

 Hello August & Happy Sunday! 


I'm here today with a couple of cards I've made using the Stencil - Rainbow & Clouds from the July Release. If you missed it you can catch up HERE and there is still just time to comment along the hop to win too ;)

I had LOTS of ideas with how to use this stencil, but end of school chaos, start of the holidays and release prep stopped me from getting them made. However, I had a few hours to myself on Friday evening and got to playing & getting a couple of them made to share with you. 


When I first started using stencils I kept very basic and rarely used anything other than ink or embossing paste and embossing paste was very sporadic too! It wasn't until I saw Brand Ambassador Wiebke use pencils and fine liners with stencils, that I started to think outside of the box and use them like I would stamps to create cards. 


So for this card I used Concord & 9th Aqua Sky card for my base and drew inside the clouds using a Bermuda Bay marker from Stampin' Up! I then inked through the largest rainbow using a variety of C9 ink colours. It was a little time consuming, but fun to do.  A sentiment from Simply Said Blocks II, some twine, foam adhesive and some Nuvo Drops finished my card off.


For my second card today I couldn't resist going back to using Gina K Designs Pastillage Texture Paste. This stuff is SO much fun! Last time I used it for my card HERE, I used a white background. But the beauty is you can apply it onto a coloured card base and add colour, like I have today.


I just love how vibrant the ink colours remain when applied over the texture paste. This little panel of rainbow sure made me happy on a dull rainy day! 


I couldn't resist using this sentiment from Reach For The Stars, it was just made to be combined with the rainbow and the little trio of stars from the set.


So many more ideas floating in my head, but I will save those for another day ;) Until next time, thank you for stopping by today.

Crafty Hugs

Monday, 7 June 2021

Mixed Media Monday - Guest Brand Ambassador Trish Latimer

 Happy Monday & Shiny New Week! 


Today I am bring a new feature to the blog and a theme that from an Instagram poll not long ago revealed that many of you would like to see more of, Mixed Media. As you know I lean towards clean & simple, but it is a style I dabble in now and then. More so when I was lucky enough to have a feature in Craft Stamper magazine. This of which leads me nicely to introducing our Guest Brand Ambassador to kick off this feature. Please give a warm Uniko welcome to Trish Latimer.


I'm Trish Latimer, full time mixed media artist. Former editor of Craft Stamper, current addict of all things painty! You can usually find me in my studio covered in paint, glue and very occasionally glitter too......


For this art panel, I scraped some texture paste through the Wonky Stripes Stencil and let it dry. Creating the rainbow is great fun, although a little messy! I used acrylic inks, but paint will work too. Simply add a small dot of colour, then spray with water. The colour will move around, giving a washed out look. The important thing to remember is to make sure each colour is dry before adding the next, otherwise you'll end up with a muddy mess. 


Once the rainbow was done, I added splats of white paint and the stamped words. This panel was glued to a wooden box frame, but of course this effect can be done as a flatter project, in an art journal or as a greetings card front.


Another art panel, but a totally different look! This one is a much more pastel affair. I painted pieces of card in my chosen colour scheme (of course you can use ready coloured card!) and then white embossed lots of designs all over them. I drew a scallop shaped template, and used this to cut down my card. Each identical scallop nesting underneath the next. 


I used the diamond shaped stamps from Background Builders Delightful Diamonds as the flower 'petals', white embossing those, cutting them put and then gluing them together. The flower stem was created by wrapping white cord around a bamboo skewer, then trimming to size. 


Again, I put this panel onto a wooden box frame for display, but the idea is another than can be easily transferred to cards!


WOW! Are you picking your jaw up off the floor like I am right now? 

Trish had no idea what products I was sending and has created two fabulous mixed media projects with completely different feels and I am inspired by them both. I am loving the rainbow colours and dimension of the first card and texture paste is something I always neglect to use but the results like Trish has achieved is amazing. Then we have the soft pastel shades with beautiful white embossing and creative flower making on the second. 

I hope you have enjoyed todays feature and a big THANK YOU to Trish for inspiring us all. 


Crafty Hugs


Thursday, 26 September 2019

DT Inspiration ....... Quick and Easy Christmas cards using Uniko Stencils

Happy Thursday ........

I hope you're having a great week.
It's Linda here, with a little festive inspiration for you this morning.

I can't believe we're nearly at the end of September ..... the festive season is going to be here before we know it (and I still haven't been on holiday yet!)

Have you made all your Christmas cards?  Or are you like me, still thinking about ideas?
Need something quick and easy but still want fabulous results?
Well, how about using your Uniko stencils.   Team them up with some texture/stencil paste, and a few different finishes, for some fun, all over, festive designs


I started with some coloured cardstock cut slightly bigger than the Uniko stencils.  I then used white texture/stencil paste through each one of the designs and added a different finish.

In the Forest, on the green card, I sprinkled over the top of the paste, whilst it was still wet, with some Platinum Embossing Powder and set this to one side to dry.


Once it was dry, I used a heat tool in the usual way to melt the embossing powder.  I love the texture that came through.


I cut off the edges around the stenciled design, and inked around the piece using Forest Moss Distress Ink to add a little shading.
I then cut the panel into two pieces so that I could stretch the design to fit on the front of my 7x5 inch cardblank


I added my sentiment into the gap I'd created, and added a few dots of glitter glue here and there.


Let it Snow on the blue card, was the paste sprinkled with Crystal Glitter this time, again whilst the paste was wet, and then left to dry.
Depending on your texture paste, and the temperature of your room, drying time will vary.


Once everything was dry, I brushed off any excess glitter and then cut the panel as before in, only this time I cut on a sort of diagonal ......


I added a sentiment and a few sparkly sequins ......


The Scandinavian Christmas on the red card I did leave overnight to dry.  The reason for this was I wanted to hot foil it.


Now I'm not sure if this will work with all brands of texture/stencil paste ...... I do know it works beautifully with the Sweet Poppy one though.

So, once it was dry I covered the stenciled design with some pretty gold foil, then with it in between pieces of copier paper I ran it through my laminator on a hot setting.


The results are gorgeous!

I cut the panel down as before, inked around the edge (Aged Mahogany Distress Ink) and then cut it into two sections giving me space to add my sentiment.


Three designs, all done in the same way, but each one with a different finish .... which one is your favourite?


Thanks for popping by ..... enjoy the rest of your day.

Cheerio until next time ......

Sunday, 9 June 2019

DT Inspiration - Alcohol inks, stencils and Bold sentiments

Bonjour !

Izzy here ! This year I wanted to try alcohol inks and I'm just starting to discover all the possibilities they offer. So today I wanted to show you what I've done with my alcohol inks, texture paste, stencils and bold sentiments die cuts.

What I love with the AI is that their colours are very bright and used on Yupo paper (or similar), they give a beautiful bright and shiny look. I had to try a technique I saw on Jennifer McGuire blog to make great backgrounds.

Here are my cards...


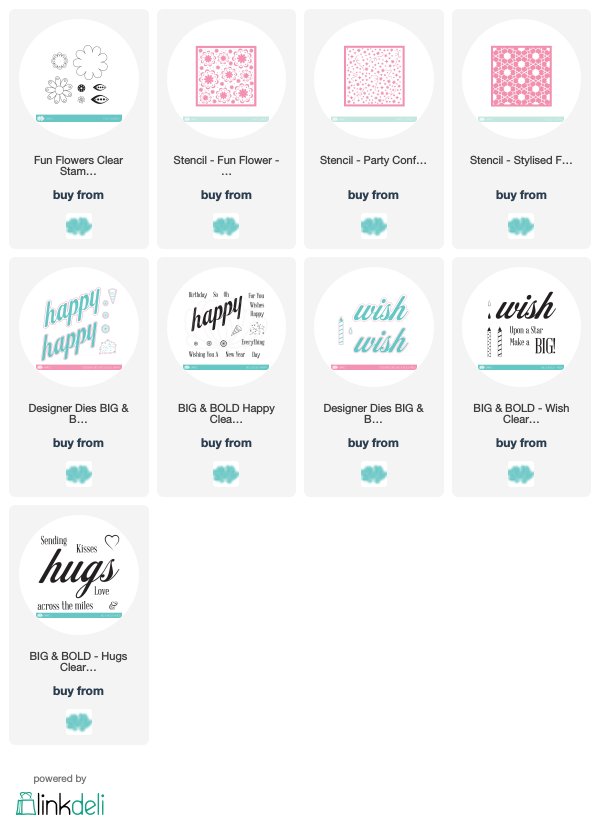
For this card I used the Fun Flowers stencil together with the Fun Flowers stamp set. On a Yupo paper I popped texture paste through the stencil and let it dry. Meanwhile I stamped the Background blocks : pinstripe in black over the white card base, I die cut the Big & Bold : Happy sentiment in a black paper and I stamped in black the flowers of the Fun Flowers stamp set then fussy cut them.

Once the texture paste dry, on a felt applicator I put 3 alcohol inks, a bit of blending solution and I blended them onto the textured Yupo paper.


Then I adhered this Yupo paper strip over the white card base as well as the bold sentiment. I glued the flowers with Glue dots. To finish I stamped the other part of the sentiment.


For this card I used the Confetti stencil and the Big & Bold : Wish sentiment. I also used texture paste through the stencil and once dry I used my AI and blending solution together with a paint brush to make this sort of rainbow colours pattern. 

The sentiment is also done with AI on a paper similar to Yupo. Once dry I die cut the AI panel with a scalloped die and glued it on the white card stock. I also die cut an oval shape in a white card stock and I stamped the rest of the sentiment on it. To finish I die cut the bold sentiment and glued it onto the white oval cut.

I really love these bold sentiment dies, and I really hope that Bev will release some more for the other bold sentiments of the collection. 


So for my last card I had to create the die cut of the Big & Bold : Hugs stamp. It is long, tedious and much less beautiful than a real die cut. Here is how I did it...


For this card I again used texture paste through the Stylised Floral stencil, let it dry and then I randomly sponged the AI with a felt applicator. I cut this panel with a heart shape die and I glued it on the white card stock. Then I glued the bold sentiment on top of it.

To finish my card, I die cut an ampersand, I foam mounted it on the card and I stamped the rest of the sentiment from the Big & Bold : Hugs stamp set.

And that's it ! I still have a lot to learn with alcohol inks but in the end I will find a way to use all these trials on cards ! They are a fabulous background for the Big & Bold sentiments !

Thanks so much for popping by and have a great Sunday !


Friday, 27 July 2018

Simple Mixed Media

Happy Friday .......

Looking forward to the weekend? ..... I know I am, it's been a busy week.

I've got a project for you today showing how you can use one of the Uniko Stencils to add a little touch of mixed media to your cards, and also compliment the pretty Originally Organic Clear Stamps and matching Dies .......  looks great, and it's so easy to do.

 
I started by stenciling the design directly onto my card blank ....... I used Victorian Velvet Distress Ink and the pretty Uniko Lattice stencil.  I kept most of the ink in the centre of the card, and faded out the colour and the design towards the edges, leaving some white space.


With the stencil still in place I then went over the top of the ink with a Transparent Gloss Texture Paste ..... not sure this really shows up in the photos but trust me, in really life it does shine and the texture looks fab ......


Once this was dry ..... and it didn't take long in this heat!!! ..... I attached a simple die cut frame using foam pads.  I wanted to frame a section of the stenciled design to create a background for my focal point. You can see I went for the jaunty angle look with the frame, but kept my sentiment straight .... I think it creates a nice contrast.


I stamped the flowers and leaves onto white cardstock, added colour using Nuvo Aqua Flow Pens for the leaves ..... new additions into my craft room, and I must say I'm loving them! .....


I used Victorian Velvet Distress Ink again for the flower heads, so that they would tone in nicely with the background.
I used the matching dies to cut them all out, and attached them onto the frame.


A few dots of white gel pen adds a little more detail to the flowers .... and I've used the same stamp set to add some detail on the inside .....


Check out your stencil collection and see what pretty backgrounds you can create .

Thanks for stopping by ..... enjoy the rest of your day and have a great weekend.

Cheerio until next time .....