Showing posts with label Fun Flowers stencil. Show all posts

Friday, 25 February 2022

Introducing and Re-introducing... Fun Flowers Stencil & Mask, Fun Flowers Spray Mask AND Fun Flowers Clear Stamps!


 Hello & Friday!

Welcome to Day 3 of the 10th Birthday February 2022 Release product introductions. If you missed day 1 and 2 you can catch up HERE and HERE.

Today myself and the Uniko Brand Ambassadors have more creative inspiration to share as we introduce and re-introduce Fun Flowers Stencil & Mask, Fun Flowers Spray Mask AND Fun Flowers Clear Stamps!

Fun Flowers clear stamp set was introduced in April 2016 and 'retired' a few years ago, mainly as it needed that something else to bring it to life, some new Fun Flower Stencils! 

All the products will be available for purchase at 10am GMT Sunday 28th February 2022.

Okay, lets get to the good stuff...


Wasn't that fun? So cheerful and colourful. I hope you enjoyed it as much as I did. 

Be sure to pop back tomorrow for the next of the product introductions.

Crafty Hugs
 

Saturday, 8 August 2020

Brand Ambassador Inspiration - Mono-printing with Stencils

Morning all, Julie here with some ideas to inspire you to get more from your stencils.

With so much time on my hands at the moment, I decided to have a play with my stencils to create some panels using a couple of mono-print techniques.

Here are two panels I made using a technique I saw Jennifer McGuire use on You Tube

I started by inking an A6 panel of white card with lots of Picked Raspberry and Salty Ocean DI. Then I made a hinge with some masking tape and added a plain white A6 panel. Without getting water on the plain panel, I spritzed the inked side then sandwiched the Stylised Floral stencil between and ran it through my die cut machine a few times using the normal die cut set up. Carefully separating the two panels revealed these colourful, fun, textured effects.

Here are a couple of cards I made using each of the panels, I still have a bit left over too for further makes! 


This first card uses a strip of the darker panel slipped behind textured lined panels, a simple stamped, uncoloured small peony bloom from Pure Florals - Peony. I kept it simple and uncoloured so as not to detract from the panel, the sentiment is from Simply Said Blocks.

For the second card I used a panel die cut from the paler print and the same bloom, again not coloured so as not to distract from the background. This time the sentiment from the peony set is stamped on matching linen cardstock.
My final card uses a slightly different technique to create the background. Instead of a piece of white card I added a cut down baby wipe over the stencil in the sandwich and ran it through a few times in the die cut machine as before. This time I rang the changes and used the Fun Flower stencil. The damp baby wipe lifts away the ink where it peeks through the stencil to leave this soft effect. The panel was inked with Tumbled Glass DI this time.

To make the card, I used more sentiments from Pure Floral Peony mounted on deep blue and the small butterfly from English Country Garden, embossed in white on vellum and then die cut. A few clear sparkly sequins complete. The embossed panel was mounted on the same blue card and added to an A6 card base.

That's it from me for this time. I hope I have encouraged you to look at your stencils again, you don't have to use these two, have a play and see what effects you can achieve with what you have.

So until next time, keep safe!


Sunday, 9 June 2019

DT Inspiration - Alcohol inks, stencils and Bold sentiments

Bonjour !

Izzy here ! This year I wanted to try alcohol inks and I'm just starting to discover all the possibilities they offer. So today I wanted to show you what I've done with my alcohol inks, texture paste, stencils and bold sentiments die cuts.

What I love with the AI is that their colours are very bright and used on Yupo paper (or similar), they give a beautiful bright and shiny look. I had to try a technique I saw on Jennifer McGuire blog to make great backgrounds.

Here are my cards...


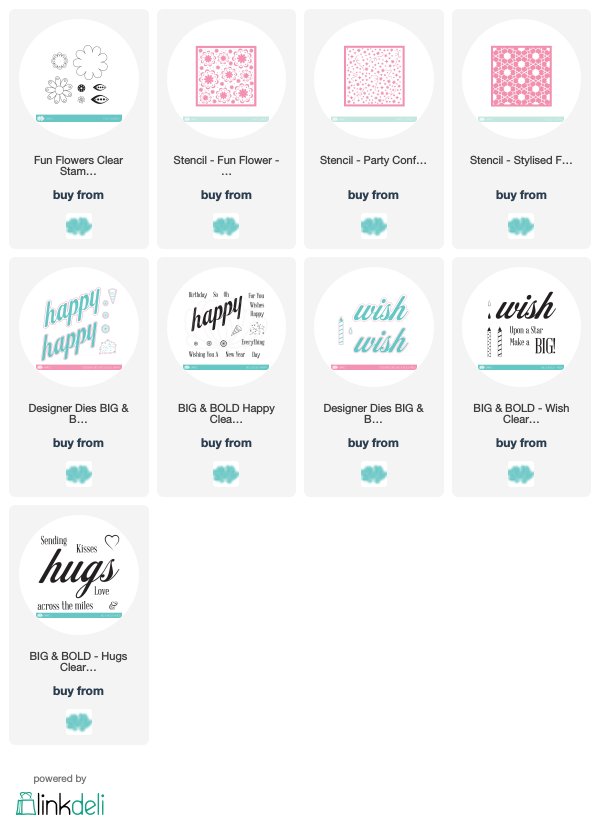
For this card I used the Fun Flowers stencil together with the Fun Flowers stamp set. On a Yupo paper I popped texture paste through the stencil and let it dry. Meanwhile I stamped the Background blocks : pinstripe in black over the white card base, I die cut the Big & Bold : Happy sentiment in a black paper and I stamped in black the flowers of the Fun Flowers stamp set then fussy cut them.

Once the texture paste dry, on a felt applicator I put 3 alcohol inks, a bit of blending solution and I blended them onto the textured Yupo paper.


Then I adhered this Yupo paper strip over the white card base as well as the bold sentiment. I glued the flowers with Glue dots. To finish I stamped the other part of the sentiment.


For this card I used the Confetti stencil and the Big & Bold : Wish sentiment. I also used texture paste through the stencil and once dry I used my AI and blending solution together with a paint brush to make this sort of rainbow colours pattern. 

The sentiment is also done with AI on a paper similar to Yupo. Once dry I die cut the AI panel with a scalloped die and glued it on the white card stock. I also die cut an oval shape in a white card stock and I stamped the rest of the sentiment on it. To finish I die cut the bold sentiment and glued it onto the white oval cut.

I really love these bold sentiment dies, and I really hope that Bev will release some more for the other bold sentiments of the collection. 


So for my last card I had to create the die cut of the Big & Bold : Hugs stamp. It is long, tedious and much less beautiful than a real die cut. Here is how I did it...


For this card I again used texture paste through the Stylised Floral stencil, let it dry and then I randomly sponged the AI with a felt applicator. I cut this panel with a heart shape die and I glued it on the white card stock. Then I glued the bold sentiment on top of it.

To finish my card, I die cut an ampersand, I foam mounted it on the card and I stamped the rest of the sentiment from the Big & Bold : Hugs stamp set.

And that's it ! I still have a lot to learn with alcohol inks but in the end I will find a way to use all these trials on cards ! They are a fabulous background for the Big & Bold sentiments !

Thanks so much for popping by and have a great Sunday !